

- How to start creating a recipe website
- Which template to choose for a culinary website
- Which plugin to choose for recipes
- How to promote a recipe website
- How to make money on a culinary website
Artificial intelligence is increasingly taking visitors away from web resources of various types, but culinary websites continue to receive traffic thanks to their own photos and the author's personal experience. Moreover, creating a recipe website is technically not difficult: you just need to choose hosting and a domain, install a CMS, template, and plugins, and regularly publish new dishes. However, the decisions made at the start determine how convenient it will be for you to work later, and the choice of plugin affects whether the recipes will be saved if you later want to switch to another one. I created a test project on TasteWP with the Blocksy theme and went through the entire process using one recipe as an example to show what to do at each step.

How to start creating a recipe website
Go to the website hosting page, choose a tariff, click "Buy," create an account, and pay for the order. On all tariffs except the cheapest SSD Start, the domain is a gift, and you just need to come up with a name and check the domain name for availability, which is also free. An SSL certificate, without which the browser marks the site as unsafe, is included in every tariff at no extra charge. Then, in the hosting control panel, install WordPress with one click.
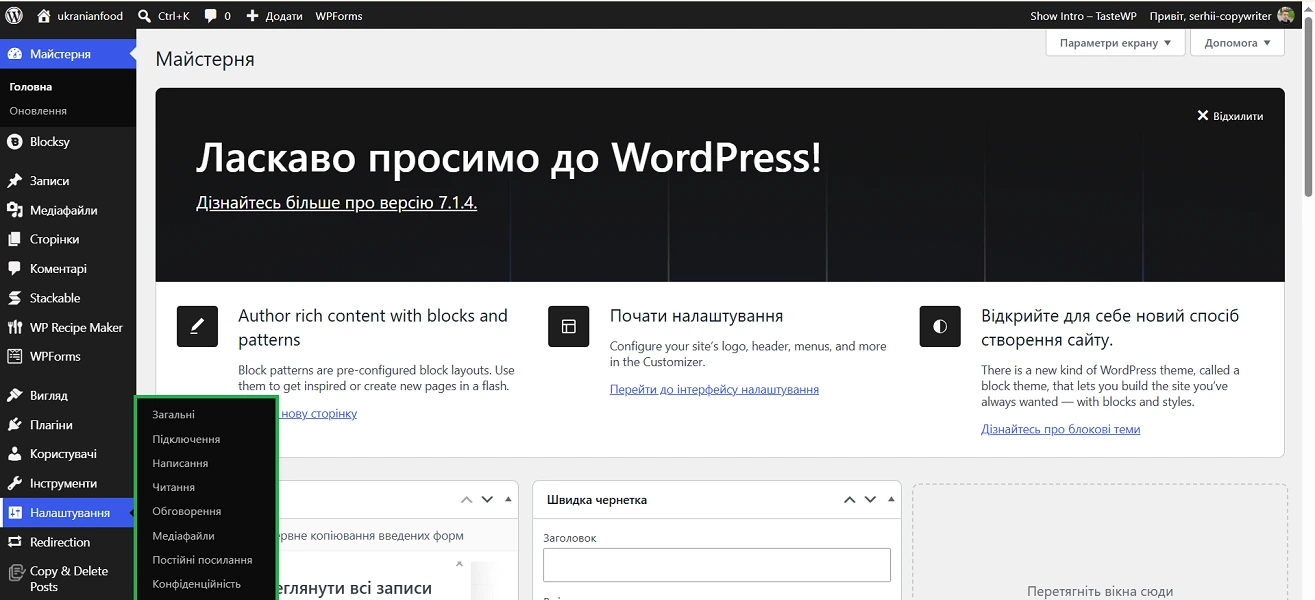
After installation, you will have an admin panel. It opens at your-site.ua/wp-admin, and all sections are located in the left menu. Before your first publication, change the following settings:
- In "Settings" → "General," enter the site name and key phrase instead of the default, as readers see them in the browser tab.
- There, choose the time zone "Kyiv" so that posts are published according to your time.
- In "Settings" → "Permalinks," select "Post name" so that the address contains the name of the dish, not a number like ?p=123.
- In "Settings" → "Reading," check that there is no tick next to "Discourage search engines from indexing this site."
- In "Settings" → "Discussion," enable manual approval of comments so that feedback appears only after your review.
- In "Posts" → "Categories," rename "Uncategorized" to a real section, for example, "Main Dishes."
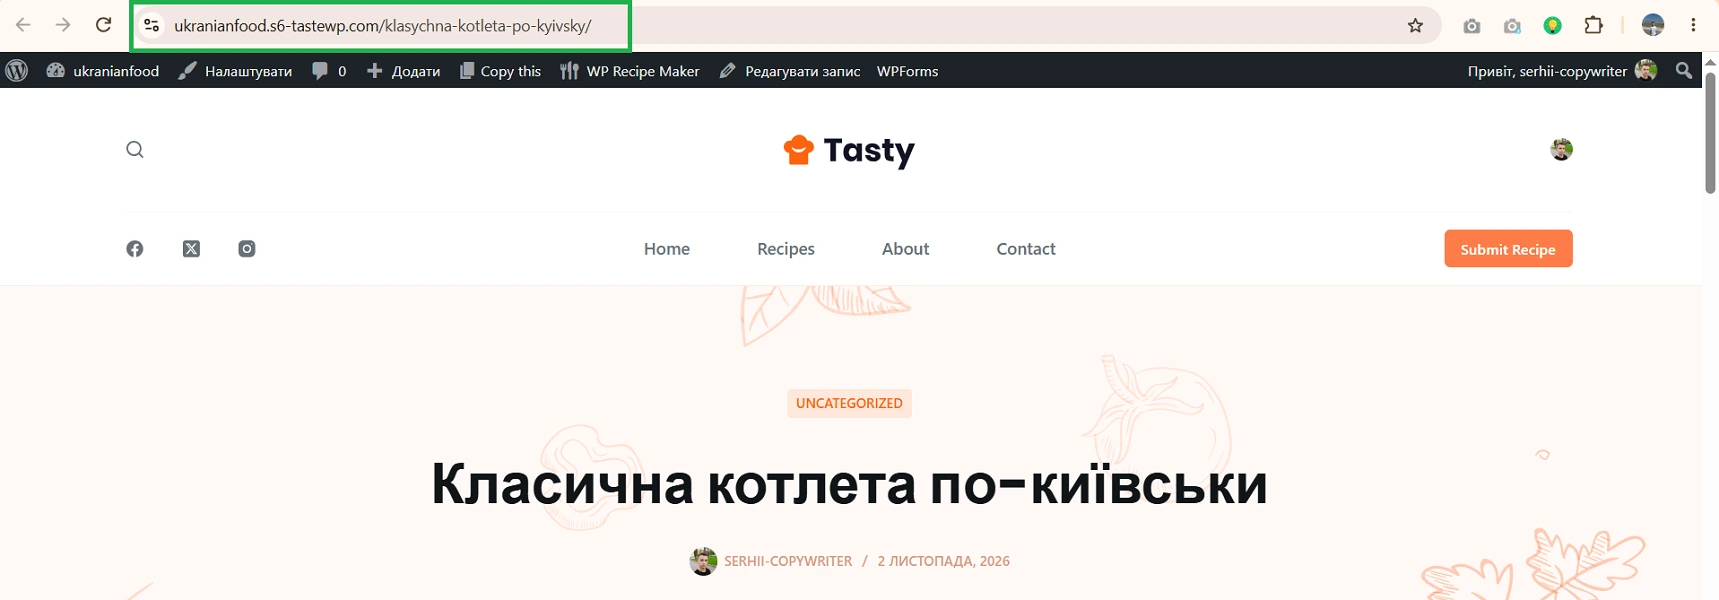
Take care of Latin addresses for pages separately. WordPress automatically generates part of the link from the post title and leaves Cyrillic, so in the messenger, the recipe address turns into %D0%BA%D0%BE%D1%82… This can be corrected manually when creating each recipe, but it’s easier to install the Lytera UA LAT plugin. With it, new URLs will look like your-site.ua/kotleta-po-kyivsky.
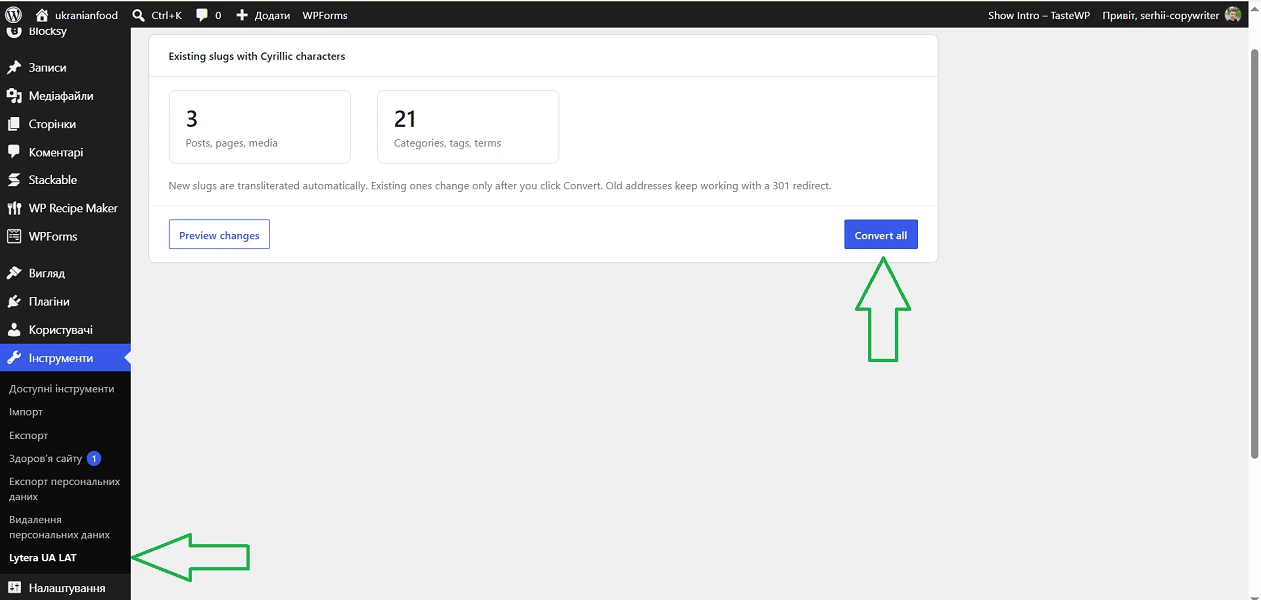
To convert already published recipes and categories, go to "Tools" → "Lytera UA LAT" and click Convert all. Old links will be redirected to new ones via a 301 redirect.
Read also: Testing WordPress updates: important discoveries after the release of Armstrong 7.0
Which template to choose for a culinary website
I have been using the free version of the Blocksy theme for two years, which has a header and footer builder, Schema microdata, and support for custom post types. For culinary projects, there is a free starter site Tasty, which installs the Recipe Card Blocks plugin from WPZOOM along with the main page, menu, and demo posts.
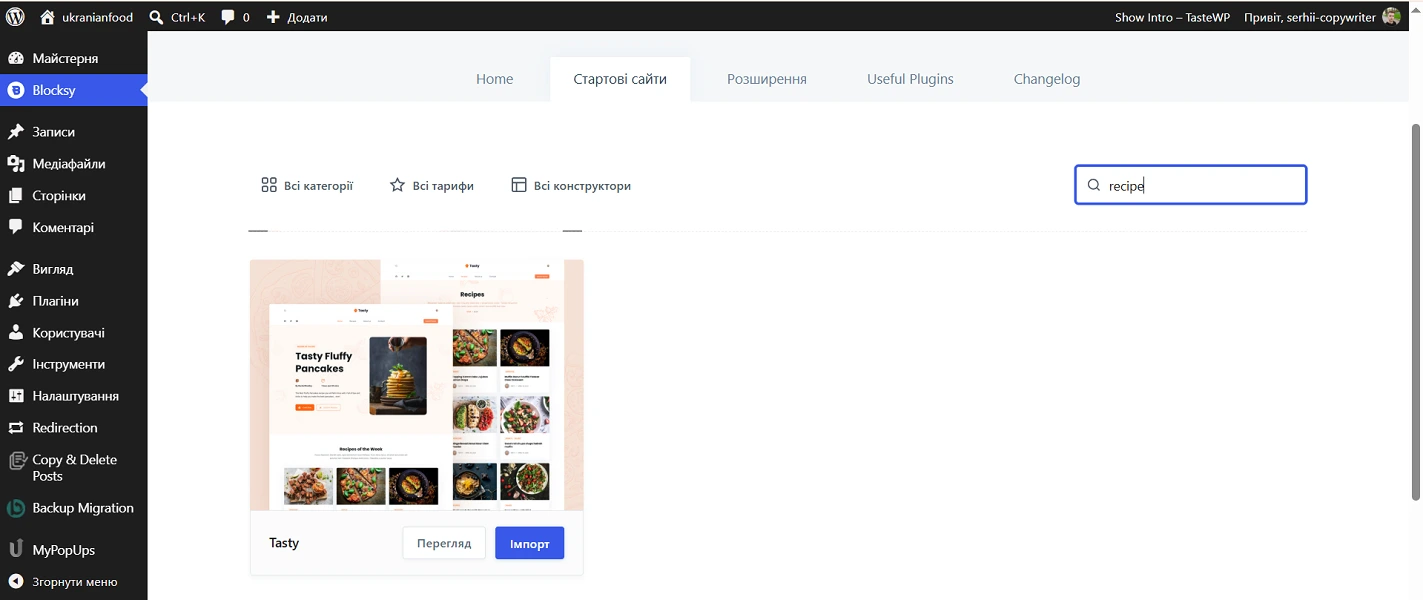
To install, go to "Appearance" → "Themes," click "Add New," find Blocksy, click "Install," and "Activate." After activation, agree to install the Blocksy Companion plugin, as without it the starter sites section will not appear. Next, open "Blocksy" → "Starter Sites," find Tasty, and click "Import." On the plugins step, uncheck Stackable and WPForms if you do not need the block builder and feedback form.
Read also: TOP-8 best WordPress themes for blogs relevant in 2024
Which plugin to choose for recipes
For most new culinary websites, I recommend WP Recipe Maker: it retains the recipe in the post after being disabled, albeit without formatting and microdata. Recipe Card Blocks is more convenient to work with, as the card is edited directly in the post and immediately looks as it will to the reader, and it is also installed with the Tasty starter site. Both plugins create a card with microdata Recipe for free, which Google uses to display the dish with a photo, cooking time, and rating.
You can switch from one plugin to another for free, as each imports recipes from the other. However, the data transfer is not perfect, so each recipe will need to be checked and corrected manually. Therefore, choose a plugin before your first publication, testing both on a copy of the site or in TasteWP.
Recipe Card Blocks — visual editing of recipes
Recipe Card Blocks from WPZOOM works like a regular block in the editor: you fill in the card directly in the post and see it as the reader will. In the free version, the plugin provides a recipe card, ratings through comments, print and Pinterest buttons, a Cook Mode where the phone screen does not turn off while cooking, and built-in microdata check with hints on which fields are missing. The Pro version unlocks serving size changes, unit conversion, automatic nutrition calculation, and a recipe catalog.
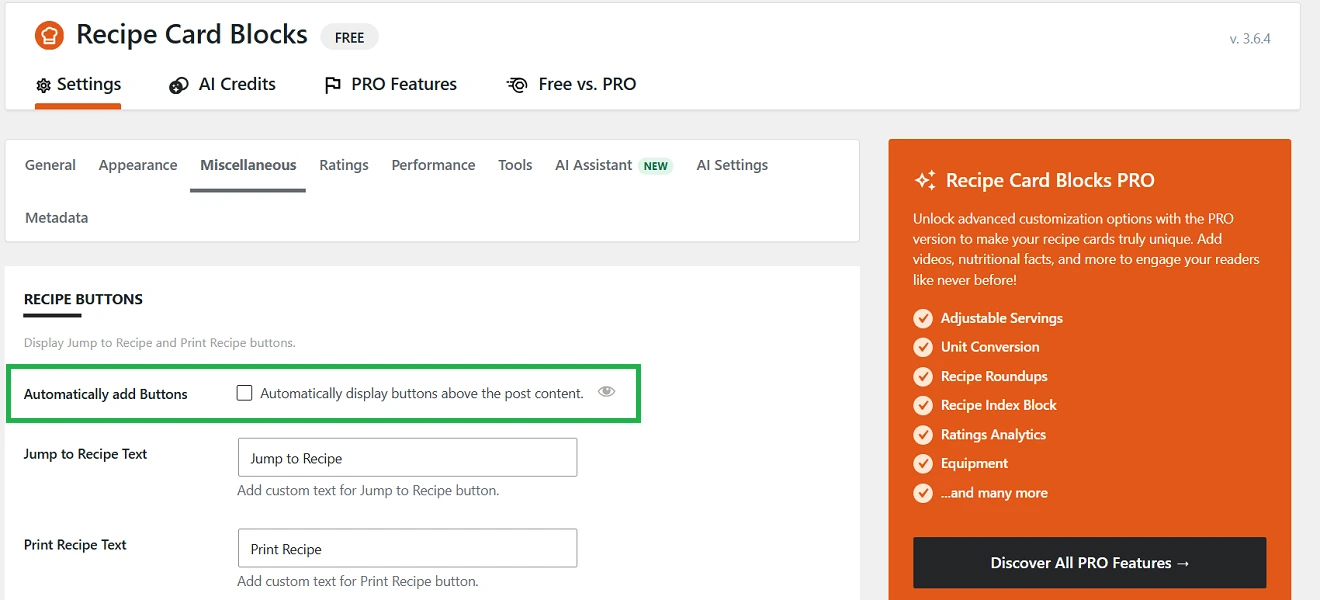
The screenshot shows the Miscellaneous tab, where the "Go to recipe" button is enabled.
Recipe Card Blocks is installed along with the Tasty starter site or through "Plugins" → "Add Plugin." After that, you can create recipes:
- Go to "Posts" → "Add New Post" and enter the name of the dish.
- Click "+" and add the Recipe Card (Schema.org) block.
- Specify servings, cooking time, and add a photo, confirming the cuisine and category with the Enter key.
- Through Bulk Add, insert ingredients and steps one per line, and wrap the stage names in double asterisks, for example, **Filling**.
- Fill in the missing fields according to the Structured Data Testing panel and click "Publish."
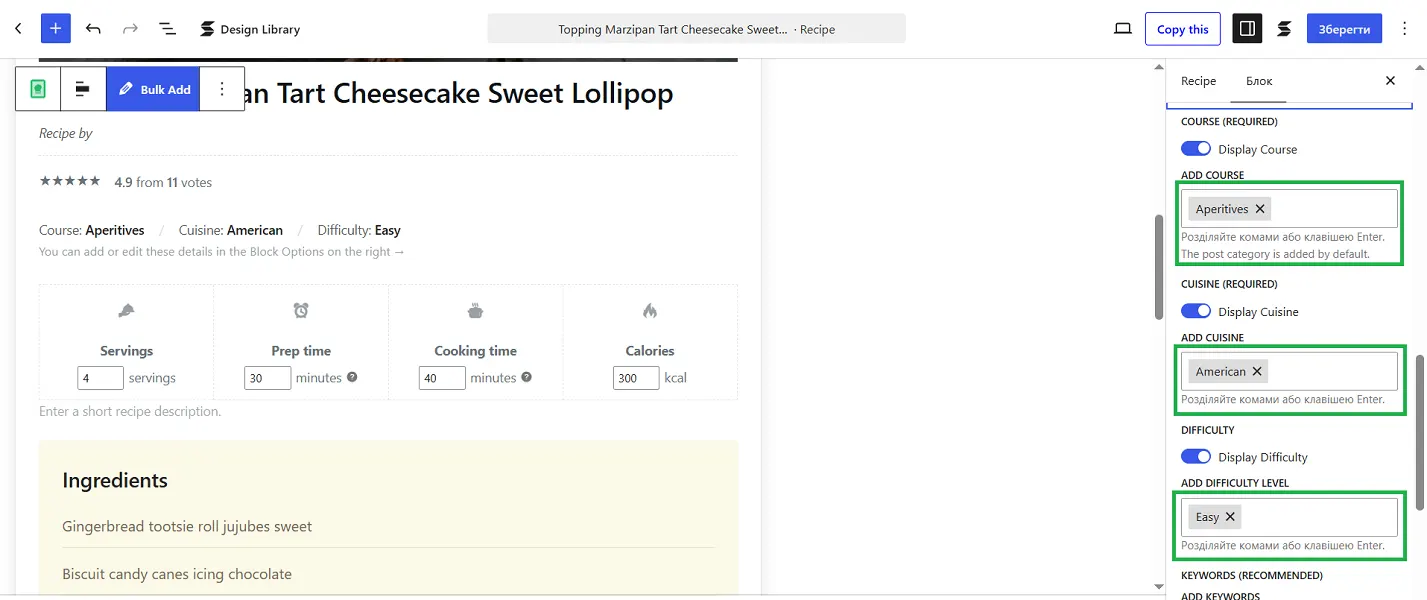
The cuisine and category fields: the value is saved only when it becomes a separate tag.
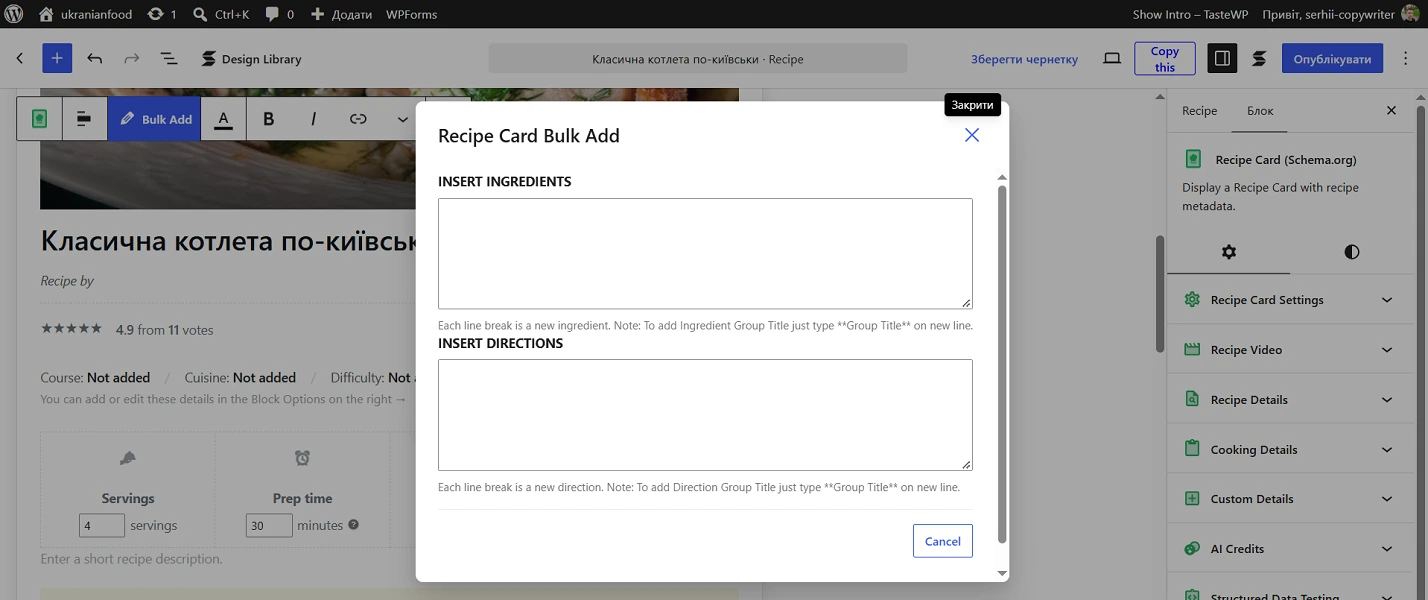
Do not forget to wrap the stage names in double asterisks in the quick recipe addition form
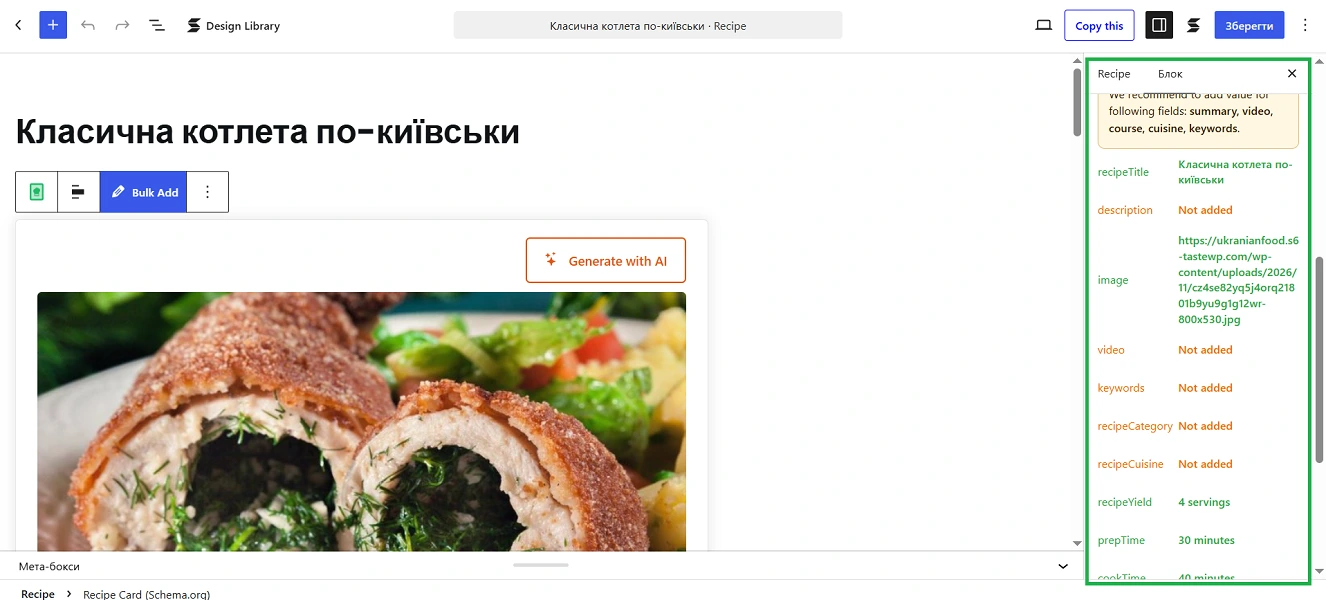
The Recipe Card plugin provides hints on which fields are missing for complete microdata.
Create the recipe directly from the post. Initially, I added the dish through the plugin menu and could not view it: such a recipe does not have its own page until you insert its shortcode into the post.
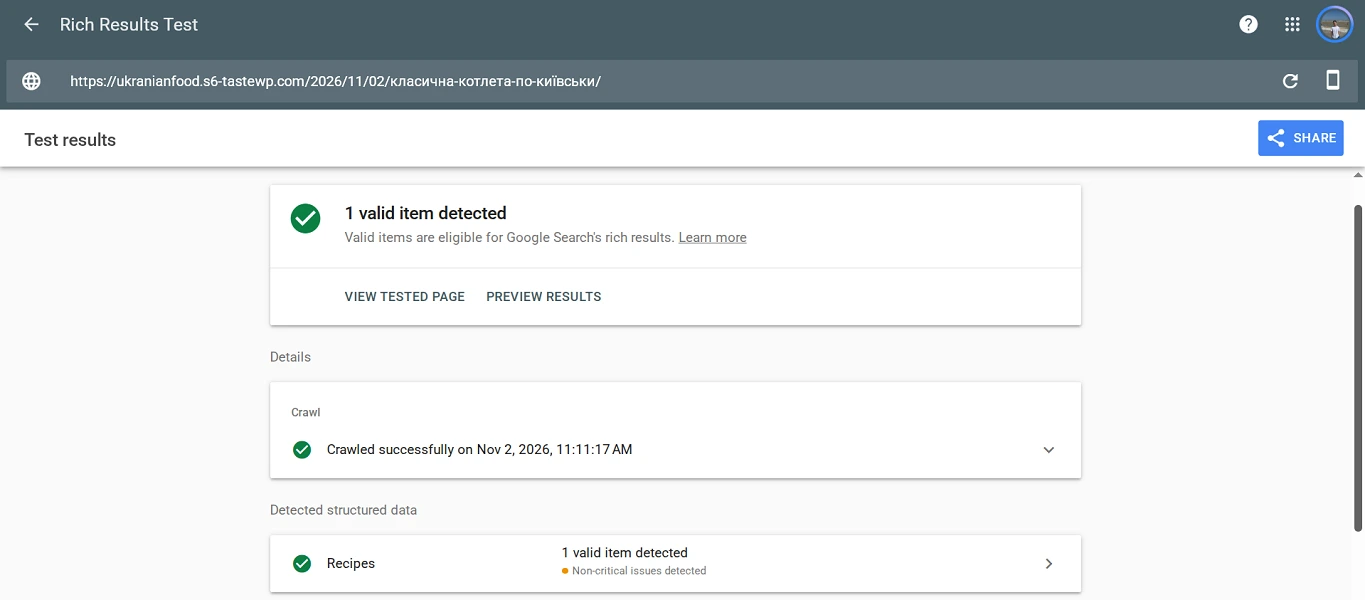
Rich Results Test found valid markup for the recipe created in Recipe Card Blocks, so Google receives all the necessary data.
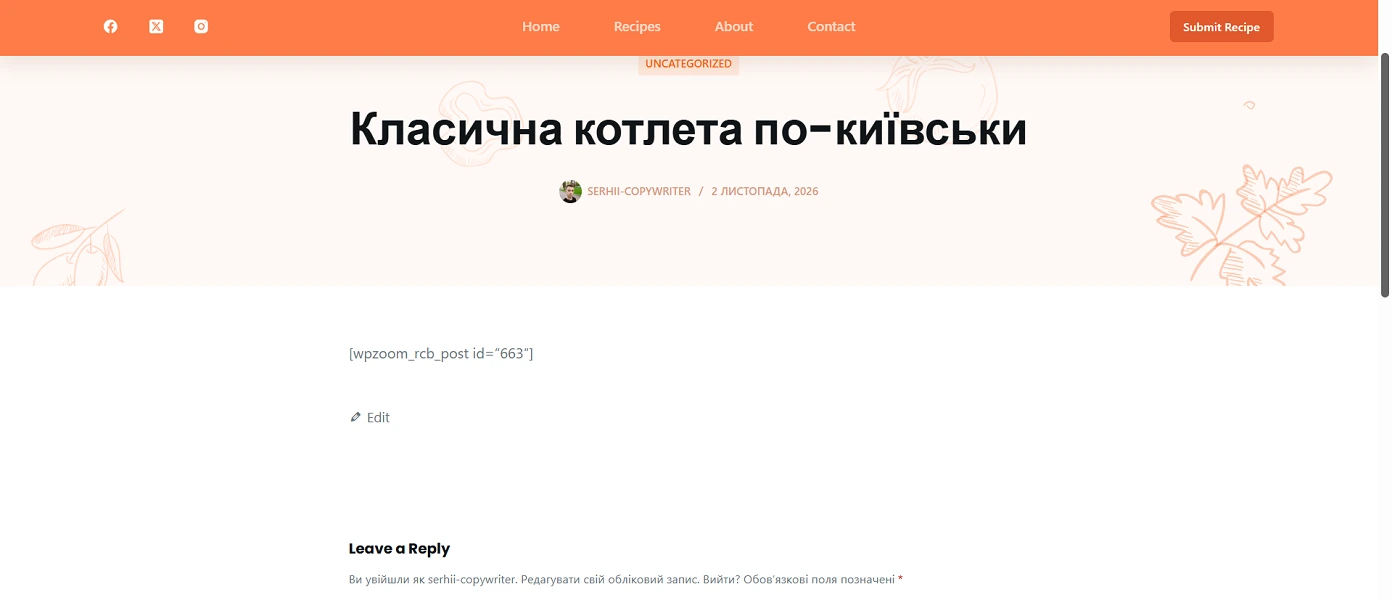
For free, Recipe Card Blocks imports recipes only from WP Recipe Maker, and export to file is available only in Pro. After deactivating the plugin, the shortcode text or an empty space remains in place of the card, although after reactivation, the recipes return.
WP Recipe Maker — saving dishes after disabling the plugin
WP Recipe Maker retains the recipe in the post even when the plugin is disabled: the reader still sees the ingredients and steps, although the formatting and microdata disappear. For free, you get six card templates, "Go to recipe" and "Print recipe" buttons above the text, a photo or video for each step, and import from over 20 plugins. Premium adds a nutrition label, a separate image for Pinterest, and AI text import.
After activation, go through the setup wizard in "WP Recipe Maker" → "Dashboard," otherwise the recipe list section will not open. Then add a recipe:
- Create a new post, add the WPRM Recipe block, and click Create new Recipe.
- On the Media tab, add a photo of the dish, without which Google will not show the rich result in the search.
- On the General tab, enter the name and short description, and in the Author field, select Name of post author.
- On the Times and Categories tabs, specify the time and your own category instead of the English variants.
- Break down each ingredient into fields: amount, unit, name, and note.
- Combine the steps into stages through Insert Group After.
- Click Save & Close and publish the post.
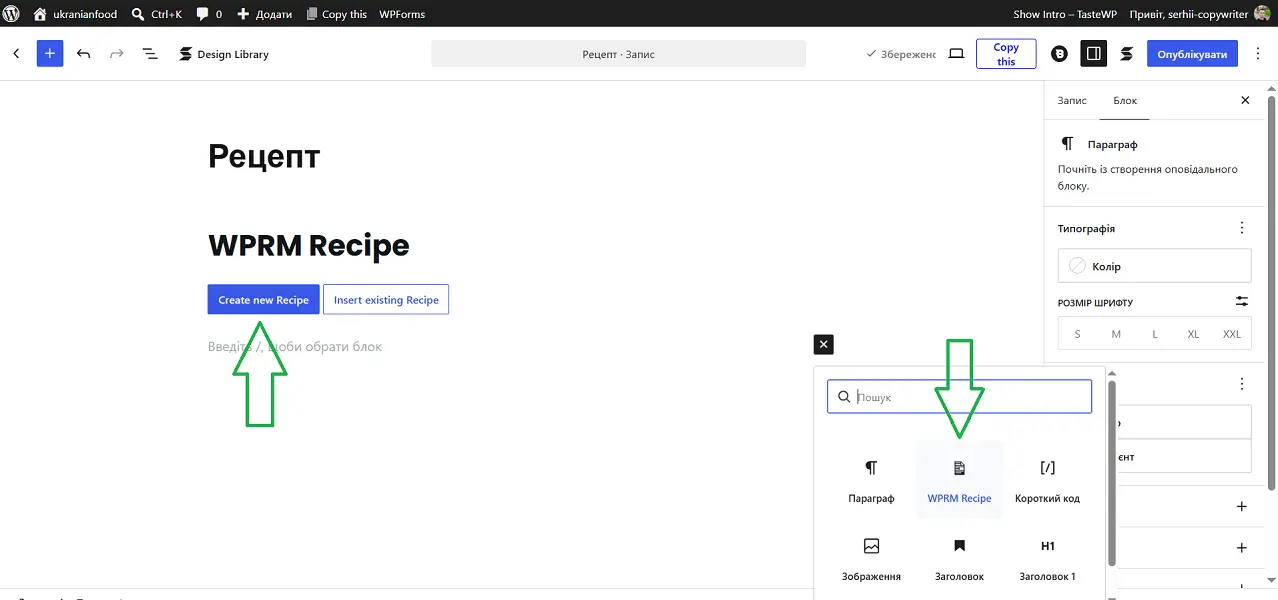
The recipe creation starts with the WPRM Recipe block
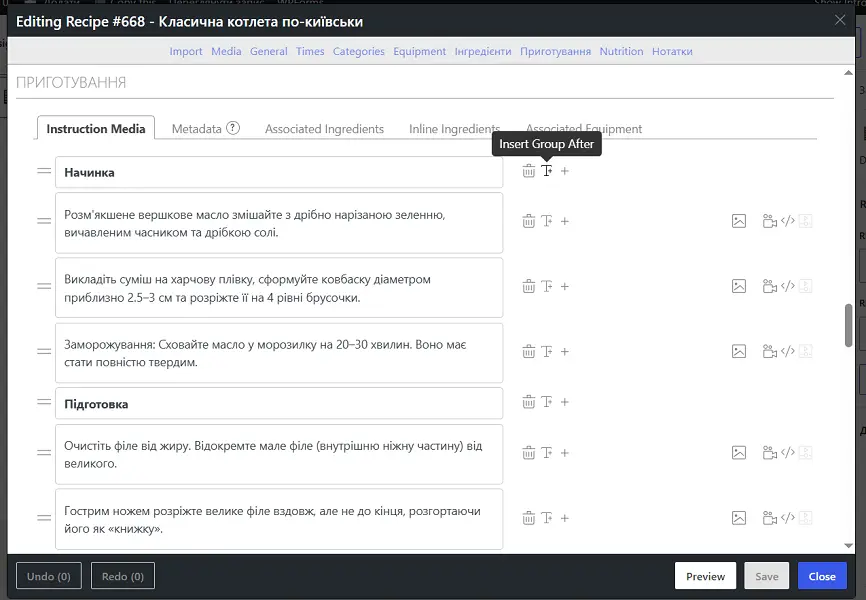
Group the steps into separate stages, such as "Filling" and "Preparation," using Insert Group After.
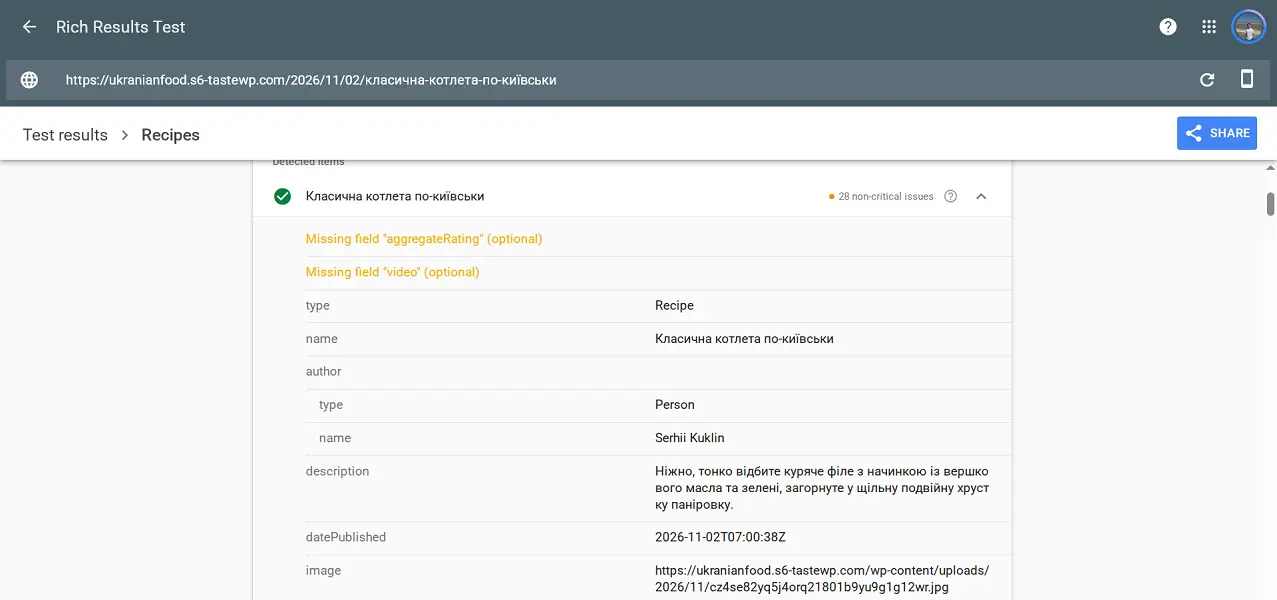
Rich Results Test confirmed that the author's name is included in the microdata as a separate entity.
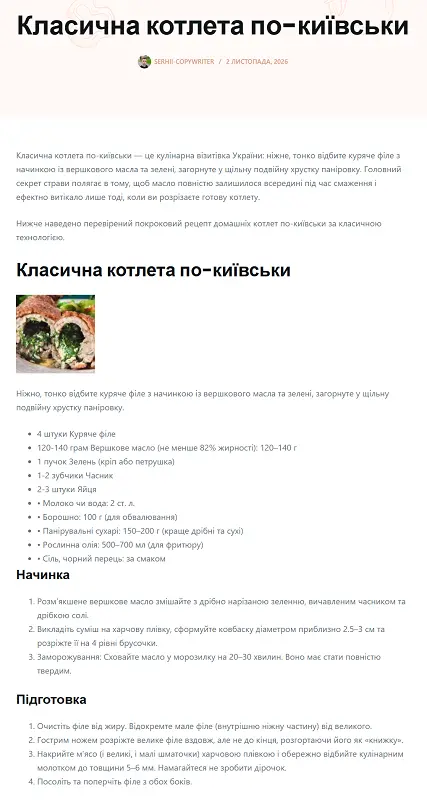
I separately checked what happens after deactivating the plugin. The post retained the title, photo, ingredients, and steps with stages, but the markup disappeared. After reactivation, both the card and the microdata returned.
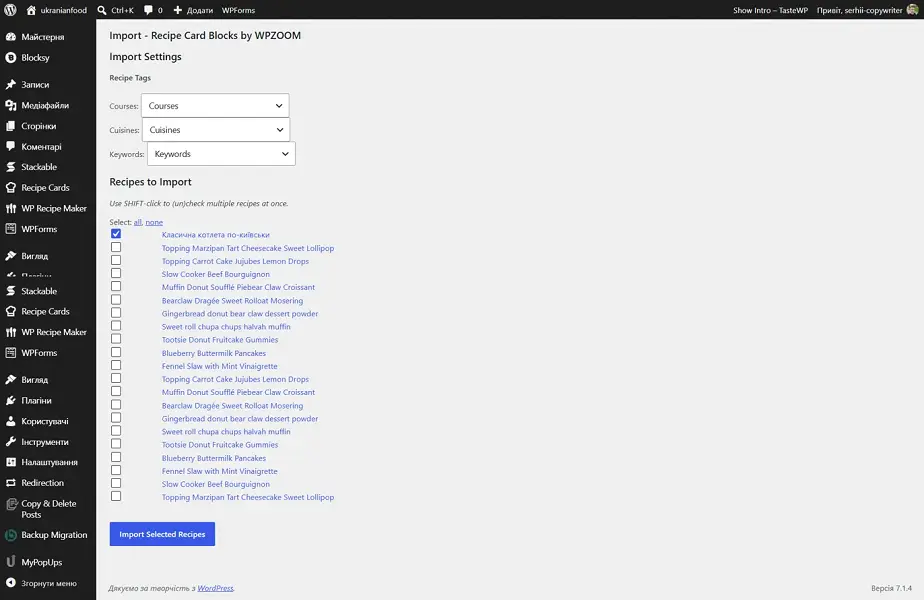
You can switch from Recipe Card Blocks to this plugin for free: in "WP Recipe Maker" → "Import Recipes," the system found 21 recipes. However, after import, Rich Results Test did not find the recipe. The microdata only appeared when I replaced the imported shortcode with the WPRM Recipe block and saved the post again.
After import, recipes transition to the WP Recipe Maker format and are no longer available in the old plugin, so first make a backup and transfer one recipe. Then, in each post, replace the shortcode with the WPRM Recipe block, save it, and check it in Rich Results Test. Finally, deactivate the old plugin.
How to translate the recipe card into Ukrainian
Both plugins on the Ukrainian site show card labels in English, and neither has an official Ukrainian translation. The documentation for WP Recipe Maker recommends translating it using the free Loco Translate:
- Install and activate Loco Translate.
- Open "Loco Translate" → "Plugins" → "WP Recipe Maker."
- Click "New Language" and select Ukrainian.
- In the location, leave "Custom" so that the translation does not disappear after the plugin update, and click "Start Translating."
- Find the string using the filter, enter the translation, and click "Save." If the string is not in the list, first click "Sync."
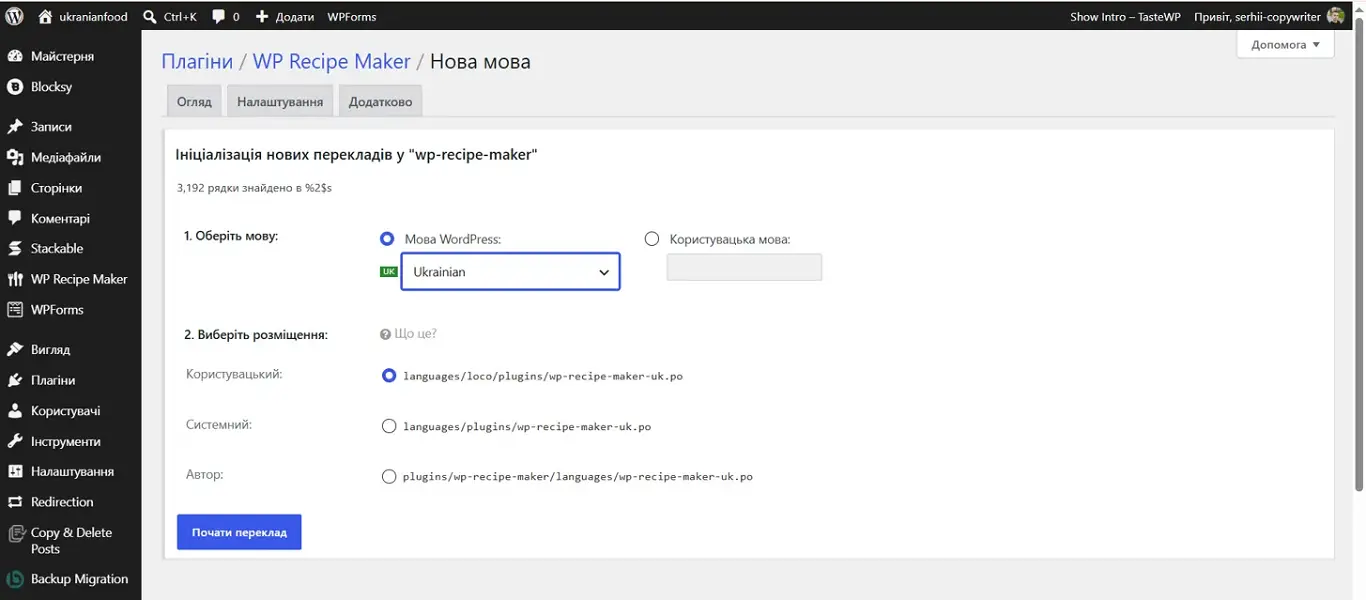
For translating text from English to Ukrainian, keep these parameters
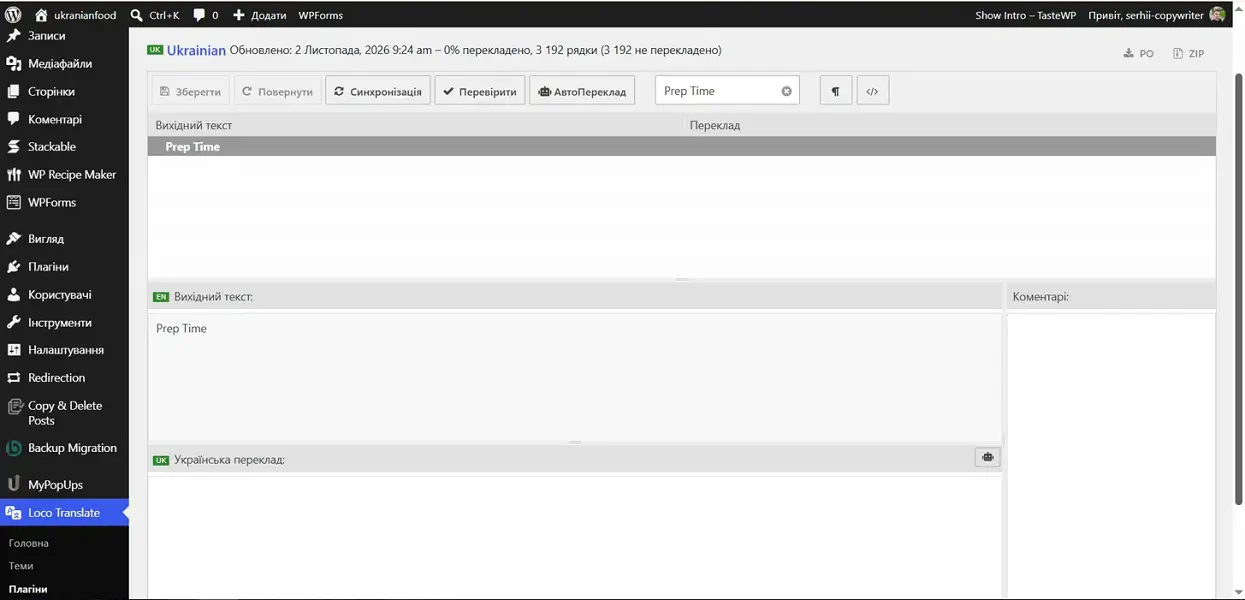
Find the required string using the filter, click on it in the "Source Text" form, and then enter the translation in the corresponding form.
You do not need to translate all 3,192 strings; just the ones visible on the card: "Preparation 30 min," "Print recipe," "Save to Pinterest." The Method title is not visible to Loco because it belongs to the card template, so it is changed in the template copy in "WP Recipe Maker" → "Template Editor."
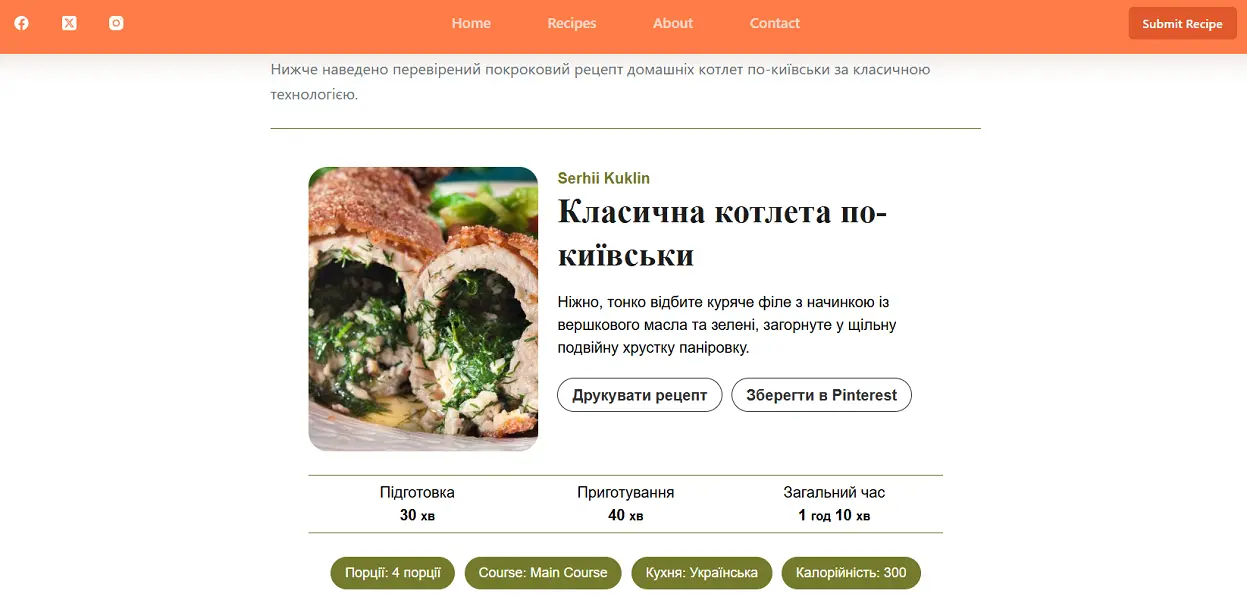
The labels of Recipe Card Blocks are translated in the same way: in the second step, select it instead of WP Recipe Maker. If there are several recipes, they can be changed in the sidebar of each card.
How to promote a recipe website
Start with organic search: install an SEO plugin like Rank Math, add the site to Google Search Console and Bing Webmaster Tools, and regularly publish recipes with your own photos. When the site has 15-20 recipes, create a business account on Pinterest and publish 2-3 posts daily. Add a subscription form from day one, even if you are not sending emails yet, as this way you gather an audience that no algorithm update can take away. If you are ready to invest more effort, start YouTube: videos in the recipe card keep the reader on the page longer, and the channel itself provides separate traffic and monetization. Add Instagram, TikTok, and Telegram when you have time.
Plan the shooting immediately for all channels: while cooking, take a horizontal photo for the site, a vertical one for Pinterest, and a video for YouTube and Shorts. This way, one recipe will work across multiple platforms, and the same name and style will turn individual posts into a brand that retains the audience after the next Google update.
When the Ukrainian version already has several dozen recipes, consider the English version. Recipes are short and well-structured, making them easier to translate than long reads. However, check each one manually: an American reader needs ounces and cups instead of grams, and some products will need explanation. The free Polylang creates language versions with hreflang attributes, which Google uses to show each version to its audience, and WP Recipe Maker supports working with Polylang. The English-speaking audience also opens advertising networks unavailable for Ukrainian traffic.
How to make money on a culinary website
Start with an advertising network: it does not require agreements for your own products and brings in the first money from small traffic. When the site has dozens of recipes and regular visitors, add affiliate programs with links to dishes and equipment from your photos. Collect your mailing list and social media from day one: this is the audience you will later approach with direct brand integrations and your own recipe collections, as these two methods bring in the most money but only work where you are trusted.
In general, a recipe website can be monetized in the following ways:
- Google AdSense. There is no minimum traffic threshold here, but the number of materials still matters. My site with 15 pages AdSense did not accept, so apply when you publish several dozen full recipes with your own photos.
- Journey by Mediavine and Raptive. This is the next level after AdSense, but only for English-speaking traffic. Journey accepts sites with 1,000 sessions per month from the USA, UK, Canada, and Australia, and gives the owner 70% of the revenue. Raptive requires 25,000 views, half of which must be from the same countries or New Zealand.
- Affiliate programs. For a Ukrainian site, the easiest way to start is with the SalesDoubler network — this is a Ukrainian CPA network that has been operating since 2012, with offers from Comfy, Moyo, Yakaboo, and other stores. The rate depends on the store and category, and money can be withdrawn from 3,000 hryvnias. For the English version, Amazon Associates will work. In WP Recipe Maker, there is a separate tab for adding equipment.
- Brand integrations. Before writing to brands, gather a media kit: monthly traffic, audience geography from Google Analytics, the number of subscribers in the mailing list and social media.
- Your own products. Recipe collections in PDF, weekly menus with shopping lists, and holiday selections sell best to readers from the mailing list, as they already know your recipes.
- YouTube. Monetization is available for authors from Ukraine after the channel gains 1,000 subscribers and 4,000 hours of views of long videos within a year. Although according to Dynamoi's data, authors from Ukraine earn only $0.11 per 1,000 views, but you can sell ads directly and insert affiliate links in the video description.
So you can start now and build a successful recipe website by 2027, but only with your own photos, notes, and a few sources of visitors. If you are motivated, rent hosting and a domain. Then install WordPress with Blocksy and WP Recipe Maker, translate the card template into Ukrainian, and publish your first dish with your photos. Then regularly publish recipes and simultaneously maintain Pinterest. Connect advertising and affiliate links when the first regular readers appear.