
-
How to Install Yoast SEO: Step-by-Step Guide for WordPress Sites
-
How to Configure Yoast SEO Plugin: Advanced Configuration and Integrations
-
How to Improve Website Optimization with the Yoast SEO Plugin
SEO (Search Engine Optimization) is a proven method for attracting targeted audiences to websites. It helps capture the attention of potential clients without continuous advertising costs, but first, one must understand the nuances of search optimization. Yoast SEO plugin for CMS WordPress can assist with this. It enables enhancement of technical aspects, visibility of the entire web resource and individual pages, user experience, and configuration of how the internet project appears on social networks. And it's all free!
What is Yoast SEO and Why Do You Need It
Yoast SEO is a plugin designed to improve a website's visibility in search engine results through general settings and optimizing pages for specific keywords. While it offers essential features such as creating an XML sitemap and editing the robots.txt file, its main value lies in the detailed optimization of individual posts. It can even perform basic configurations (creating titles and descriptions, social media cards, etc.) automatically.
For a better understanding, let’s look specifically at why the Yoast SEO plugin is needed:
-
effective keyword usage — simply enter the focus keyword, and the system will analyze the content and suggest where and how many times the keyword should be included;
-
improving structure — generates an XML sitemap with a proper structure, automatically updates it after each relevant change on the site, sends data to search engines, improving the internet project's indexing;
-
social media engagement — provides separate settings for how content appears when shared on social networks, increasing traffic through this channel;
-
local SEO — allows you to configure the entire web resource and individual pages for local search queries, which is useful for businesses with a physical location;
-
performance monitoring — seamlessly integrates with Google Search Console, enabling you to track the site's performance in Google search and identify issues promptly.
An additional advantage of the Yoast SEO plugin is its simplified installation and management. Installation can be done directly from the WordPress dashboard. After activation, you are provided with a step-by-step guide for basic setup. The system automatically integrates the tools, allowing you to immediately proceed to the desired page and perform its optimization. If you have any questions, the developers offer a detailed user guide with free lessons to improve SEO.
How to Install Yoast SEO: Step-by-Step Guide for WordPress Sites
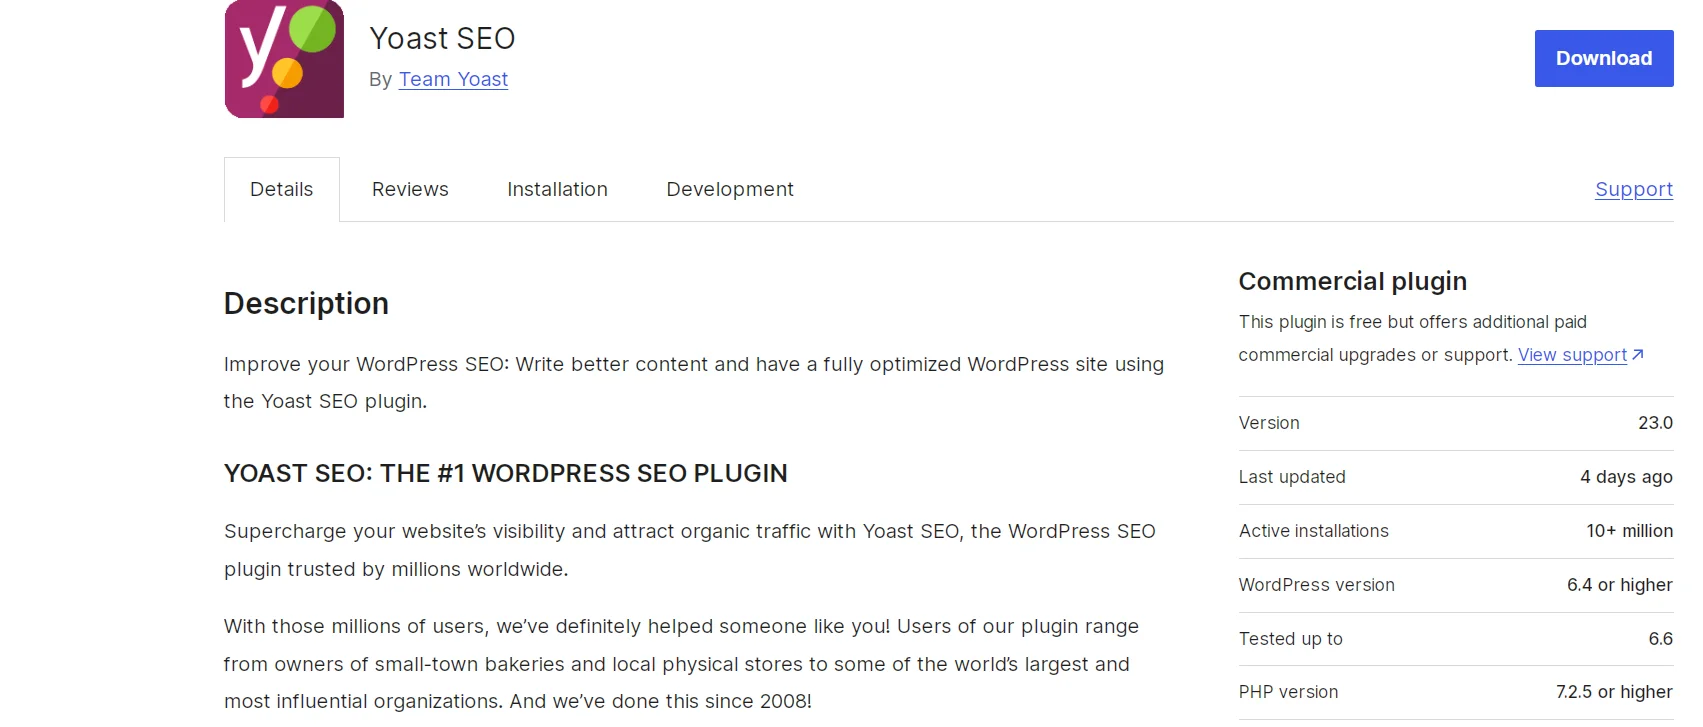
There are two ways to install Yoast SEO on WordPress: download the file from the official website (WordPress or the plugin itself) or install and activate it from the admin panel. Which option is better is up to you, but it is much simpler and faster to do it from the admin panel.
Moreover, Cityhost hosting services come with a convenient CMS auto-installer. With it, you can install not only WordPress but also other popular systems like Drupal, Joomla, OpenCart, and others in just a few clicks. You can find the auto-installer in the Hosting → Management → Settings section.
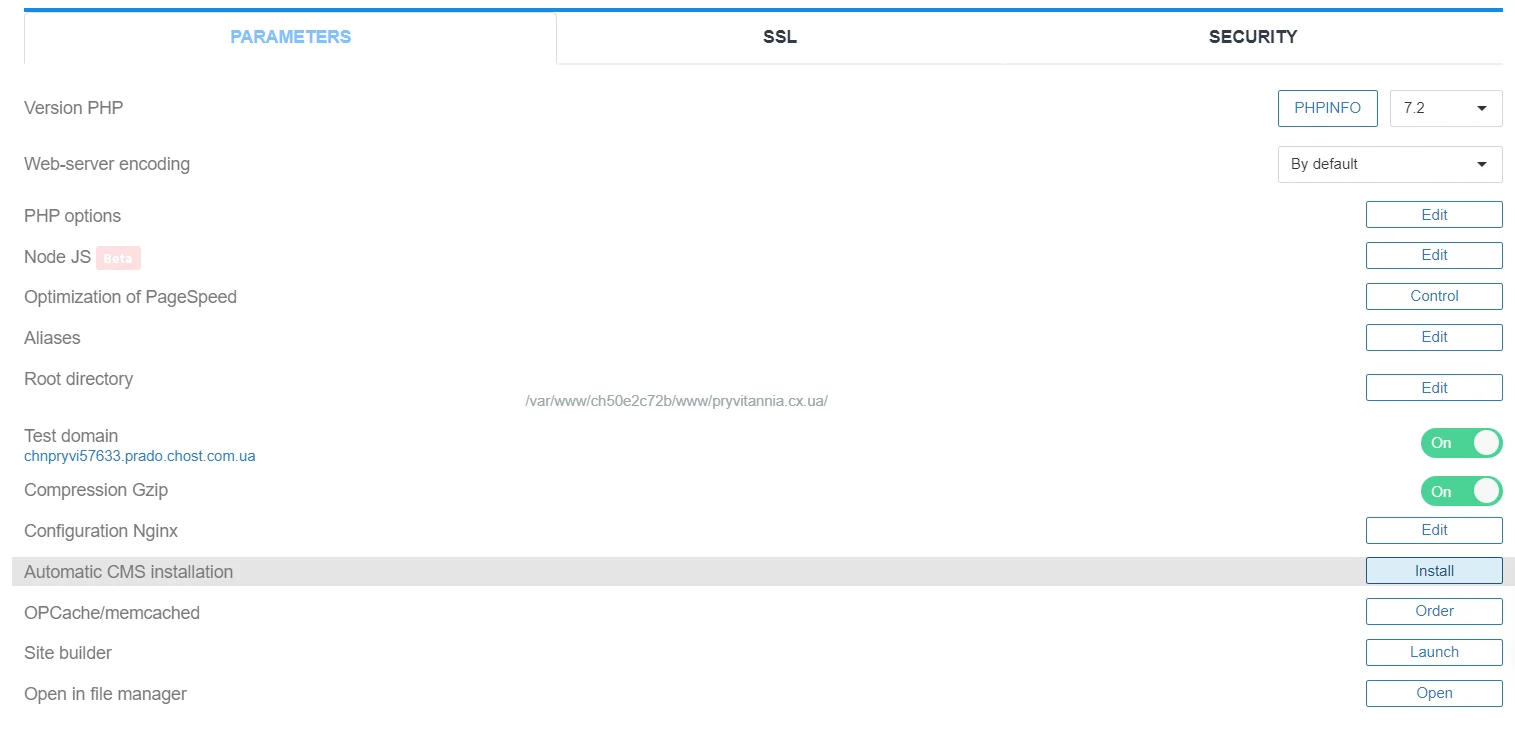
Before the automatic installation, you need to manually create a MySql database. This is especially important if you have multiple sites on one hosting. Without creating databases for each web resource, the system will create all sites on one database, which can lead to difficulties later on.
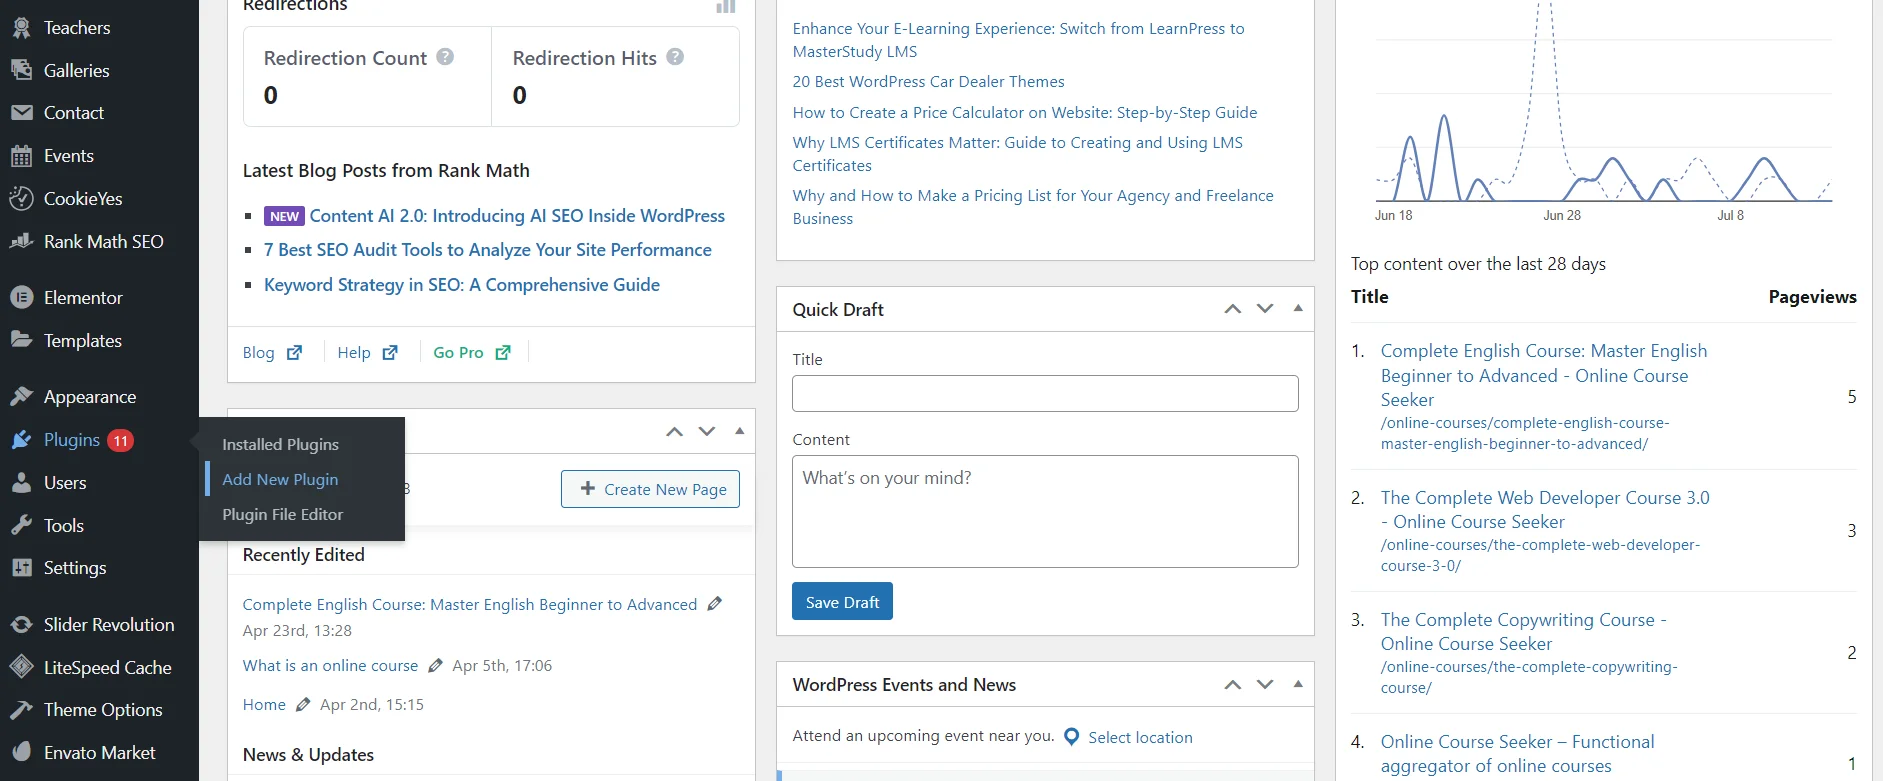
Now, let's go through the step-by-step instructions for installing Yoast SEO on WordPress:
-
Go to your website's dashboard.
-
Navigate to Plugins → Add New Plugin.
-
Type the name "Yoast SEO" in the search bar.

-
Click Install Now on the appropriate plugin.

-
Click the blue Activate button.

Warning: "Please keep only one SEO plugin active, otherwise you might lose your ranking and traffic."
Given the overlap in general features, the content management system advises against using multiple SEO plugins simultaneously. For example, if you activate both Yoast and Rank Math at the same time, the system will prompt you to remove one. You can try several extensions, but ultimately, you need to leave only one active to ensure your web resource functions correctly.
Once you activate the plugin, the system will automatically create a corresponding section in your website's dashboard. New options will appear in the Posts and Pages sections, including readability scores, titles, descriptions, keywords, and an overall optimization assessment for each page.
Read also: How does WordPress hosting differ from regular website hosting
How to Perform General Settings for Yoast SEO

After activation, we recommend utilizing the step-by-step process for basic site setup. Go to the Plugins section, find the necessary plugin, and click Finish your first-time configuration.
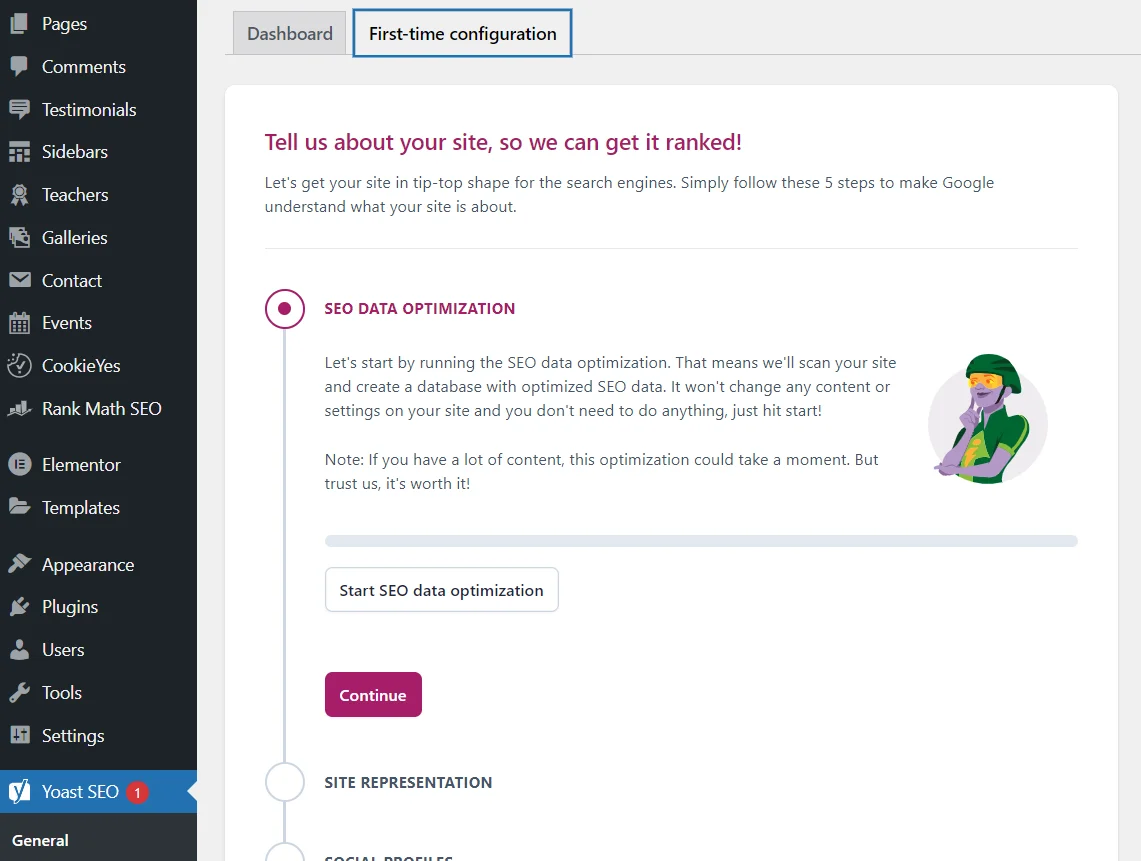
Alternatively, navigate directly to Yoast SEO → General. Then go to the same tab — First-time Configuration.
The initial configuration of Yoast SEO consists of the following sections:
-
Data Optimization — the system will scan your web resource and create a database with optimized data. The analysis time depends on the volume of your internet project's content.
-
Site Representation — this section involves the representation of your site in search results and social networks. You should provide basic information, including the name of the web resource and the logo.
-
Social Profile — here, you set how your site appears on social networks. You can add links to official pages.
-
Personal Preferences — this involves subscribing to the plugin for news, tips, guides, and more.
-
Finish Configuration — this is a greeting for successfully completing the basic setup and an offer to visit the official website for useful information on search optimization.
At first glance, it might seem that nothing important has happened. However, the system has already used the analyzed data and your information to create an XML sitemap, robots.txt file, and basic markup.
How to Configure Yoast SEO Plugin: Advanced Configuration and Integrations
The Yoast SEO plugin offers numerous settings that can be configured either immediately after activation or later on. You can skip them altogether since the basic configuration has already been successfully completed, and proceed to optimizing individual pages and posts. However, it is recommended to familiarize yourself with the features so that you know what and where to edit when needed.
Basic Settings
In the plugin tab, find the Settings section. The first category displays the general configuration (name, logo, web project image, etc.) that we set up immediately after activating the plugin.
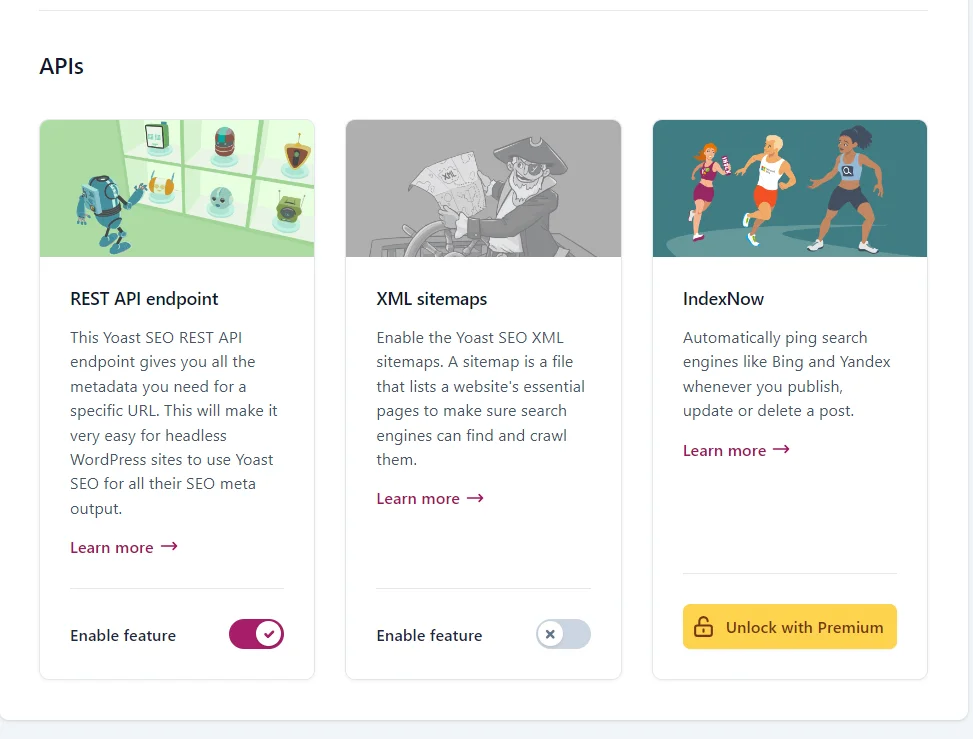
The only additional step is activating the necessary features: review them in the Site features tab and activate the desired ones. If another SEO plugin was previously installed, ensure that the system has enabled XML sitemap generation, i.e., the sitemap for search engines. You can find it at the link https://sitename/sitemap_index.xml. Replace "sitename" with your web resource's domain name, for example, cityhost.ua.
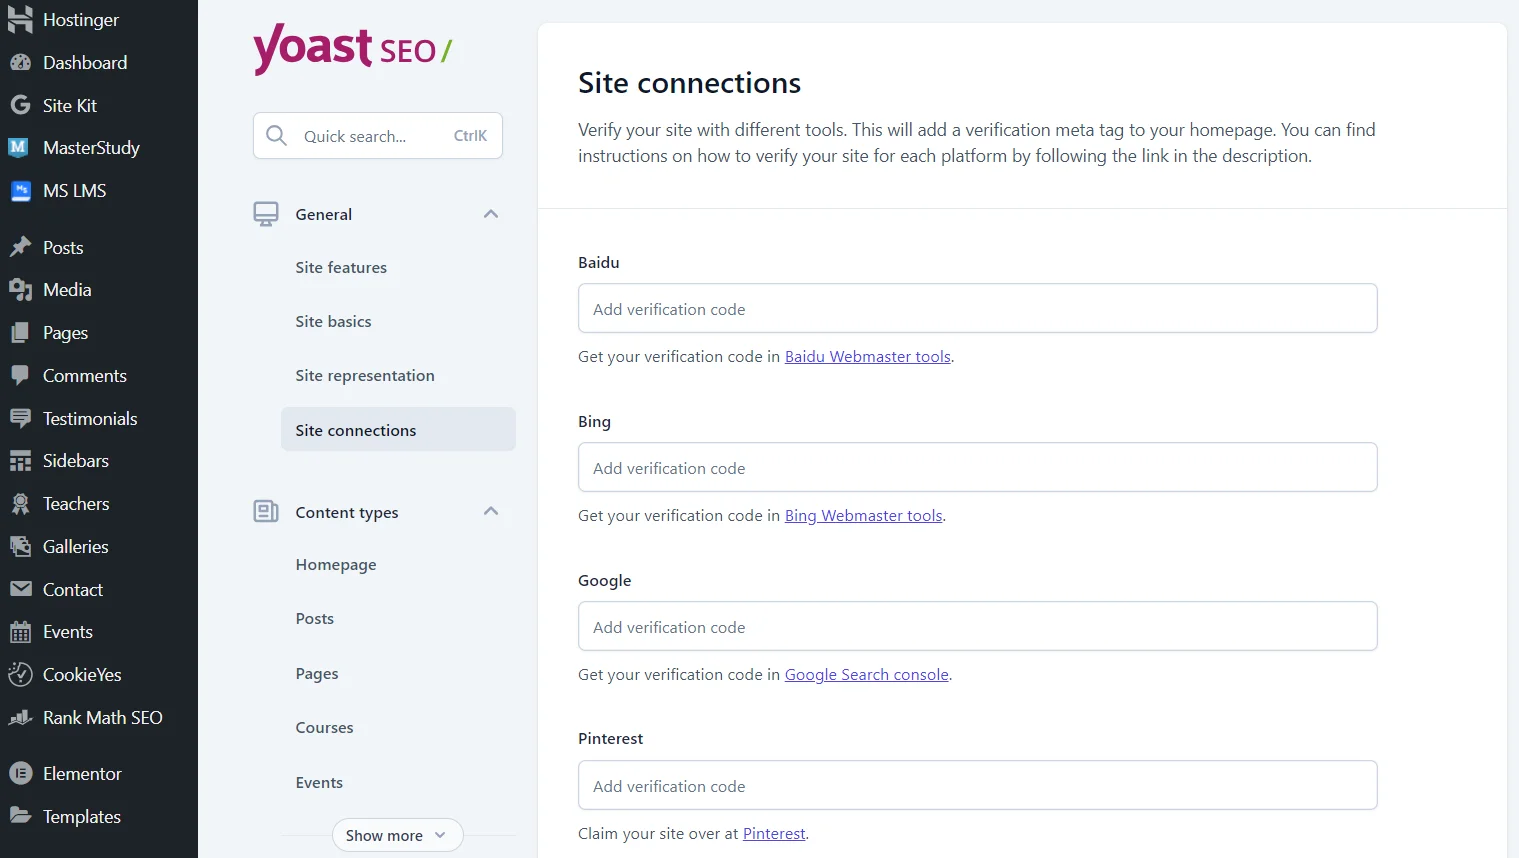
In the Site connections section, you can link your web resource to various tools, whether they are search networks or social services. For instance, this section is convenient for setting up the Google search network, which allows you to avoid verification through developer code. Each service has a step-by-step guide for obtaining the verification code.
Default SEO Settings for Posts and Pages
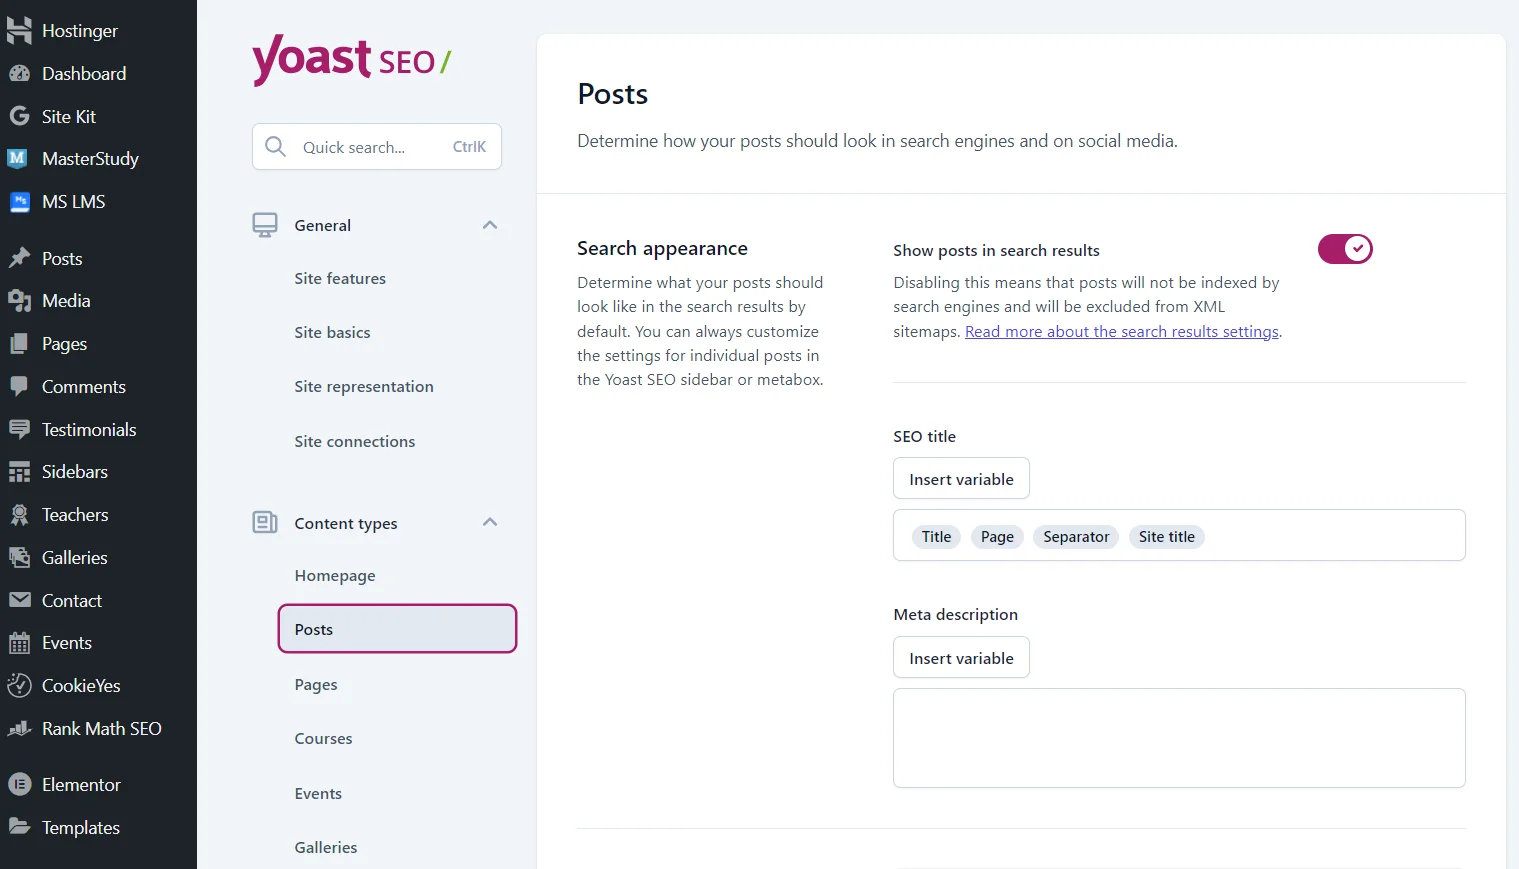
In the Content types section, you can specify the general appearance of all pages and posts in search results and social networks. For example, the default title for posts might be displayed as: article title, page, dash, website name. However, the system will choose the description automatically (usually 1-2 unrelated sentences). You can add default information or, more effectively, specify individual titles and descriptions for each post.
Default SEO Settings for Categories
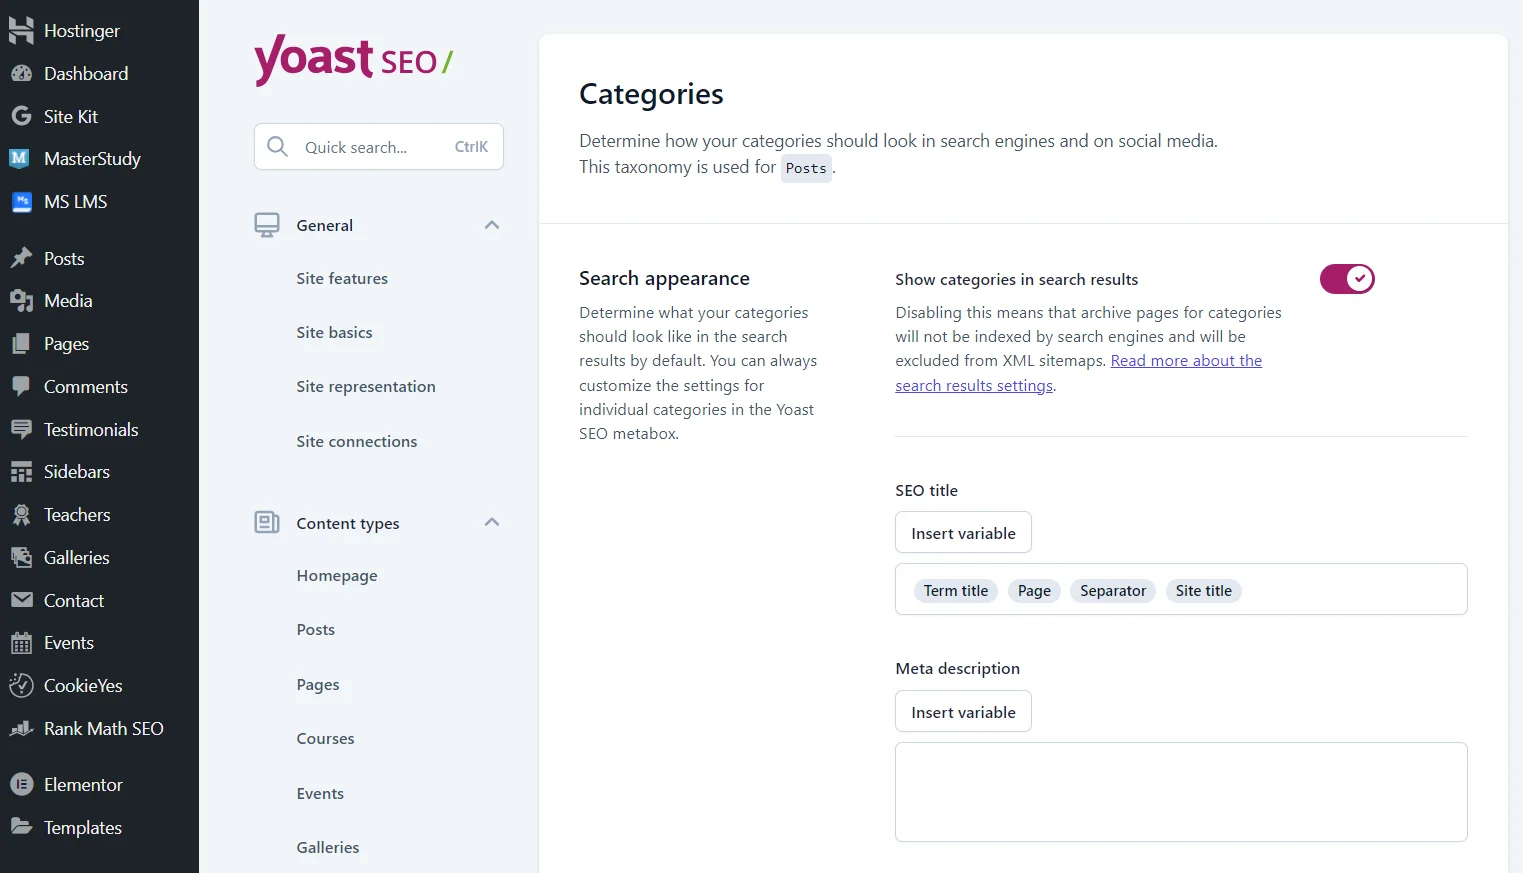
Next is the Categories & tags section, which configures categories and tags. The fields are identical to those for posts, meaning you also need to specify the appearance of the title and description.
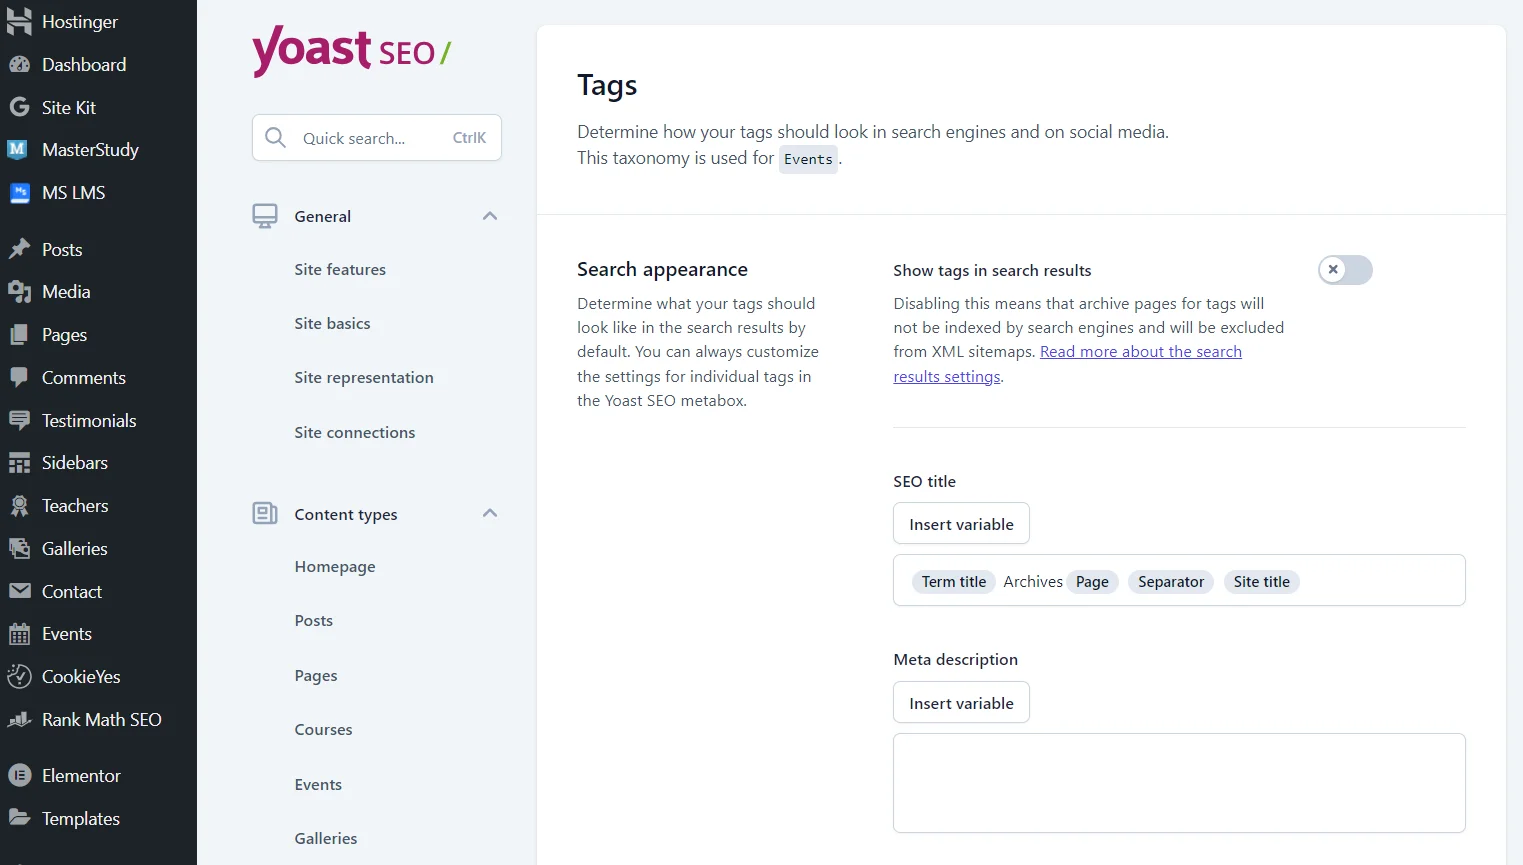
The difference is that it's better not to display tags in search results since they are used to simplify navigation for users and don't hold much value for search engine bots. Moreover, displaying a large number of tags can lead to search engines indexing less important pages instead of the more important ones.
The Yoast SEO plugin can create content types. For example, if your site has educational materials, it will create a subcategory for configuring the appearance of these pages in search results. This is a significant advantage of this plugin as you won't need to change the site's code manually.
Advanced Settings
In the Advanced category, there are several subcategories, including settings for archives and special pages. The system has set the necessary values by default, but you can always edit them.
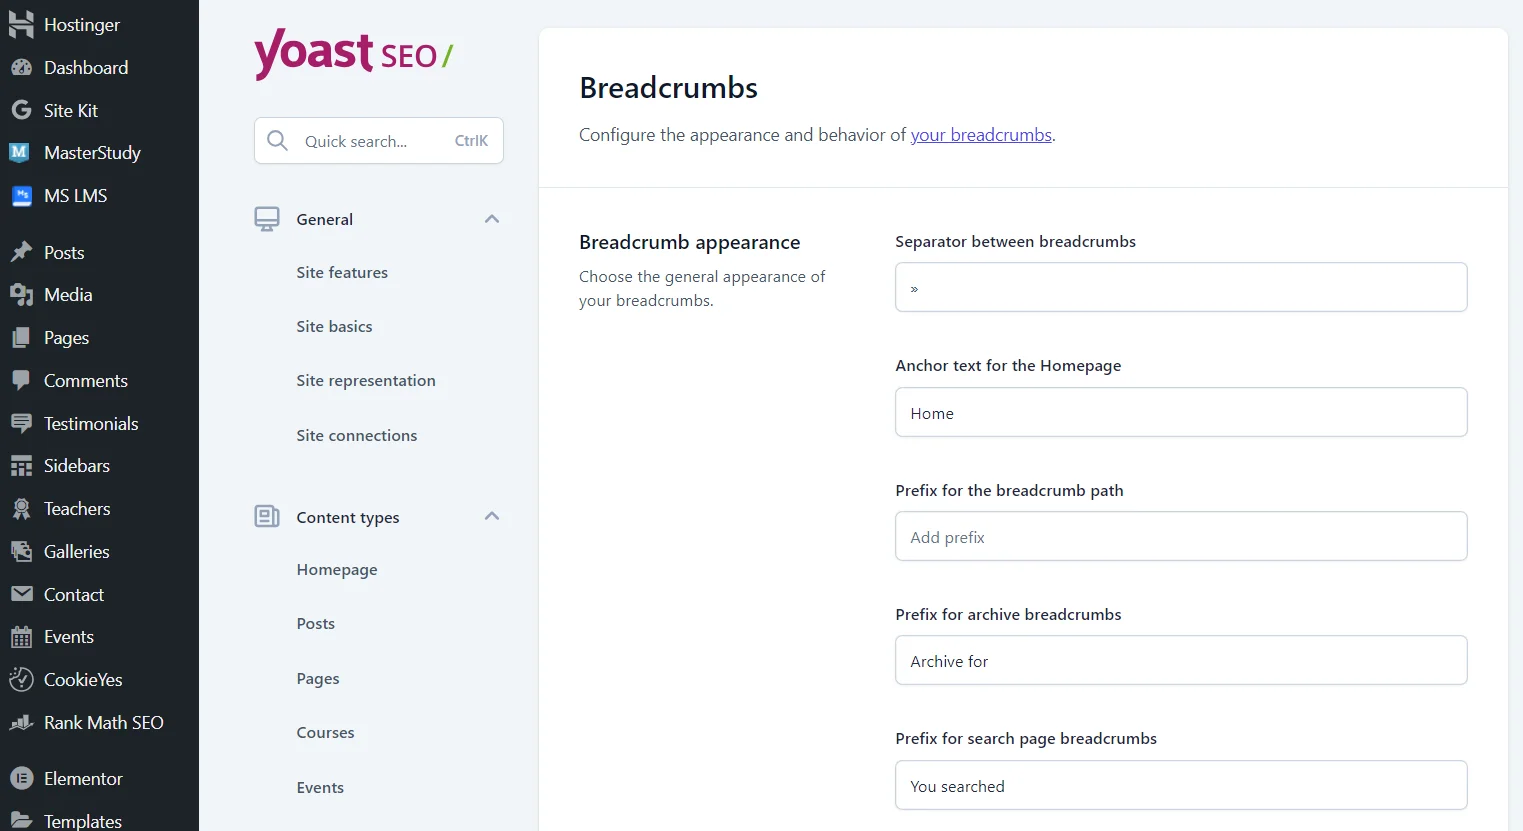
In the Breadcrumbs subsection, you can change the appearance of breadcrumbs. You can also select the taxonomy for each publication type: posts, categories, galleries, individual content types. After the main settings, there is an explanation on how to add breadcrumbs to your site with the Yoast SEO plugin: you can copy and paste the code yourself or enable automatic navigation.
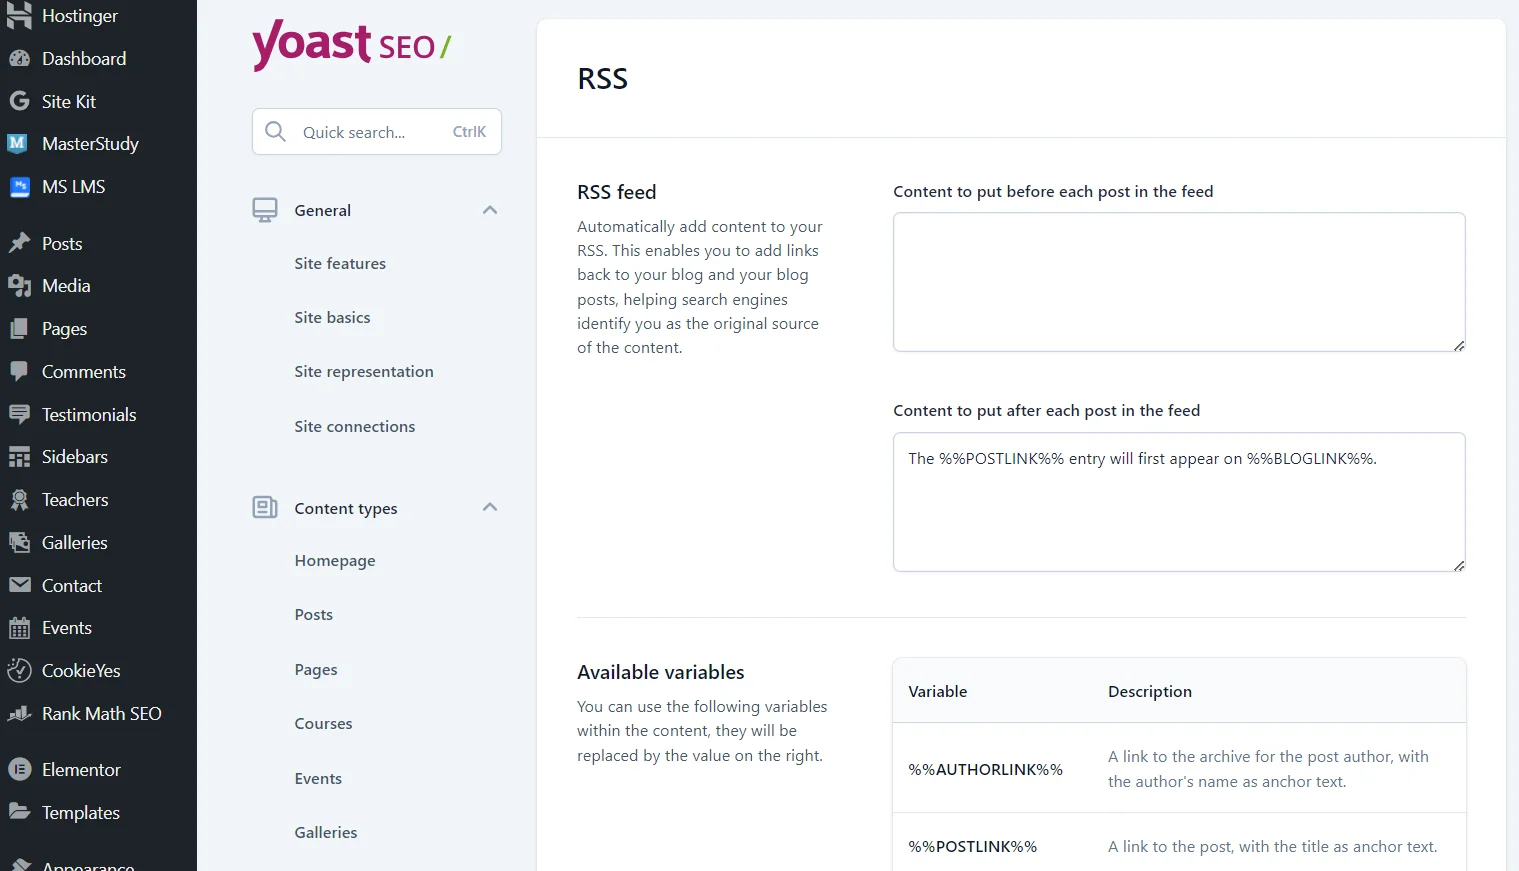
In the RSS section, you will find the settings for your news feed. Automatically adding content before and after each post in the news feed allows search engines to better identify you as the source of the content.
How to Improve Website Optimization with the Yoast SEO Plugin
After the general settings, you can finally move on to optimizing individual pages and posts. Once the plugin is activated, the system will automatically add the necessary blocks, and you just need to specify the parameters and fill in the fields for each page/post.
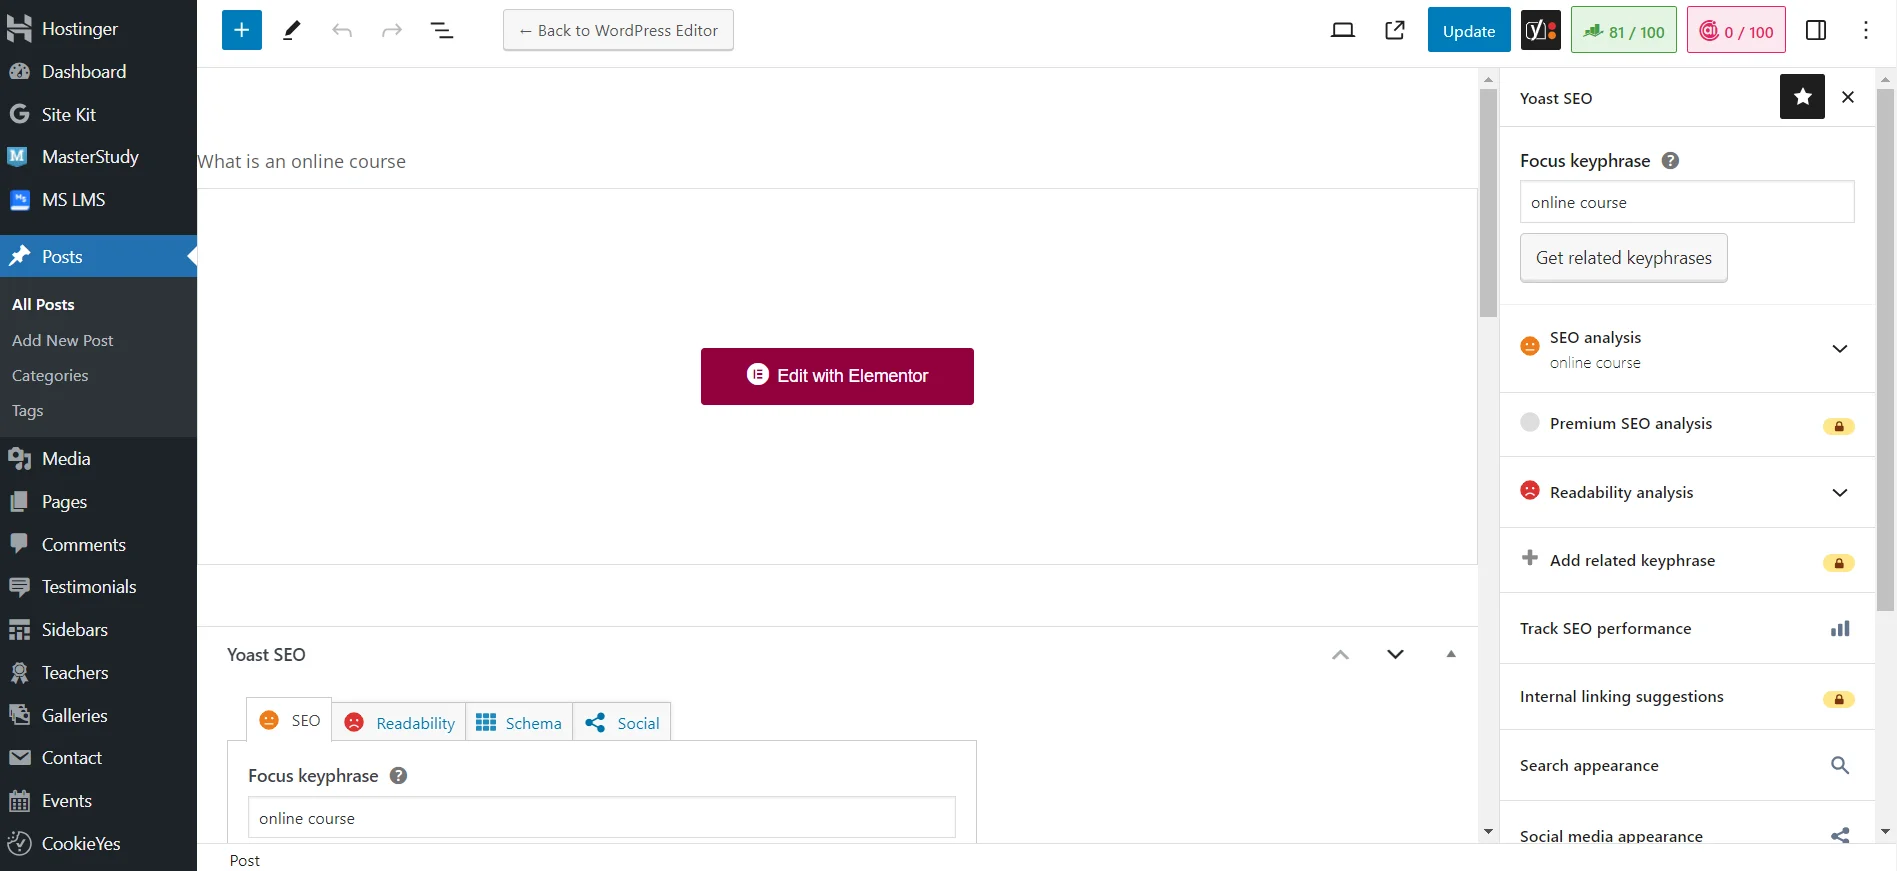
For example, you have already written and added an article through the admin panel. To begin the analysis, you need to add a keyword/phrase. You can expand the sidebar or find the Yoast SEO section at the bottom of the editor. When you specify the keyword, the system will instantly analyze the content and provide optimization scores (keyword density in the text) and readability scores (how easy the content is to read for web resource visitors).
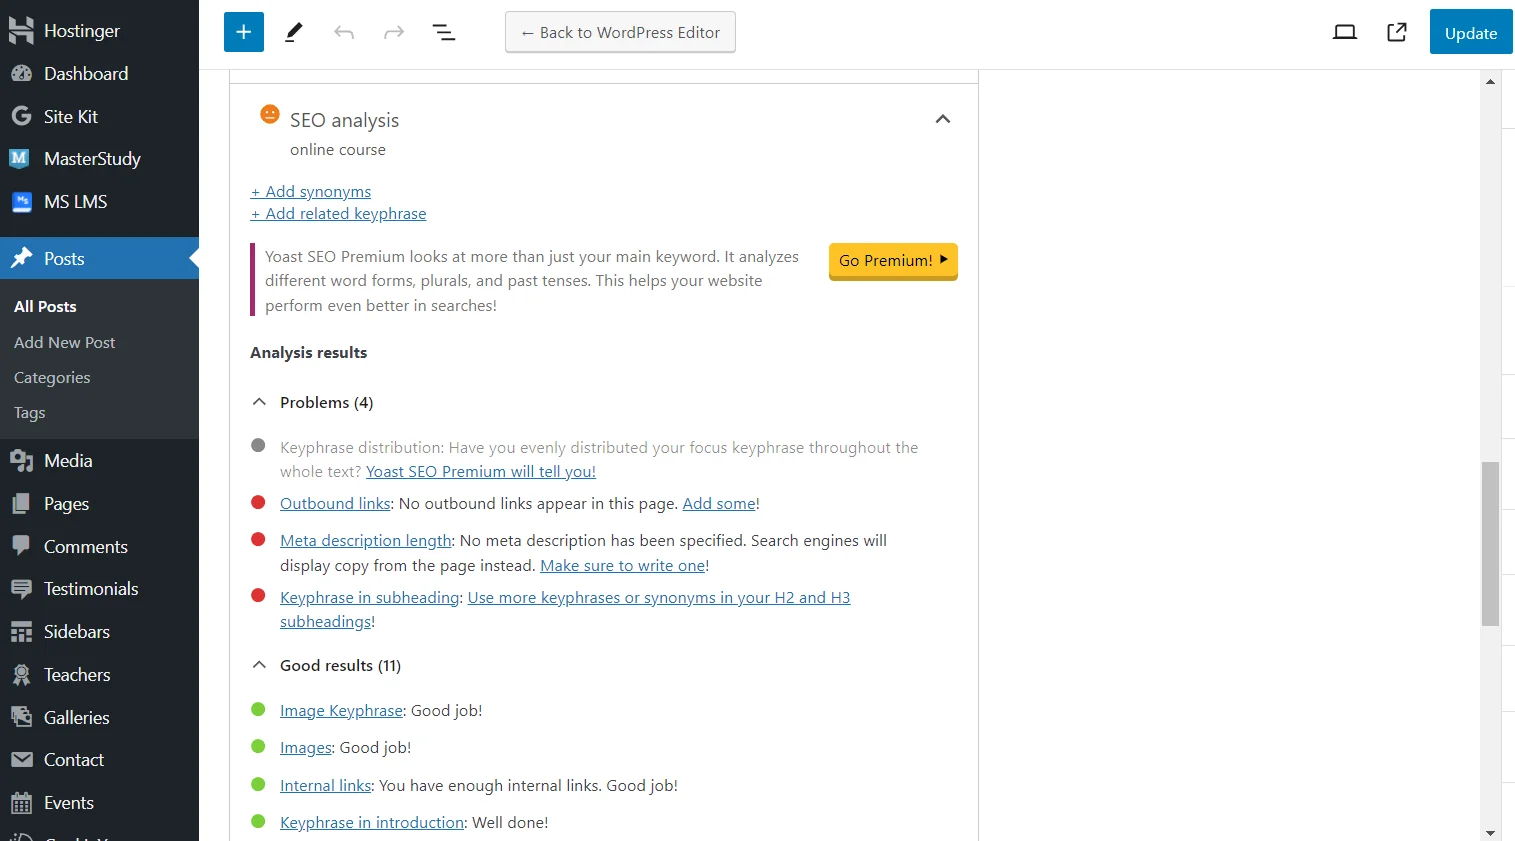
Let's start reviewing the SEO analysis results. The plugin marks good results in green, such as the presence of the keyword in image descriptions, the first paragraph, title, link to the article, internal links, optimal character count, etc. Issues are marked in red, such as a short description, insufficient keyword occurrences in H2-H3 subheadings, and the absence of external links. You don't have to resolve all the issues, but it's best to follow the key recommendations.
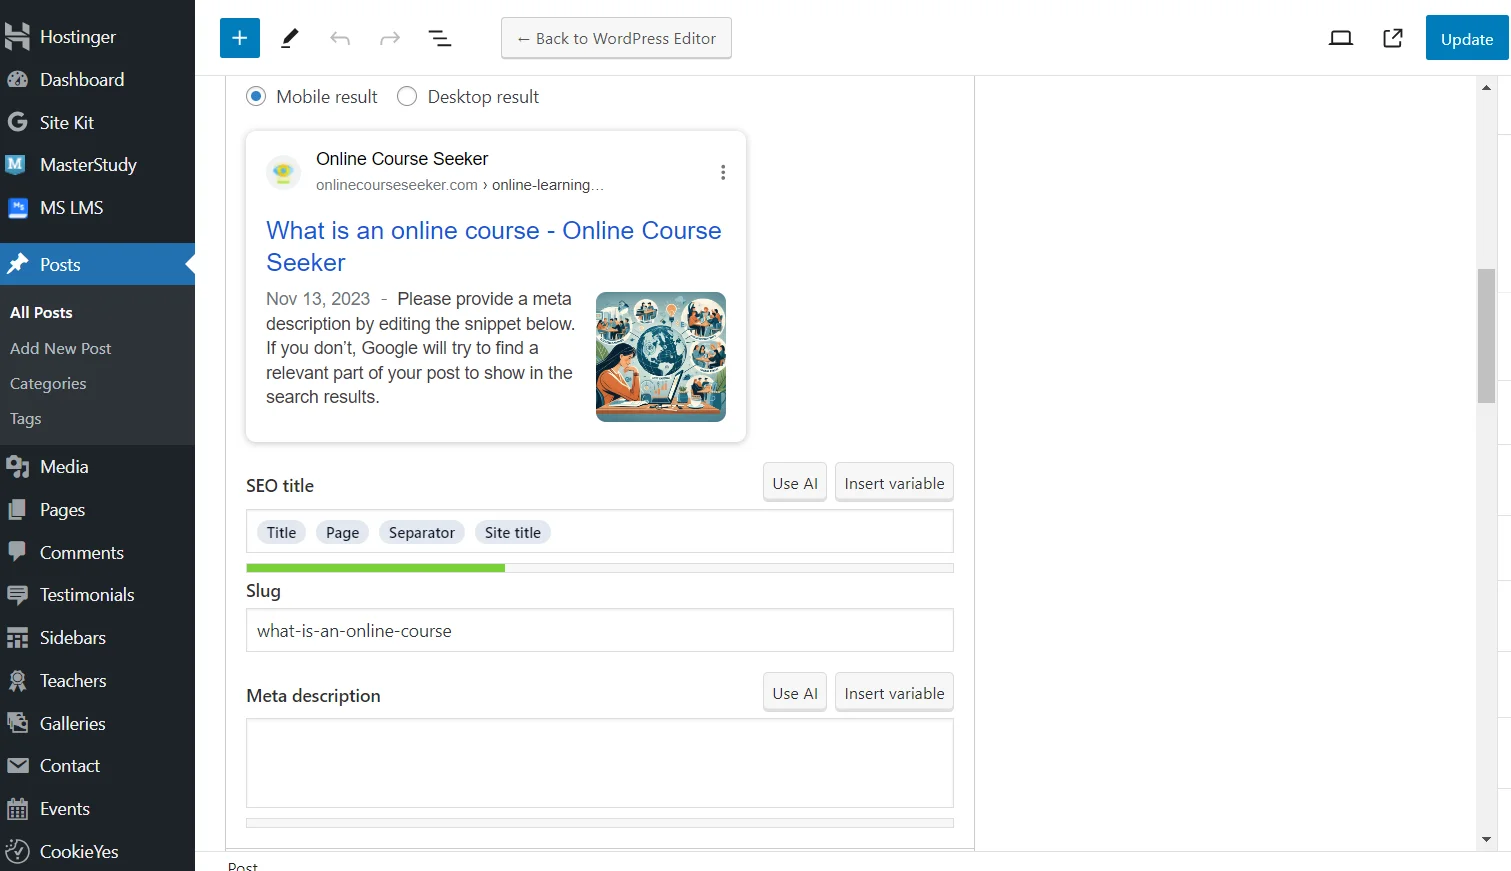
In this section, you can also immediately view the title and description. By default, a template is used, which you saw earlier in the general settings. However, it is recommended to manually specify the SEO title and description for the article to achieve the best results in search rankings. Additionally, you can preview how the page will appear in search results on both mobile and desktop devices.
The Advanced tab deserves special attention. Here, the plugin allows you to:
-
allow or disallow indexing of the post;
-
specify whether the search engine can follow links in the article;
-
choose the type of meta robots;
-
customize the appearance of breadcrumbs;
-
add a canonical URL.
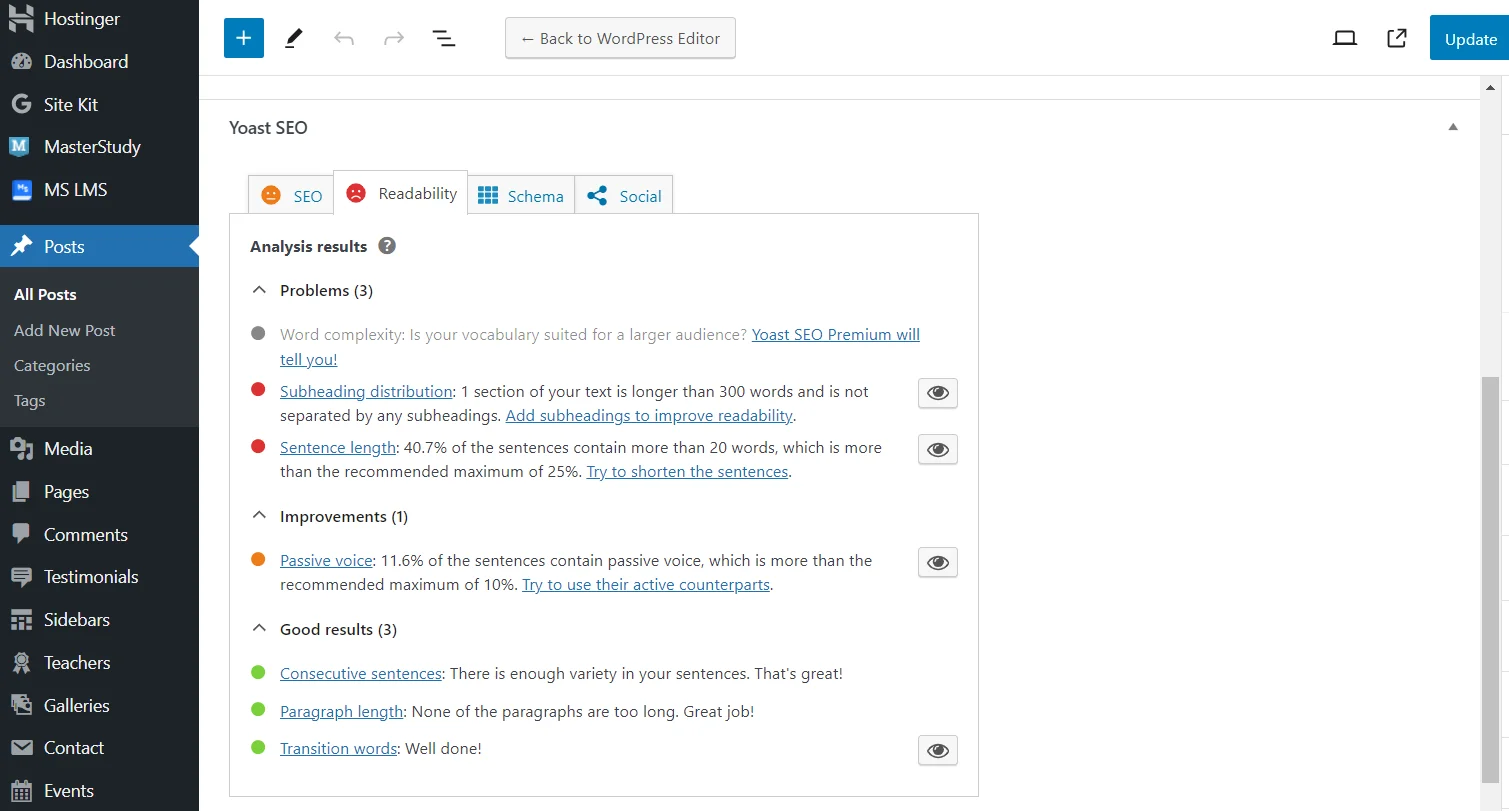
Next, we move to the Readability section. In our article, we have sufficiently sequential sentences, optimal paragraph length, and transitional words, but the system recommends reducing the number of passive sentences. Additionally, our subheadings are improperly distributed, and some sentences are too long. We can click on the eye icon next to each issue, and the system will automatically highlight them in the text.
Should You Buy Yoast SEO Premium
Yoast SEO is a free plugin for website optimization with vast capabilities. We’ve only covered a portion of the settings available in the standard version. However, some features, as you may have seen in screenshots, are not accessible to users on the basic plan.
If you install the SEO plugin and find that its capabilities are insufficient, you can upgrade to the premium version for €99 per year. Yoast Premium offers the following additional features:
-
AI-generated titles and descriptions;
-
increase in the number of keywords/phrases from 1 to 5;
-
automatic redirection from "dead pages" (404 errors);
-
suggestions for linking to other pages on the site (saving time on manual searches);
-
preview of how the page will display on Facebook and Twitter;
-
24/7 instant support, even on weekends;
-
free access to all paid courses.
Among the features listed, the increase in keyword occurrences and automatic redirection from 404 pages are particularly useful. Whether it’s worth paying €99 a year for these and a few less significant features is up to you, depending on the specifics and scale of your internet project. However, if you choose to save, you will still receive all the necessary functions for proper optimization of pages and posts, and consequently, improving your positions in search results!
