According to the latest W3Techs data, 43.5% of all websites run on WordPress. This engine is completely free, and the only thing you’ll need to do to use it is purchase inexpensive hosting and register a domain name. Another advantage of the CMS is that regardless of the chosen WordPress installation method, it will take you 5-10 minutes, and 1-2 hours to learn the basic functions.
How to Install WordPress Using the Autoinstaller
If your site is hosted on Cityhost, installing WP will take 2–3 minutes. Regardless of the selected virtual hosting plan, the control panel includes a module for automatic installation of popular engines, including WordPress.
How to Install a CMS using the Autoinstaller — described below:
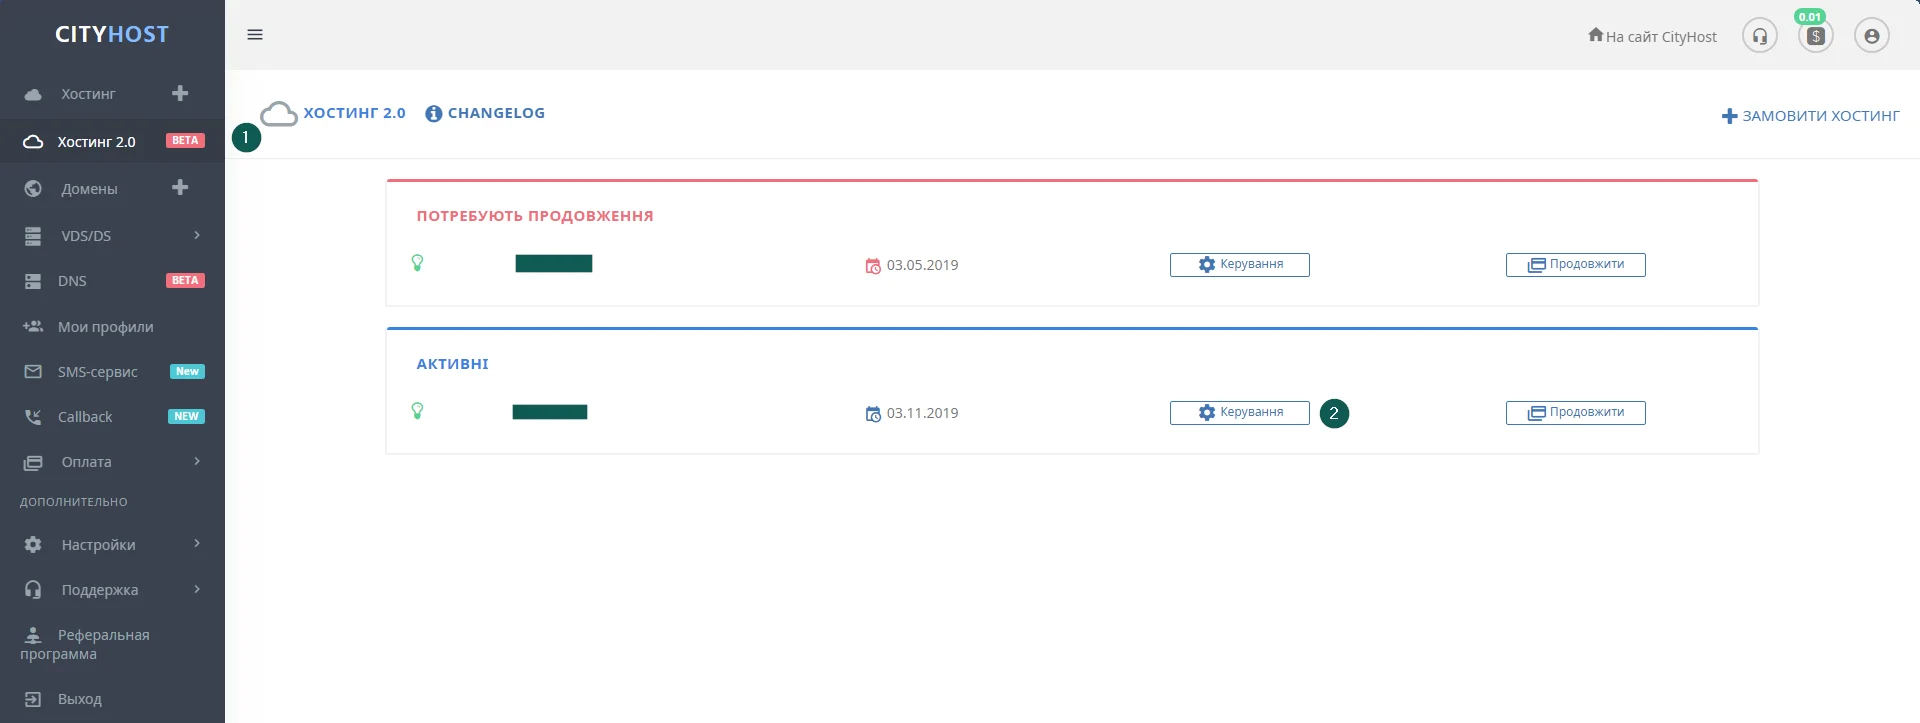
- In the main menu of the Cityhost control panel, select the “Hosting 2.0” section and click the “Manage” button in the row that contains the domain of the site where you want to install WordPress.
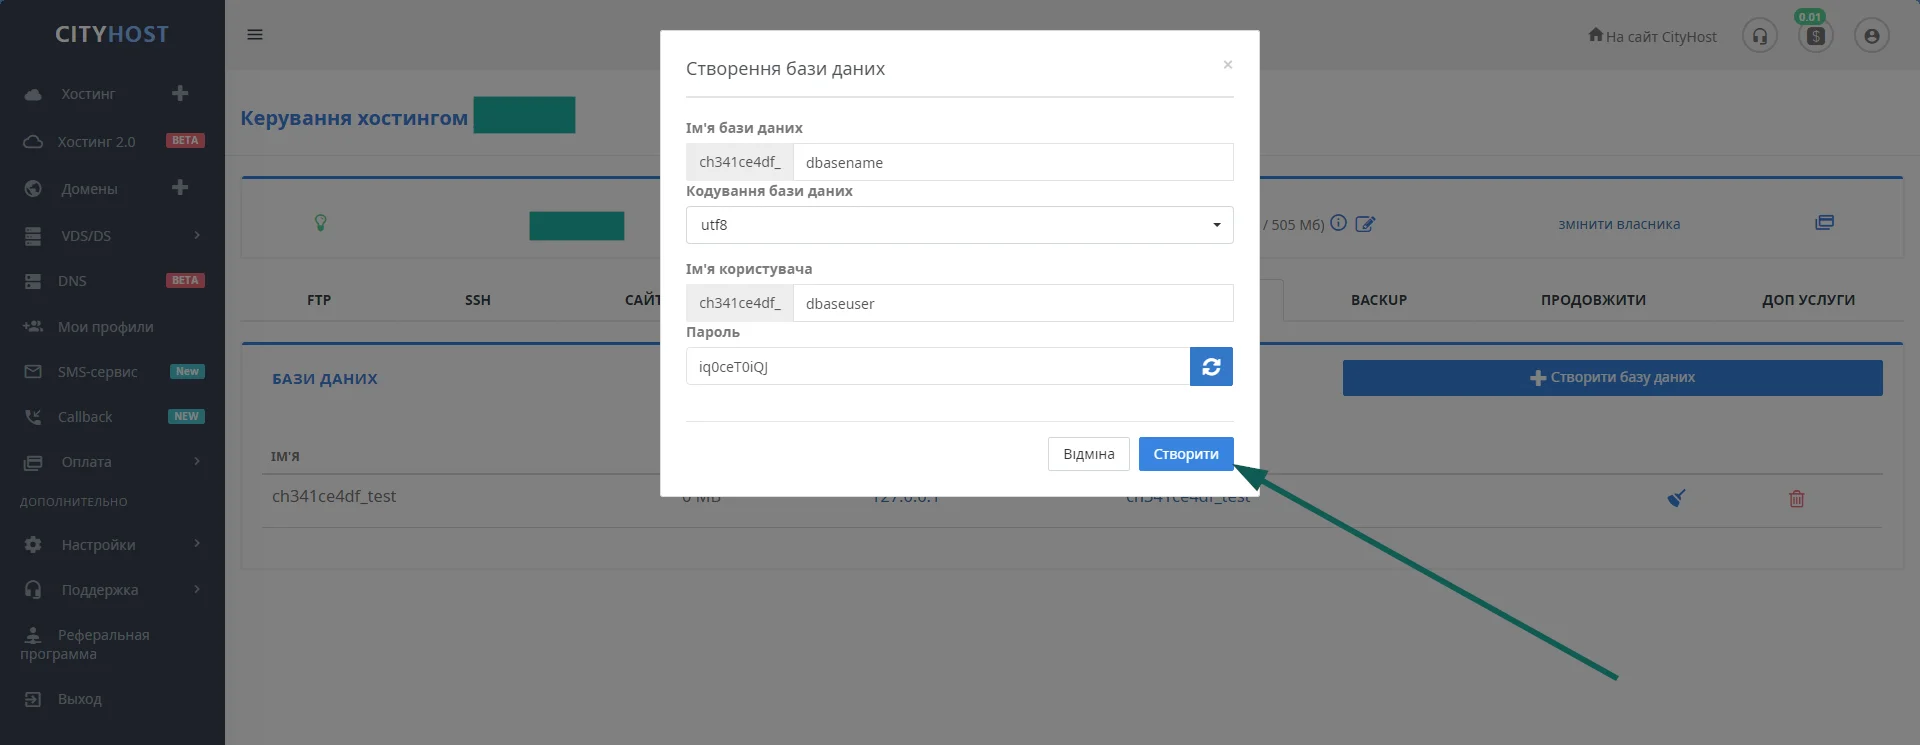
- Go to the MYSQL tab and click the “Create Database” button.
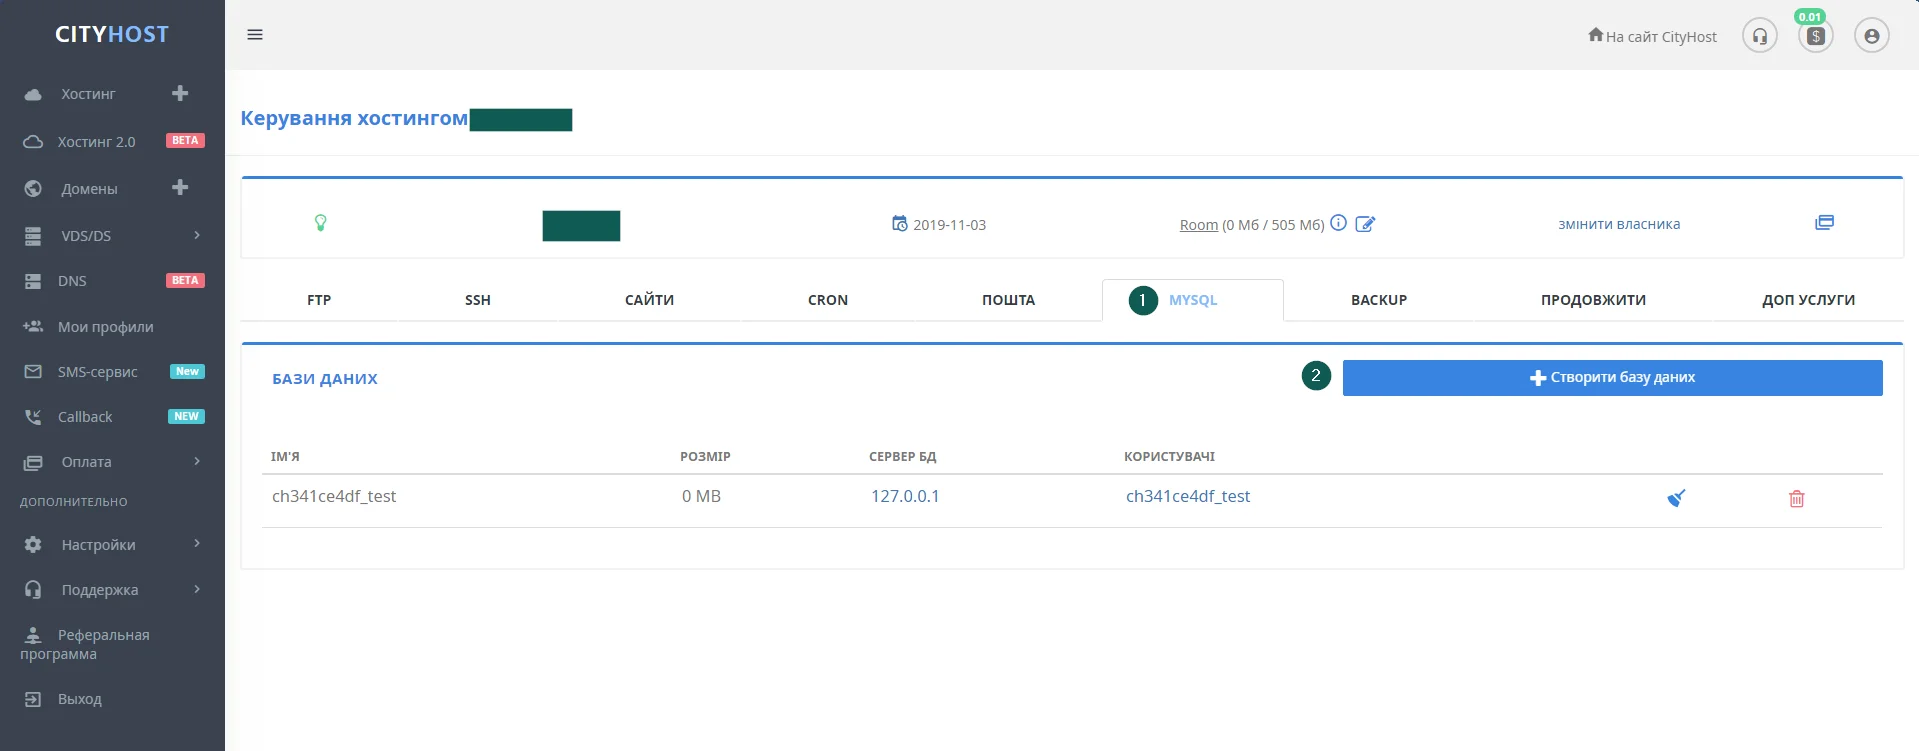
- Come up with a name and password for the database user, as well as the name of the database itself. Enter them in the corresponding fields, select the utf8 encoding, and click the “Create” button.
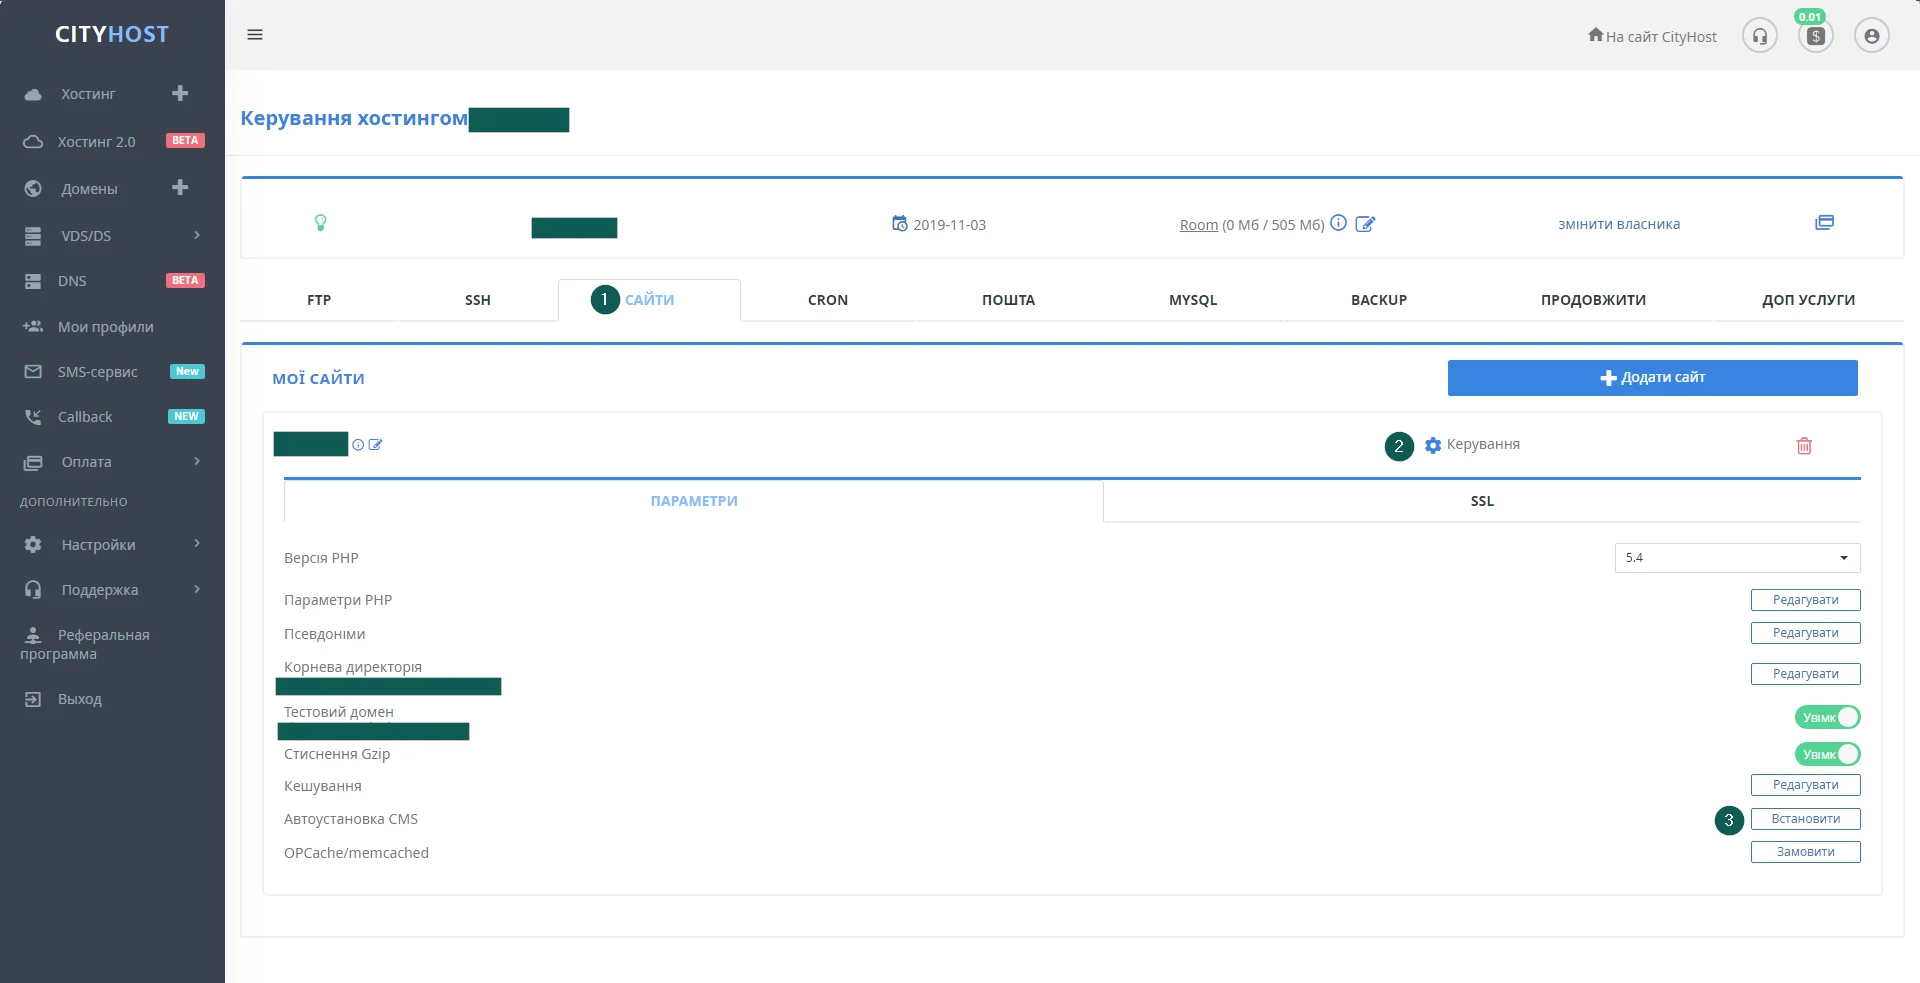
- Go to the “SITES” tab, click the “Manage” button, and then click “Install” in the “CMS Autoinstaller” row.
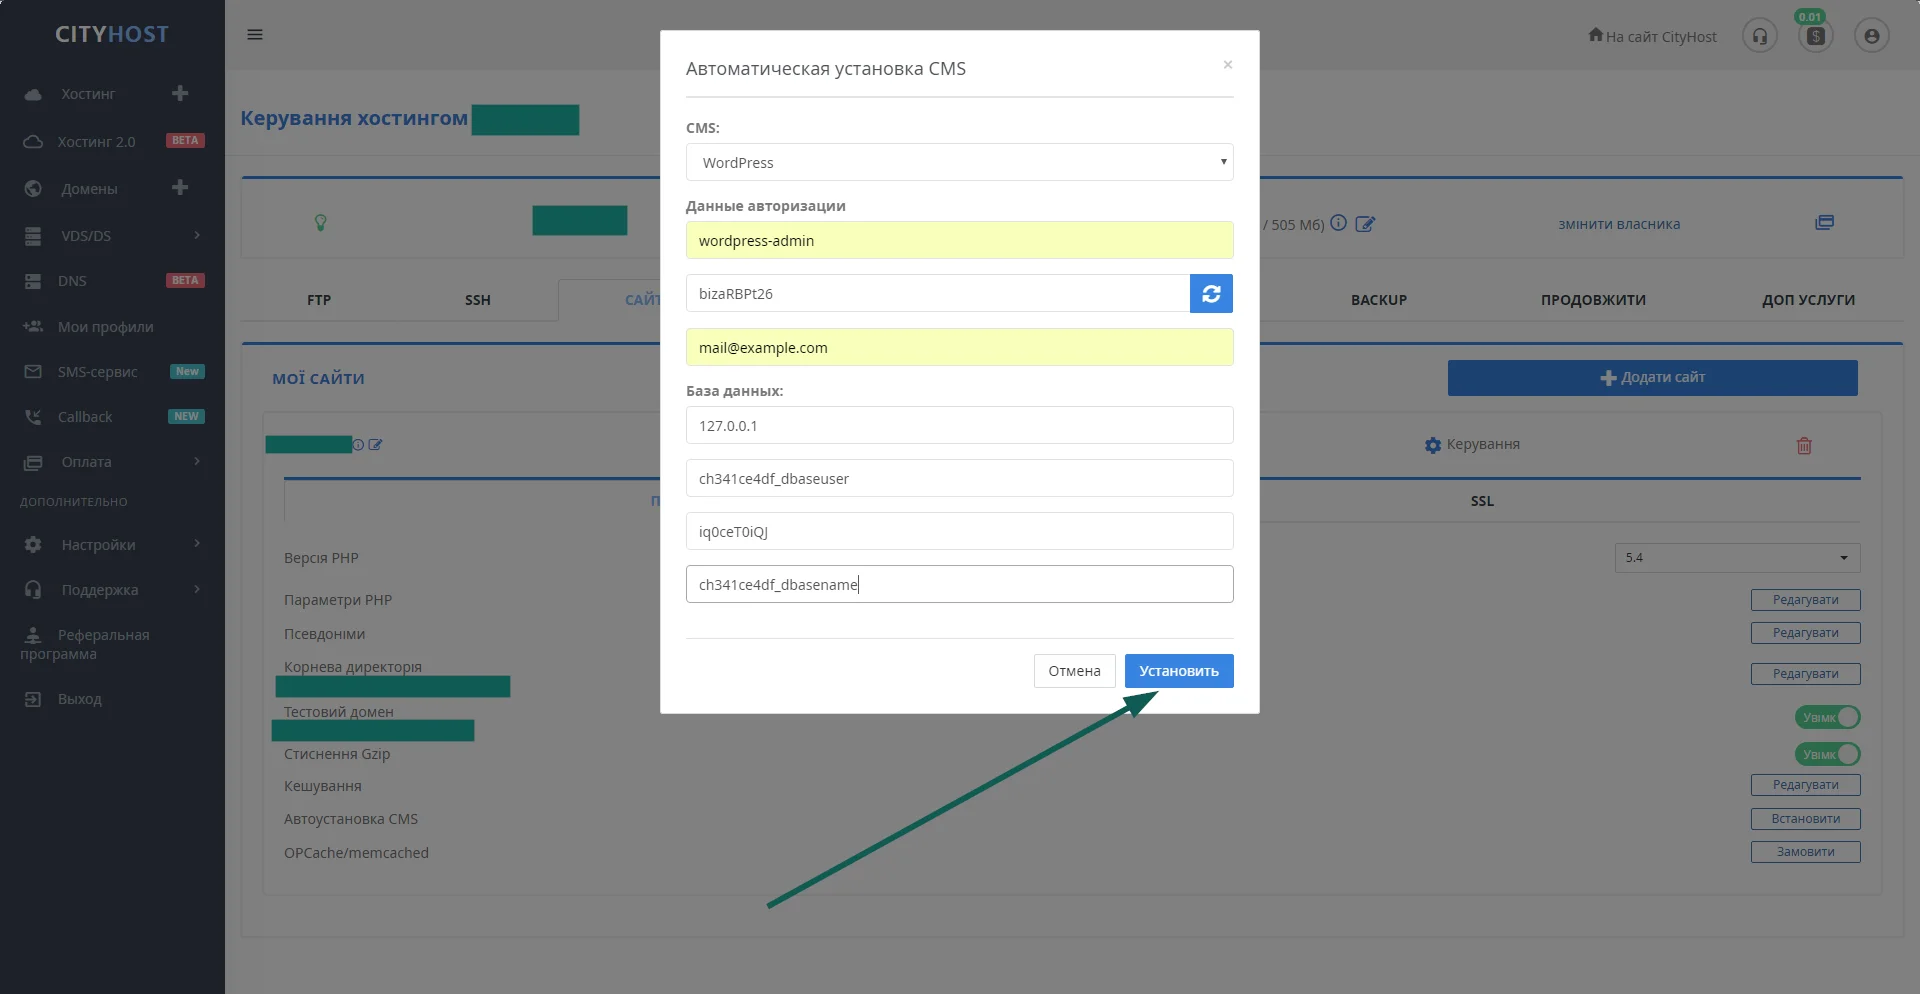
- The WordPress installation method using the auto installer does not require knowledge of how to work with the FTP protocol or understanding of technically complex actions. Just select the CMS name from the drop-down list, enter the login and password you will use to access the site admin panel, email, and the previously created database details, and click “Install”.
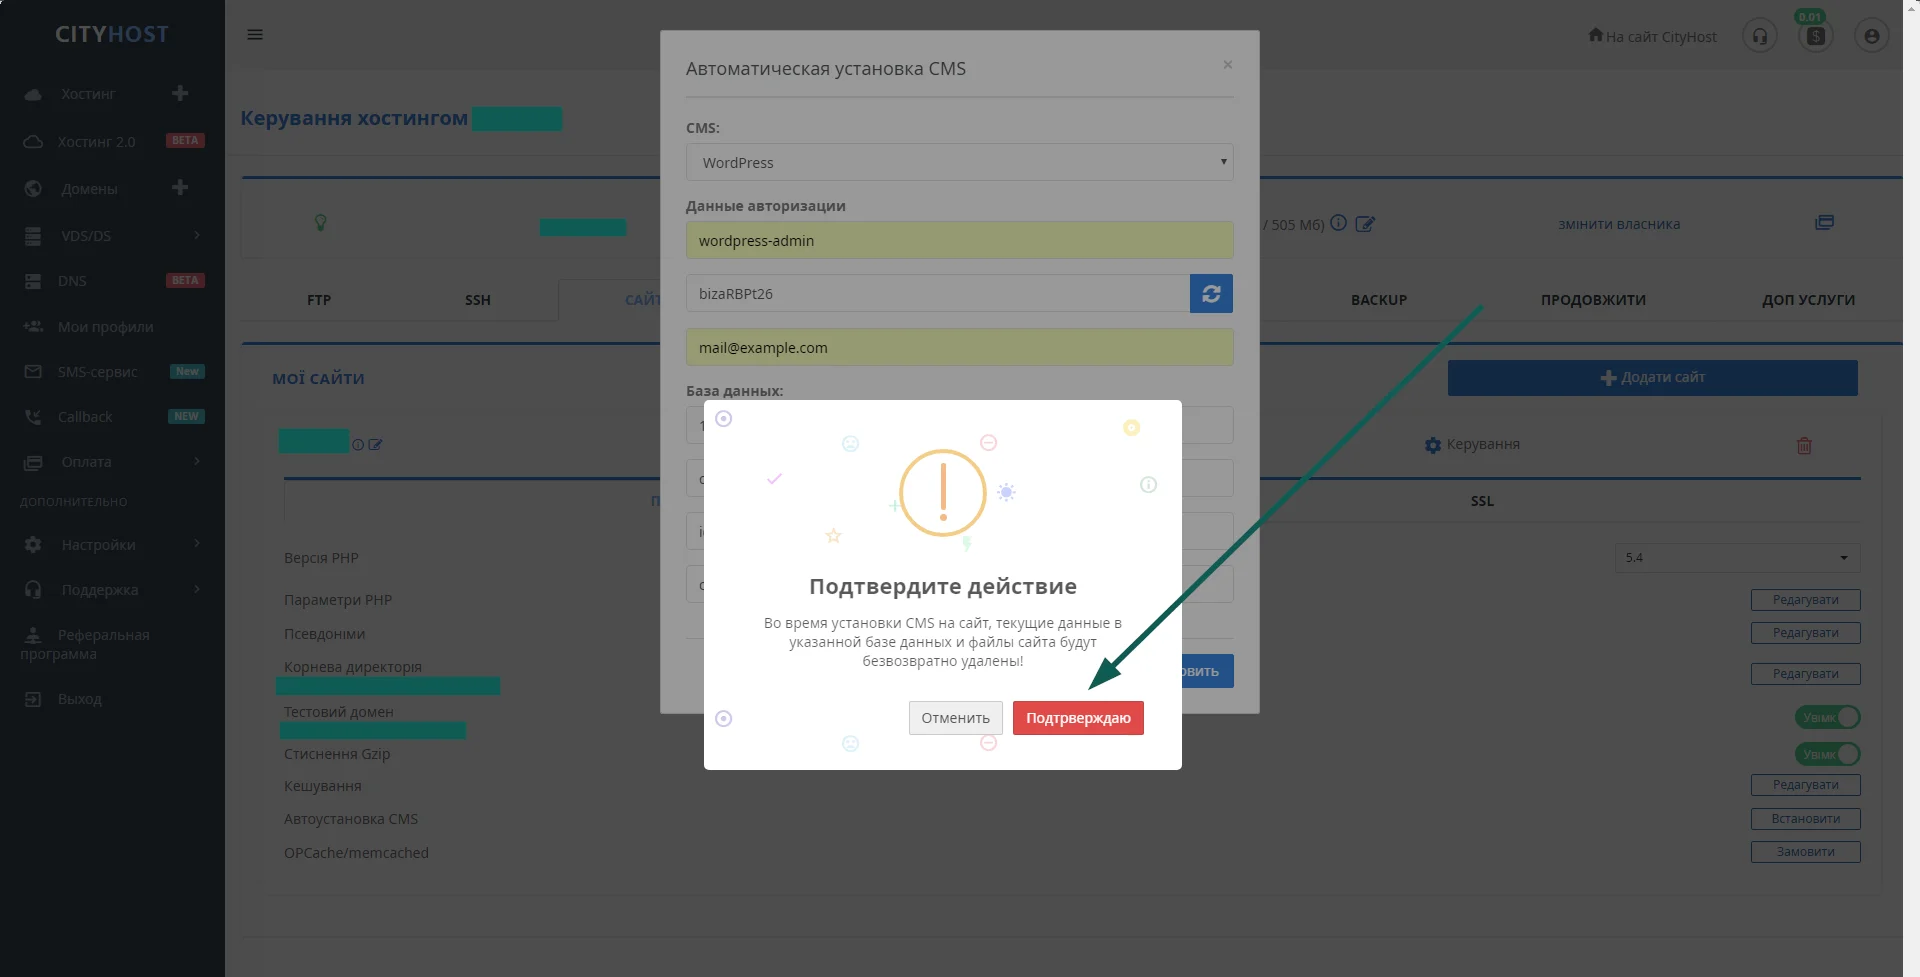
- Confirm the WordPress installation by clicking the “Confirm” button.
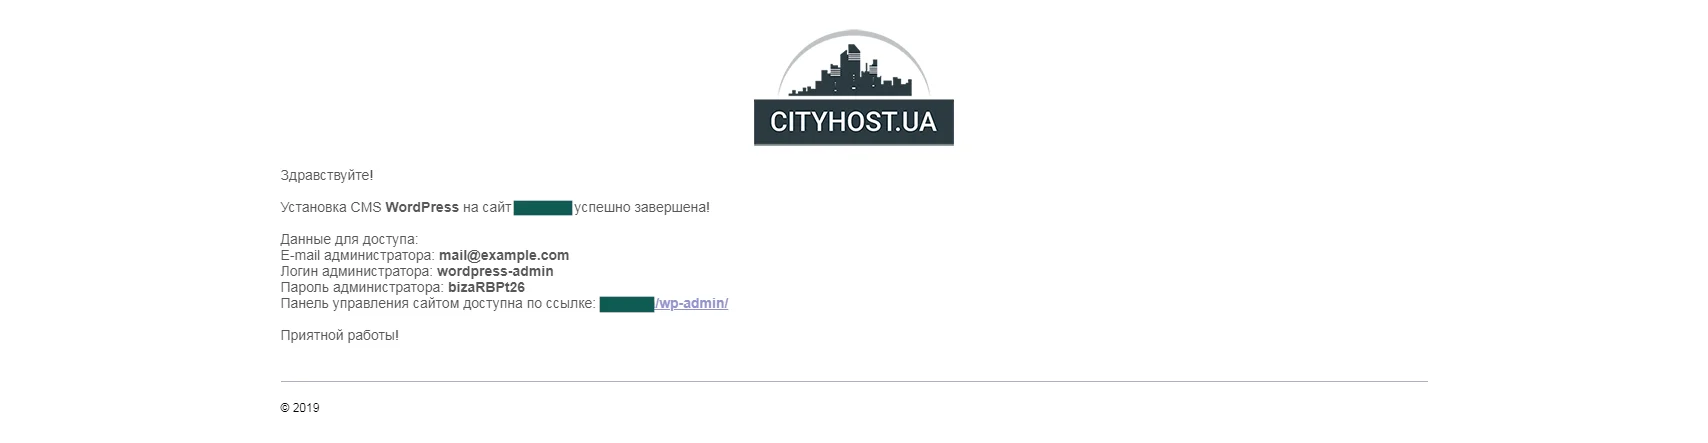
- As soon as the engine is installed on the site (5-10 seconds), you will receive an email with the login credentials and a link to the WordPress admin panel.
Knowing how to install WordPress on hosting using the CMS auto installer will help save time and minimize the risk of errors.
Important to know: you can install WordPress using the auto installer without creating a database — for the first site, it will be created automatically. But all subsequent web resources will operate on this first database. If you plan to host more than one site on the hosting WordPress, create a separate database manually for each one; otherwise, all your projects will use a single shared database, which may lead to complications in the future. Create separate databases for different web resources and name them with clear names (for example, the name of the site) — this will simplify administration and help avoid many errors.
Read also: How to Prepare a Website for Integrating a Payment System
How to Install WordPress via FTP
Note: The following instructions are based on the example of the FileZilla FTP client and assume that you have already added your site, which will run on WordPress, to the program. You can download and install this program from https://filezilla-project.org/. You also need to understand what website hosting and databases are.
- Download the latest version of the engine from https://wordpress.org/latest.zip.
- Unzip the downloaded zip archive to your PC’s hard drive.
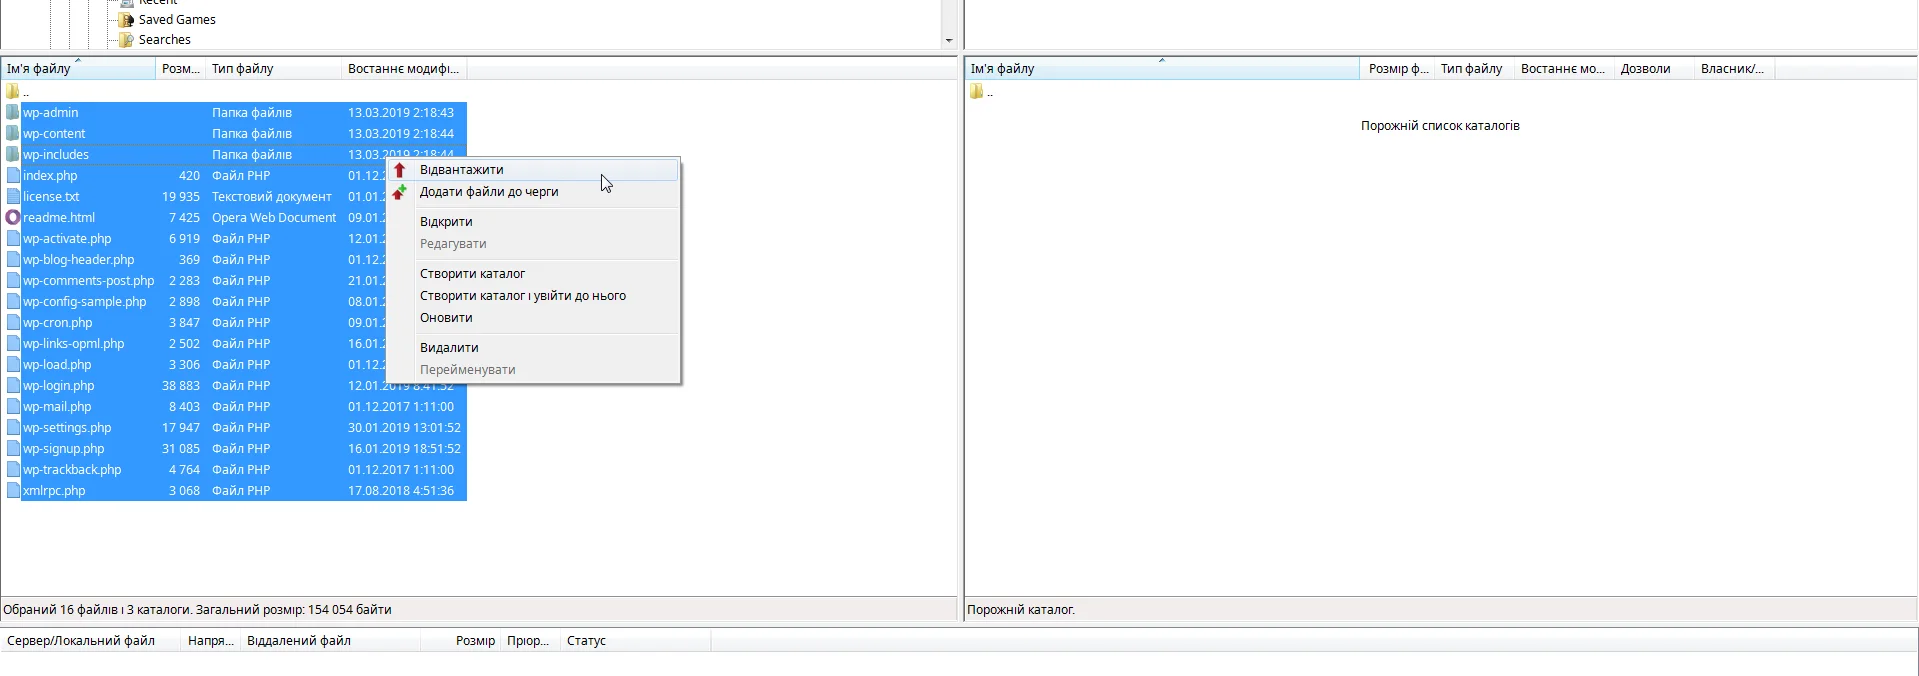
- Connect to the web resource using FileZilla. In the lower right window, go to the root directory of the site, and in the lower left — to the folder with the files and folders from the unzipped engine archive. Select all files and folders (Ctrl + A), right-click on them and select “Upload to server”.
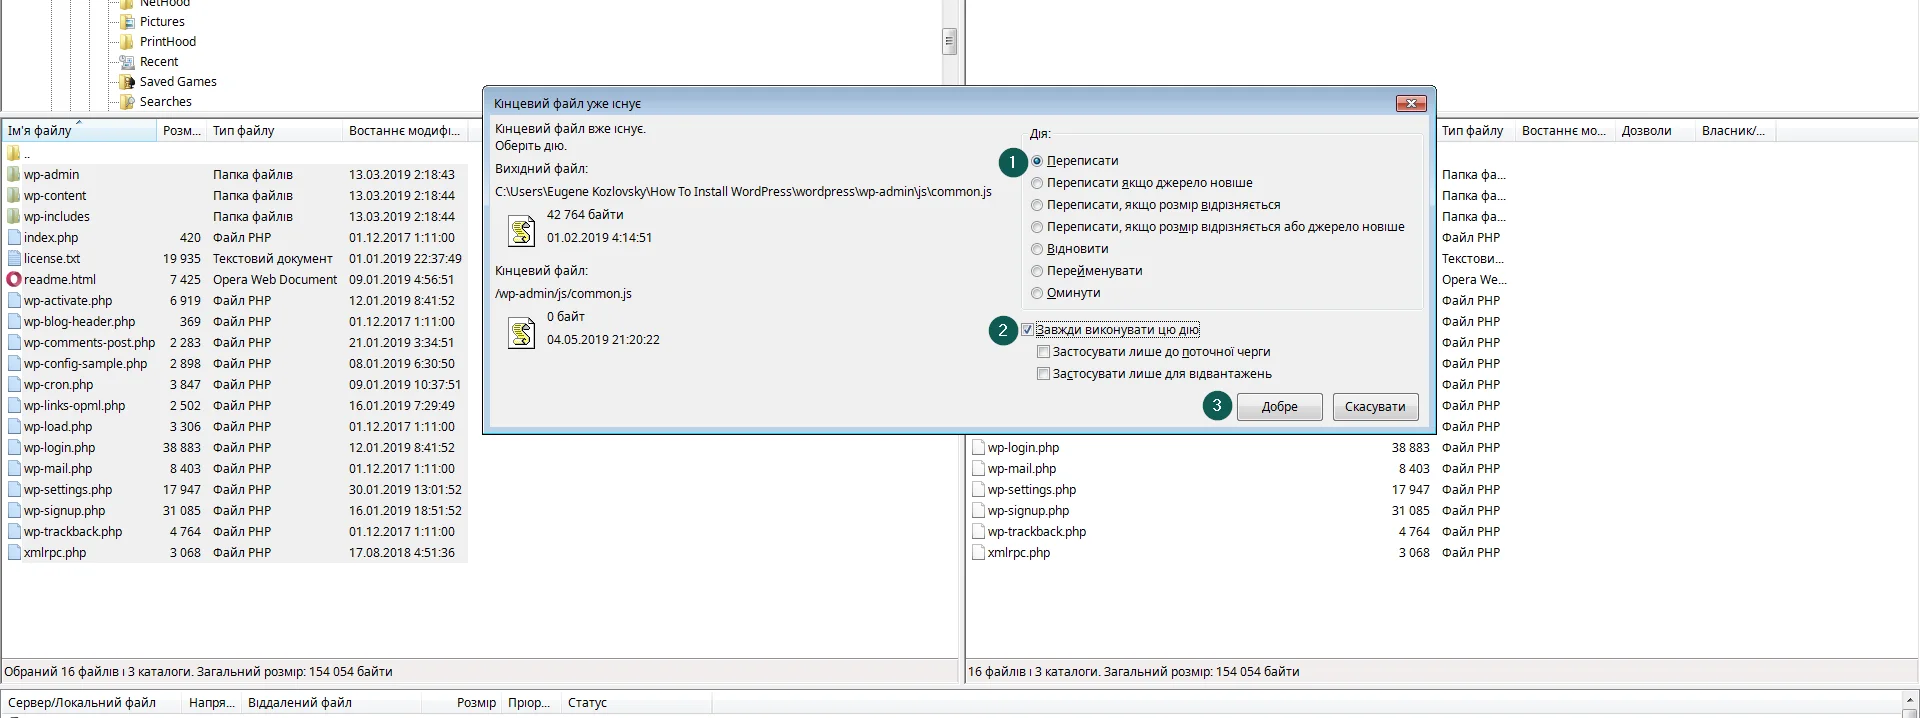
- If the message “File exists” appears, select the “Overwrite” radio button, check the box “Always use this action”, and click OK.
- While the files are copying, create a database. How to do this is described above.
- After the engine files and folders are copied to the server, proceed with the WordPress installation. To do this, open the site’s domain in a browser, choose a language, and click “Continue”.

- Click the “Let’s go!” button.

- Enter the previously created database information, specify the server IP, and click “Submit”.
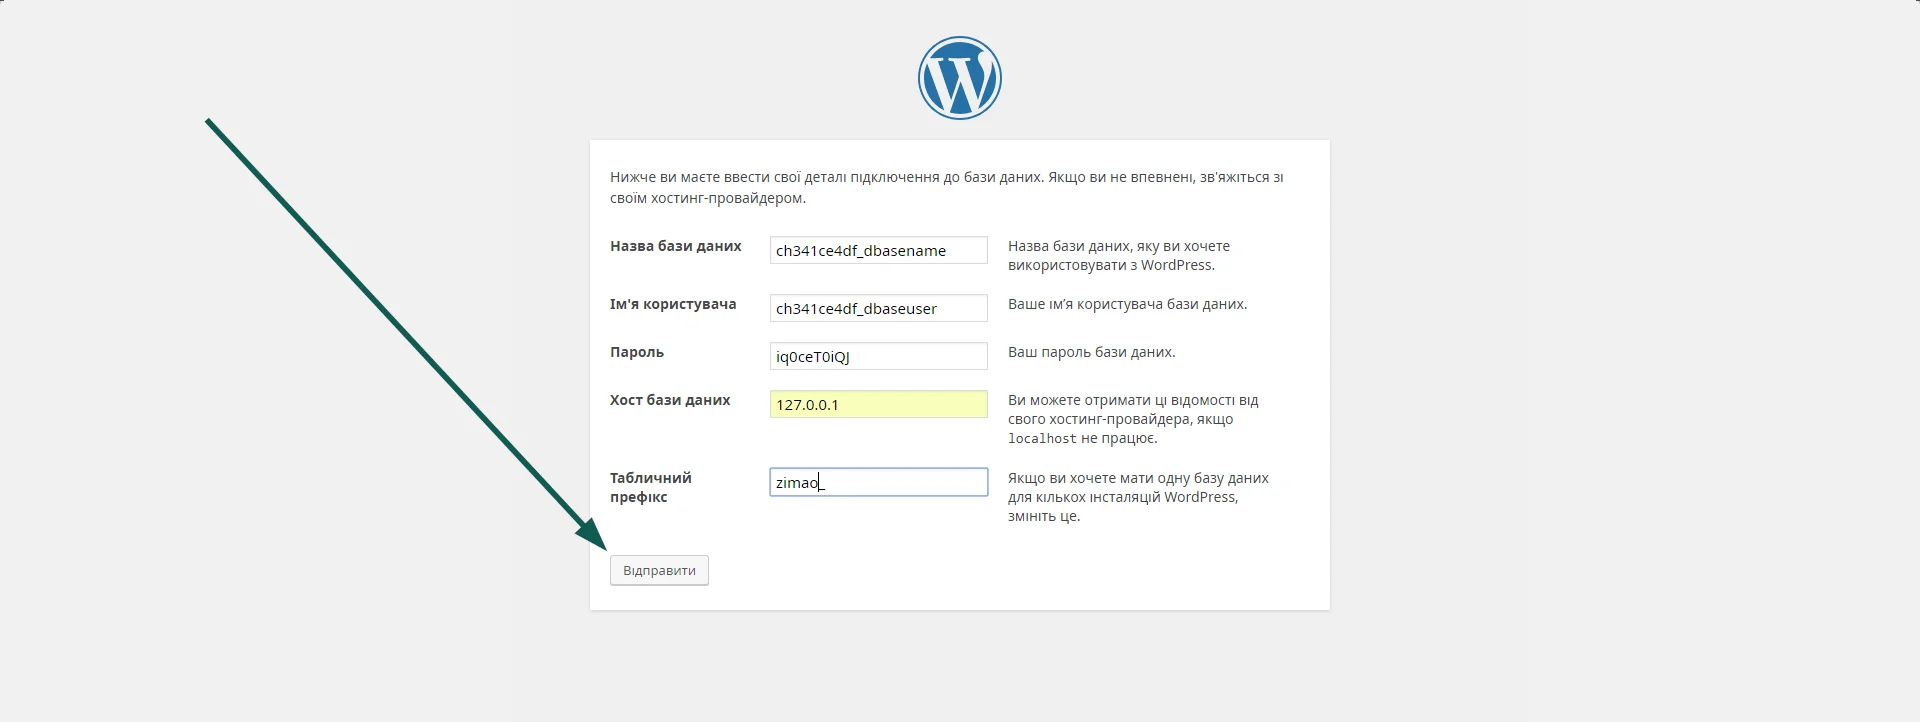
- For security, we recommend changing the default DB table prefix `wp_` to a random set of Latin letters. On the page confirming the database connection, click the “Run the installation” button.

- Enter the site title, username, password for logging into the WordPress admin panel, email, and click the “Install WordPress” button.
After 5–10 seconds, a message will appear indicating that the engine has been installed.

An email will be sent to the specified address with a link to the CMS admin panel login page.

This concludes the question of how to install WordPress. If you already know how to work with WordPress, you can immediately change the design of the site, add new features using plugins, and fill the web resource with content.
Was this publication informative? Then share it on social media and join our Telegram channel.