
For modern hackers, traditional email is a relatively easy method of obtaining confidential information. That's precisely why companies need to take care of their own mail server, allowing more efficient and secure management of email flow, reducing dependence on external providers. Right now, you'll learn how to launch a message forwarding agent on a virtual server.
What Is an Email Server and Why Is It Needed
An email server is software responsible for receiving, processing, and sending emails on the internet. This program analyzes and delivers incoming messages to the respective recipients and relays outgoing emails as intended.
While third-party software performs well for standard functions, it is more suitable for individuals and small companies. When it comes to medium and large enterprises, it's better to launch your own email server with its crucial features:
-
Full control: You have complete control over the process of sending and receiving emails without external providers.
-
Convenient scalability: You can scale resources according to your needs.
-
Reliable protection: Implement high-security standards and freely introduce encryption to protect confidential information.
-
Custom domain: Emphasizes corporate identity, making the brand more recognizable.
Medium and large enterprises processing a significant volume of emails require their own mail server, especially in sectors with high security standards, such as finance, healthcare, and law.
How to Choose VPS for Launching an Email Server
On a private virtual server, email software allows the user to have maximum control over their email while ensuring data security. By making the right choice of VPS, you can obtain the necessary resources and tools for a quick server launch and complete control over it.
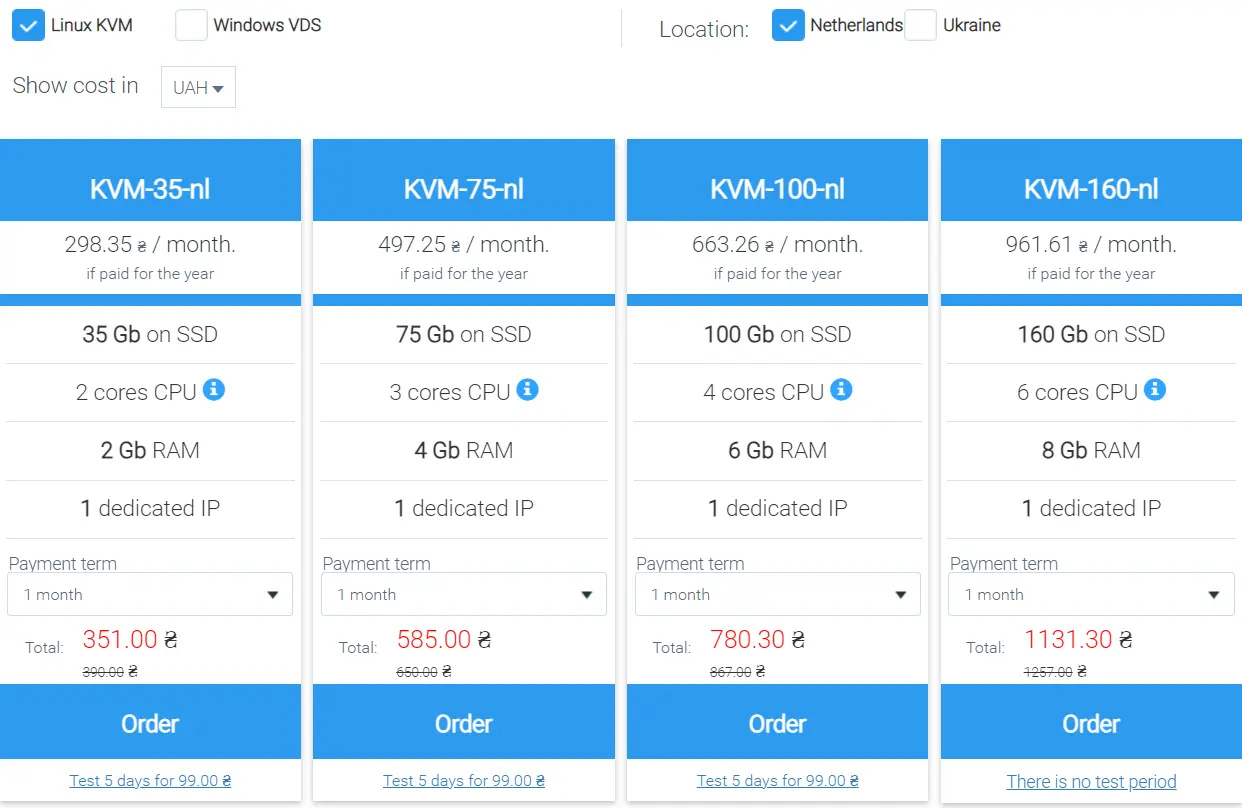
However, it's essential to first understand the key criteria for choosing VPS for launching an email server:
-
Security system: Ensure the provider guarantees stable server operation, regular backups to prevent data loss, modern protection technologies, and the ability to install additional measures.
-
Operating system: Linux or Windows (choose the OS that you or your employees can confidently administer).
-
SSD disk: Size may vary from 35 to 400 GB (Linux) or from 50 to 400 GB (Windows).
-
RAM: From 2 to 8 GB (Linux) or from 4 to 16 GB (Windows).
-
Number of cores: From 2 to 8 (affects the performance and speed of the email server).
-
Data center location: It's beneficial when the provider offers multiple placement options, such as Ukraine and the Netherlands, to choose the optimal one, ensuring high-speed email delivery.
As you can see, choosing VPS for launching an email server needs to be based on multiple criteria. Yes, it will take time to analyze providers and available tariffs. However, such investments will pay off with a simplified setup process, stable, and secure operation of the message forwarding agent.
Read also: How to start a video surveillance system on the server
How to Deploy an Email Server on VPS
To begin with, you need to choose an operating system based on the specific features of each OS, your particular needs, and experience. Windows Server facilitates easier integration with Active Directory services and the use of other Windows products, but it requires a valid license. Linux, being completely open and free, utilizes resources more efficiently and offers convenient package managers.
Let's examine the process of launching an email server on VPS for both operating systems.

Deploying an Email Server on Windows
Deploying an email server on VPS with Windows can be done using hMailServer or Microsoft Exchange. The latter is a powerful platform with many features, often used in corporate environments, so let's focus on it:
1. Start by selecting a VPS provider, create a new virtual machine, and note the server's IP address.
2. Use Remote Desktop Protocol (RDP) to connect to Windows VPS. Enter the IP address and log in with the credentials provided by your provider.
3. Download Microsoft Exchange Server and install it, choosing settings according to your needs. You'll need to configure parameters such as organization name, server roles, and mailbox databases.
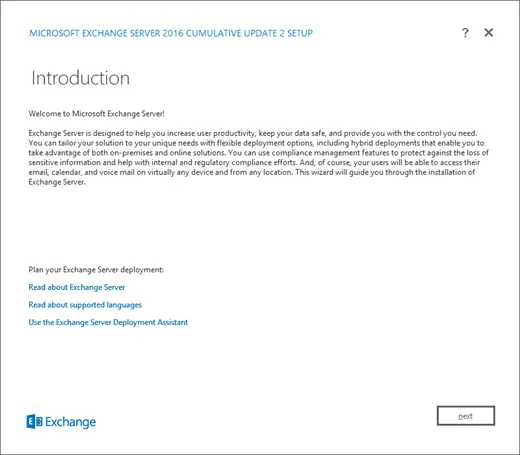
Installing Microsoft Exchange Server. More details on the official website.
4. In the control panel, add two DNS records of type "A" (one for the domain, another for the subdomain). Then, add an MX (Mail Exchange) record to specify the mail server for your domain.
5. Ensure that the VPS firewall allows traffic through port 25 (SMTP). Open the Exchange Management Shell on your server and execute the command:
Test-NetConnection -ComputerName localhost -Port 25
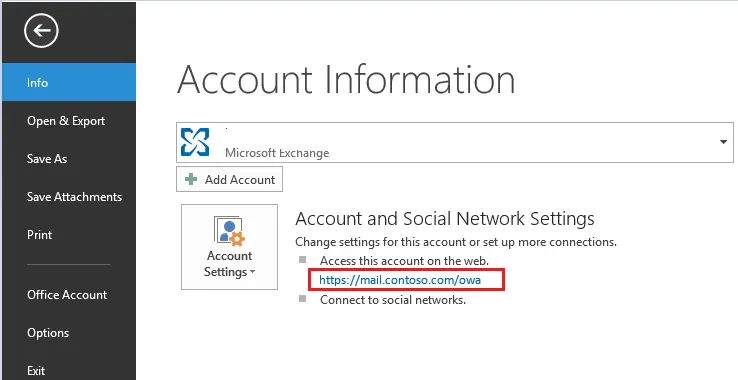
6. Configure the email client, such as Outlook. Open the client, choose "Microsoft Exchange" as the account type, enter the user's details (name and email address), server details, and connection settings.
7. In the final step, test the email server's functionality by sending and receiving a few test emails.
If you opt for Microsoft Exchange Server, ensure you have a valid license. Before starting, verify that your VPS meets the platform's requirements (SSD disk size, RAM, etc.).
Read also: VDS for Accounting
Deploying an Email Server on Linux
For launching an email server on VPS, Linux is often preferred as most distributions are open and free, eliminating the need for licensing expenses. Additionally, Linux offers a straightforward command-line interface for administration.
If you choose this operating system, here's a step-by-step guide on how to deploy an email server on Linux:
1. Set up DNS records immediately by navigating to the provider's control panel, finding the relevant section, and adding an "A" record pointing to your mail server's IP address. Then, add an MX record pointing to the server's name.
2. Choose a suitable Linux distribution for VPS based on your requirements. Ubuntu is a commonly used option.
3. Connect to your VPS using the command:
ssh your_username@your_server_ip
Replace "your_username" and "your_server_ip" with the actual username and IP address.
4. Update core system packages using the commands:
sudo apt-get update
sudo apt-get upgrade
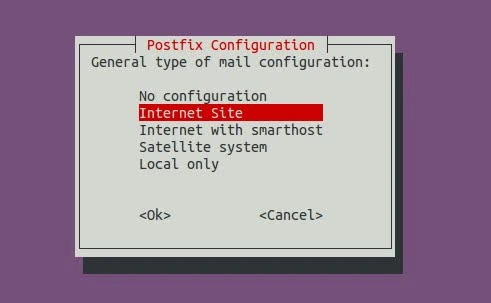
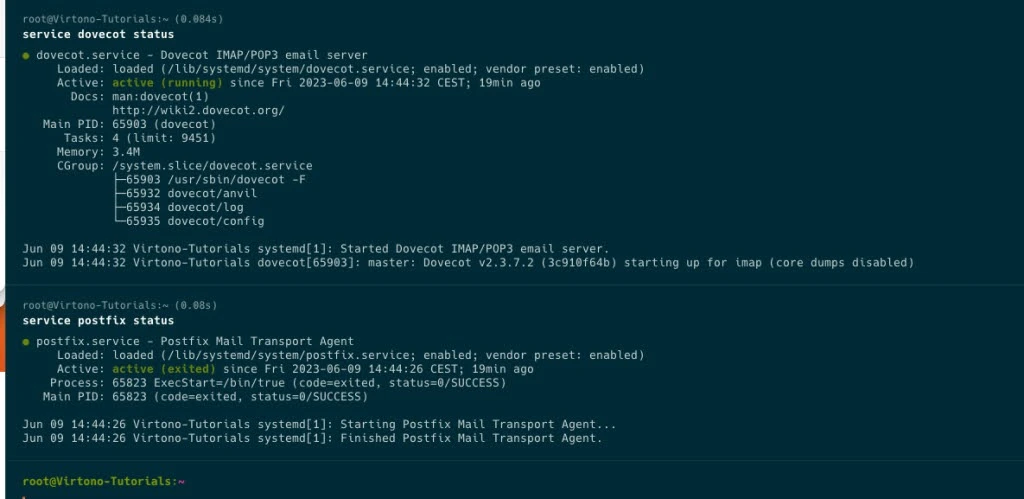
5. Install mail server components with the command:
sudo apt install postfix dovecot-imapd dovecot-pop3d
Use Postfix as the mail transfer agent (MTA), and Dovecot as the Internet message access protocol (IMAP) and post office protocol (POP3) server.
6. Edit the main Postfix configuration file:
sudo nano /etc/postfix/main.cf
Ensure the following parameters are configured:
myhostname = your_domain.com
mydomain = your_domain.com
myorigin = $mydomain
inet_interfaces = all
mydestination = $myhostname, localhost.$mydomain, localhost, $mydomain
mynetworks = 127.0.0.0/8 [::ffff:127.0.0.0]/104 [::1]/128
After editing, save changes, exit the editor, and restart Postfix:
sudo systemctl restart postfix
7. Configure Dovecot by first editing the configuration file:
sudo nano /etc/dovecot/dovecot.conf
Check that the parameters "protocols = imap pop3" and "mail_location = mbox:~/mail:INBOX=/var/mail/%u" are set. Save changes, exit the editor, and restart Dovecot:
sudo systemctl restart dovecot
8. Verify the email server by creating a test user account:
sudo adduser testuser
Replace "testuser" with the desired username.
9. Test your email server by sending and receiving a few emails. For example, send a test message to the newly created user using the command:
echo "This is a test." | mail -s "Test Email" username@yourdomain.com
Check for any issues in the mail logs, typically located in "/var/log/mail.log" or "/var/log/maillog." To view the latest entries, use the command:
sudo tail /var/log/mail.log
Primary source: virtono.com
You've now configured a basic mail server on your VPS. Keep in mind that email server administration involves ongoing maintenance and monitoring of security and performance. Ensure that the server firewall is configured to allow traffic through necessary ports, and consider implementing additional security measures if necessary.
If you plan to use Linux but prefer not to manually configure an email server, you can use control panels such as HestiaCP or FastPanel. While they consume more resources, they simplify parameter management through a graphical user interface, automate key processes, and include built-in security features.
How to Set Up Data Transmission Protection Between Email Servers
To ensure mutual understanding between sender and recipient mail servers, it is advisable to implement the SPF (Sender Policy Framework) authentication mechanism. SPF automatically determines which mail servers are authorized to send emails on behalf of your domain. This is done to prevent software from marking all emails coming from domain mailboxes as spam.
To add SPF, go to your provider's website, locate the "DNS Management" section, and create a new TXT record in the format "v=spf1 mx a ip4:your_server_ip ~all", where:
-
v=spf1 – SPF version;
-
mx – allows domain MX servers to send emails;
-
a – allows domain A records to send emails;
-
ip4:your_server_ip – specify the IP address of your mail server;
-
~all – the server should accept the message but mark it as potentially suspicious.
To confirm that an email was genuinely sent by the domain it claims to be from and that it was not altered during transmission, utilize DKIM (DomainKeys Identified Mail). DKIM helps protect recipients from fraudulent emails aiming to spoof sender addresses and obtain confidential information.
To configure DKIM, follow these steps:
1. Create public and private keys using the OpenDKIM tool:
sudo apt install opendkim opendkim-tools
sudo mkdir /etc/opendkim
sudo opendkim-genkey -D /etc/opendkim -d your_domain.com -s default
2. Configure OpenDKIM by entering the command:
sudo nano /etc/opendkim.conf
Add or replace the following lines:
«Domain: your_domain.com
KeyFile: /etc/opendkim/default.private
Selector: default»
Save and close the file.
3. Publish the DKIM public key by adding a TXT DNS record:
«default._domainkey IN TXT "v=DKIM1; k=rsa; p=your_public_key"».
Replace "your_public_key" with the content of the previously created "default.txt" file.
You can verify the correctness of the record settings using online tools such as SPF Record Testing Tools and DKIMValidator.
Conclusion
Having your own mail server provides the freedom to independently manage email processing, sending, and receiving, irrespective of third-party providers. You can employ standard security methods or enhance the security system as needed, conveniently scaling resources to meet growing business requirements.
To launch a mail server, it's essential to choose the right VPS, considering the provider's resource availability, data center location in desired countries, and the flexibility to switch to another tariff. Once you have chosen, created, and configured the VPS, proceed to launch the mail server using either Windows or Linux. We've provided detailed deployment processes for each operating system, so simply follow the step-by-step instructions.