There are several ways to set up https for WordPress. For example, using an SSH connection and the w-cli utility. This is a simple method, but it is only suitable for advanced users who understand how to manually change a site's domain .
Therefore, below will be considered https setup for WordPress using a plugin. This is the easiest way, which is clear to both beginners and experienced webmasters. After all, 90% of the work will be done by the plugin. Which? There are many options, but we will look at setting up https for WordPress using Really Simple SSL.
Preparatory works
To begin with, be sure to create a backup copy of the site and database. This is a standard procedure that is always followed in such cases. If the unexpected happens, you will be able to calmly restore the site's functionality.
You also need to buy and install an SSL certificate in advance. It can be purchased from your hosting provider.
How to install the plugin?
The first thing you need to do is install the Really Simple SSL plugin. It is available in the marketplace. Next, do the following:
- Log in to the Wordpress admin panel. To do this, go to the URL of the form http://sait.ua/wp-admin/ and enter the login and password.
- In the left column, select the "Modules" section, then the "Add new" item.
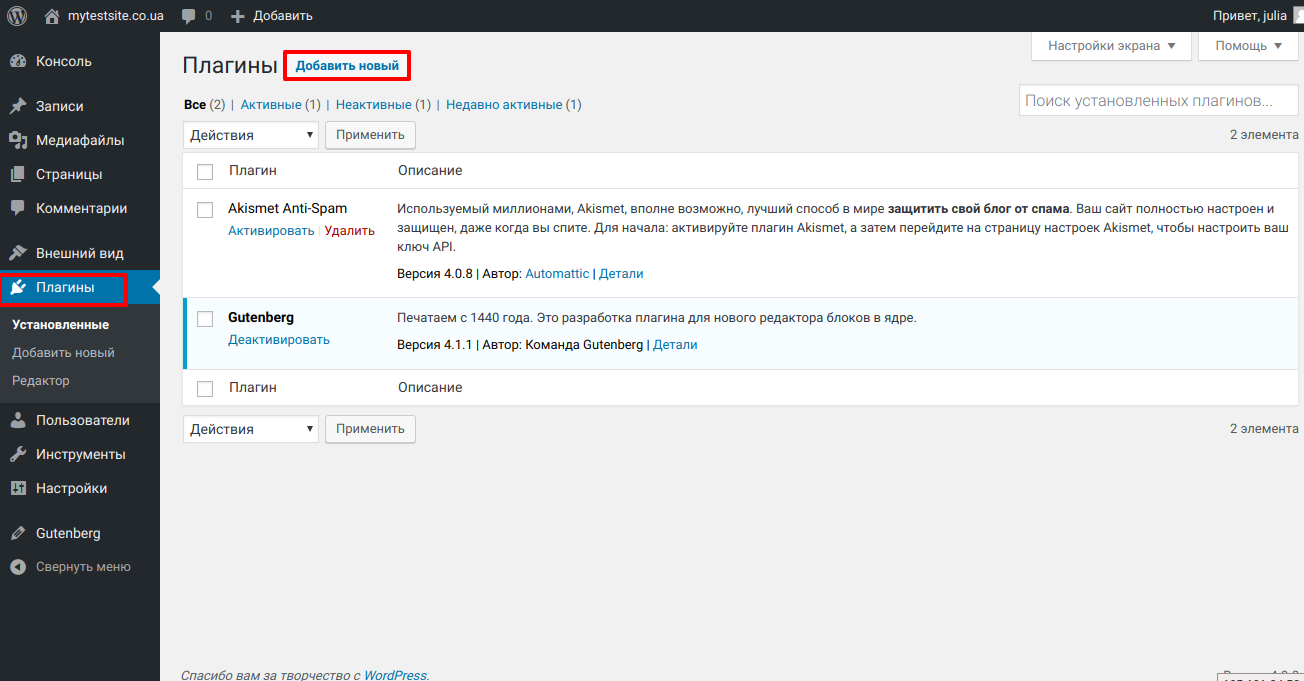
- Write the name of the plugin in the search field and click the "Install" button.
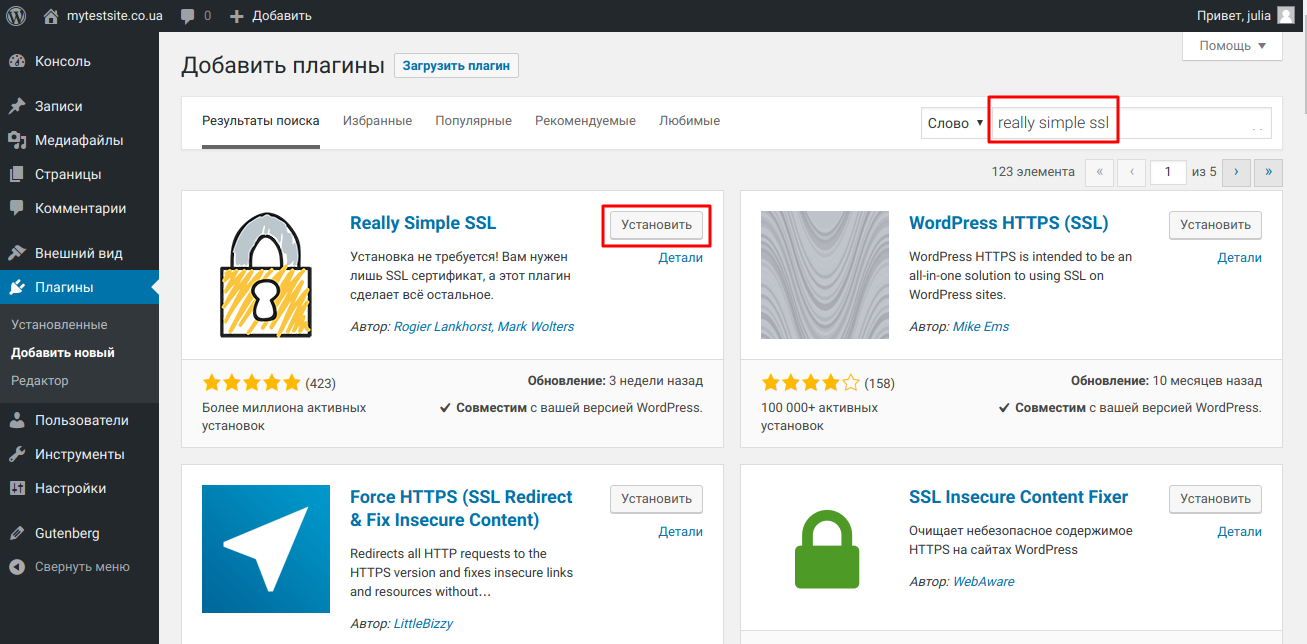
- Wait for the plugin to install. Click the "Activate" button.
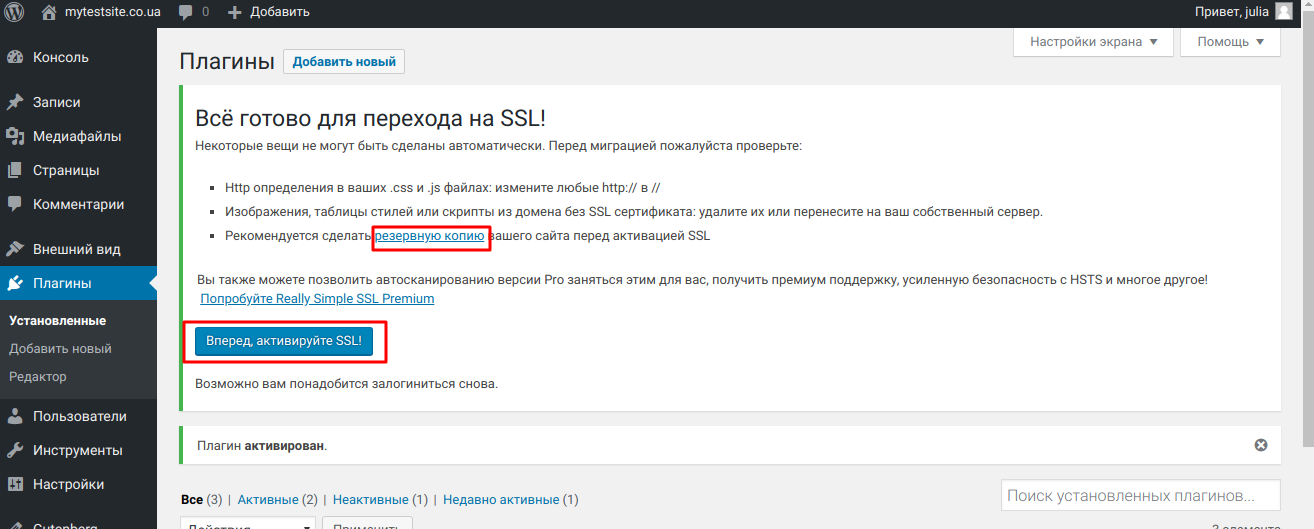
A message will appear at the top with an offer to enable the https protocol . By this time, a backup copy of the site should have been saved. If not, do it, and then accept the offer.
To activate SSL, be it com.ua domain or another , you need to click the "Next!" button. The current session in the administrative panel will end: you will be kicked out and you will have to log in again. Next, the admin page will be opened at the new address with HTTPS.
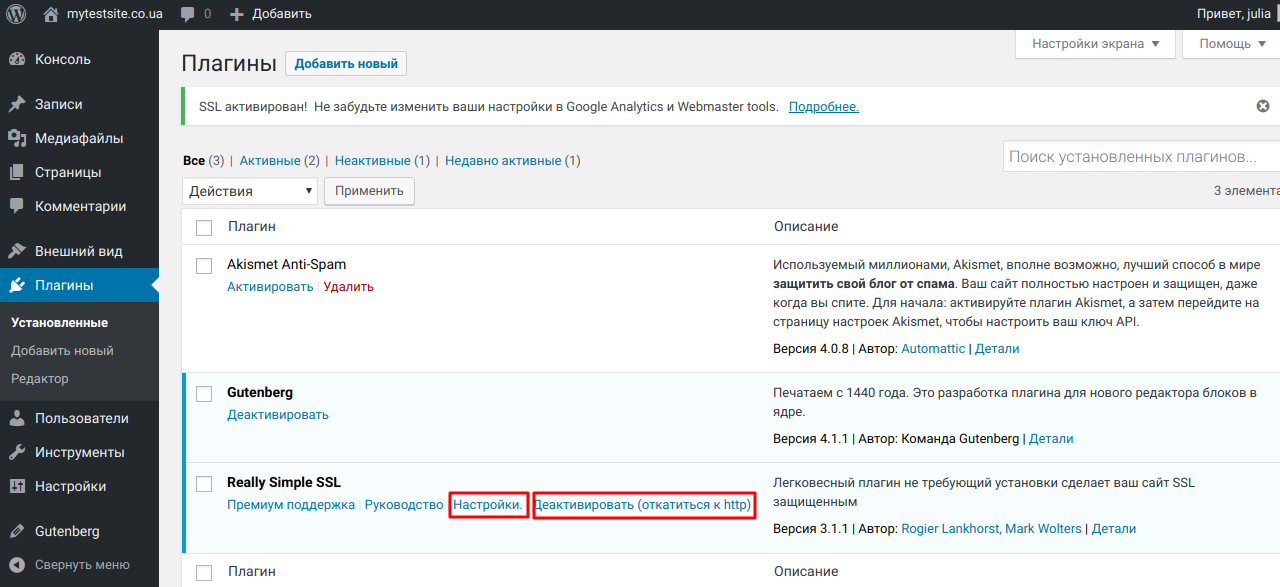
At this point, the transition can be considered complete. The site on WordPress opens at a new address, all links will be automatically replaced with https versions.
If necessary, you can disable the plugin and cancel all changes. To do this, you need to go to the list of plugins and click the corresponding button. True, all links will be replaced by http versions.

If you want to disable the plugin, but leave HTTPS, then you need to go to the extension settings.
Error elimination
It is not always possible to correctly configure https for WordPress. Sometimes a web resource does not function as it should. You can fix this by activating debug mode. Or by digging into additional parameters.
There are many of them, so let's briefly consider the main functions :
- Automatically replace mixed content. Removes errors of the mixed content type. All http links are replaced by https.
- WordPress 301 redirect to SSL. Configures a 301 redirect. All parameters are entered automatically, there is no need to manually change anything in .htaccess.
- 301 redirect .htaccess. Also activates HTTPS redirection. But in order not to avoid a cyclic redirect, do not enable this option together with the previous one.
- JavaScript to SSL redirection. Does the same thing. It is activated in cases where the previous two options did not work.
- Debugging Enables debug mode. You can study the logs on a separate tab.
- Prohibition to edit the .htaccess file. This option is activated when using the third function in the list.
- Toggle mixed content correction option. The second (alternative) way to eliminate errors of the "mixed content" type. It is used if the first one did not work.
- Deactivation of the plugin with SSL preservation. Disables internal redirects. Cancels the replacement of http links with https. But SSL is preserved and the site will open at the new address with https. The redirection in .htaccess will also remain.
If there are problems with the plug-in or other errors remain, they can be solved with the help of the technical support of the hosting provider.