
If you are tired of standard fonts and want to improve your site, making it more original, you need to know how to add a font to a WordPress theme and what you need to do for this. We suggest that you familiarize yourself with the main ways of connecting it.
Where to download fonts for WordPress?
If earlier it was necessary to pay considerable sums for fonts, today things are different. Google Fonts, Typekit, FontSquirrel and many other services are available to search for free fonts.
Before adding a font to WordPress , be sure to remember that a large number of them will slow down the site. We recommend choosing two options and using them in all design elements - in this case, the resource will look more aesthetically pleasing.
Google Fonts as one of the ways to connect fonts in WordPress
Google Fonts is a fairly simple and quick way to install a font on a WordPress site. It is a free resource with a huge selection of many fonts.
- Go to the Google fonts Library and select the appropriate font.
- Click on "quick use" below it.
- A new page will open with a proposal for choosing styles. We advise you to pay attention only to those styles that you will actually use.
- Go to the section with the code for embedding.
- Copy the code and paste it into the header.php of the current theme after the < head > tag. Done, Google Font added to WP site.

We add the font manually
Another way to connect fonts for WordPress is to do it manually. The process will not cause difficulties: after downloading the fonts to the website hosting account, it will be enough to edit the CSS file of the theme:
- We download the font to the computer, extract it from the archive.
- Download the font file (we recommend using an FTP client or a file manager) to the wp-content/themes/your-theme/fonts directory (if there is no fonts folder, create it). Take Lobster-Regular.ttf as an example.
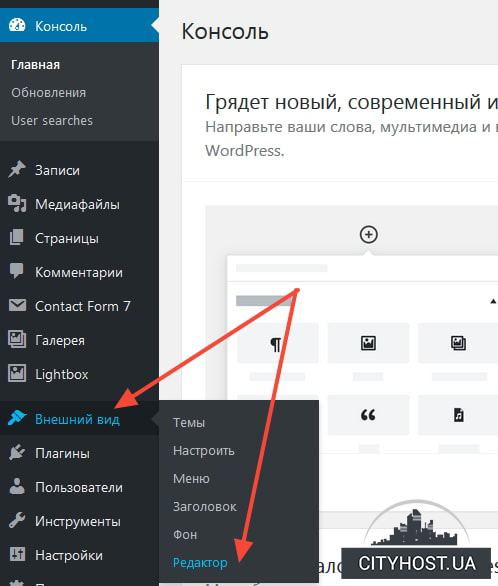
- In the WP admin panel, go to "Appearance", then click "Editor".
- Select style.css, change the font-family and url names to your own and add the code.
- Click "Update file" to save the changes.
After performing the above actions, the interface will not change. To assign a font to a specific element, you will need to edit style.css. For example, the following code will use the Lobster font for the site title:.site-title {font-family:"Lobster-Regular",Arial,sans-serif;}.
Using plugins to add fonts
The easiest way to add fonts to WordPress is to install special plugins.
Yes, in the case of Google Fonts, you need to install the plugin of the same name, after which you will be able to choose fonts for different pages and records, and most importantly - you will not have to edit the code.
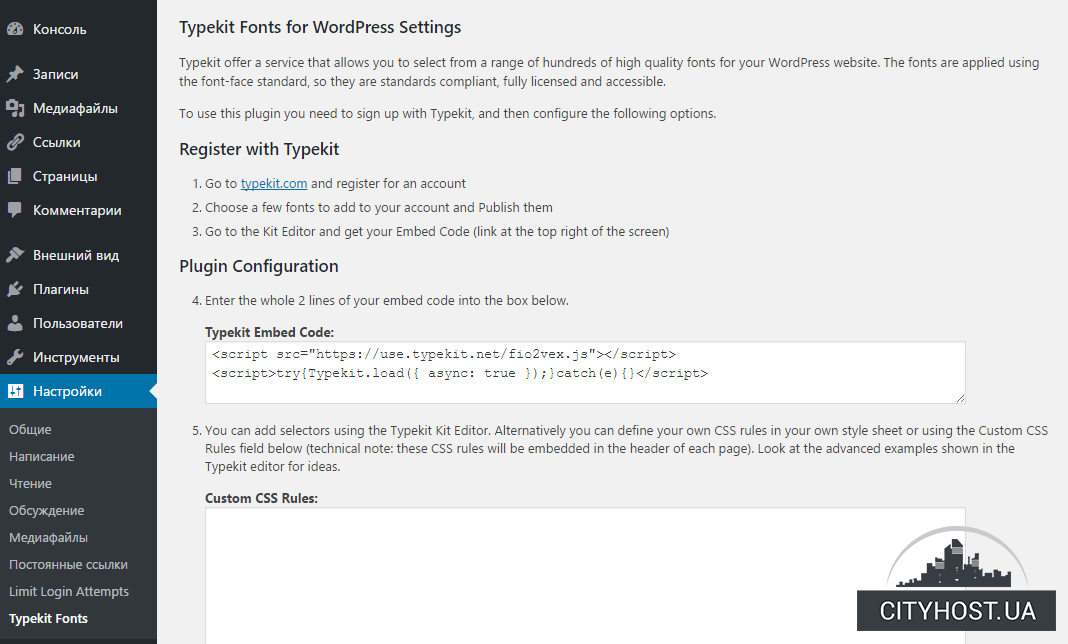
How to connect a font to a WordPress site using the Typekit plugin? It's simple: register on the site and create your own set. Next, we install the Typekit Fonts For WordPress plugin. In the "Settings" - "Typekit fonts" section, insert the code received on the site. All fonts added to the set will be automatically downloaded.
Use Any Fonts is another popular plugin for adding fonts to a WordPress site. It is on the official WP repository. After installing the plugin, go to "Use any font", create an API key and verify the operation. When the check is complete, you will be able to download fonts of different formats.
Now you know well how to connect a font in WordPress to make some changes to the appearance of the resource so that it fully meets your requirements and preferences. We also suggest paying attention to quality hosting for WordPress .