Working with graphic files and multimedia on the Wordpress platform is easy and simple. You can insert a picture in just a couple of clicks by clicking the "Add media" button. But there are already difficulties with how to make a gallery in Wordpress. And many users have.
The ability to create a gallery is already provided in the WordPress functionality. Various plugins also help in this. Let's consider both options, and which one to use - decide for yourself.
Creating a gallery using the built-in functionality of Wordpress
So, the first way to make a gallery in Wordpress is to use the corresponding function in the CMS itself. It is suitable for those who do not want to install unnecessary plugins and load the site.
The function of creating a gallery in WordPress is literally right in front of your eyes. But since many simply do not notice it, we will give detailed instructions on how to do it.
Immediately note that the gallery can be added for any page or record. To do this, you just need to go to the admin, find the desired document (or create a new one) and start editing it.
To create a gallery, perform a number of elementary actions:
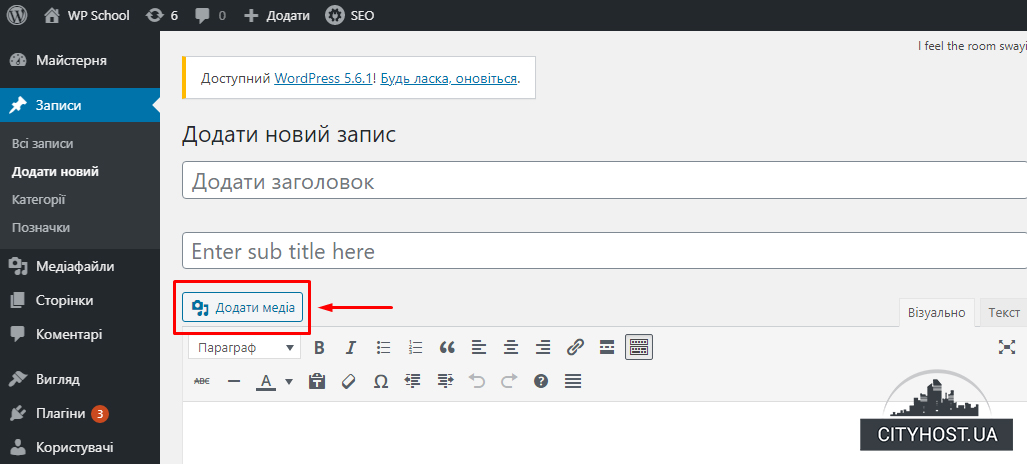
- Put the cursor in the desired place of the text (if there is one) where the gallery should be displayed and click the "Add media" button.

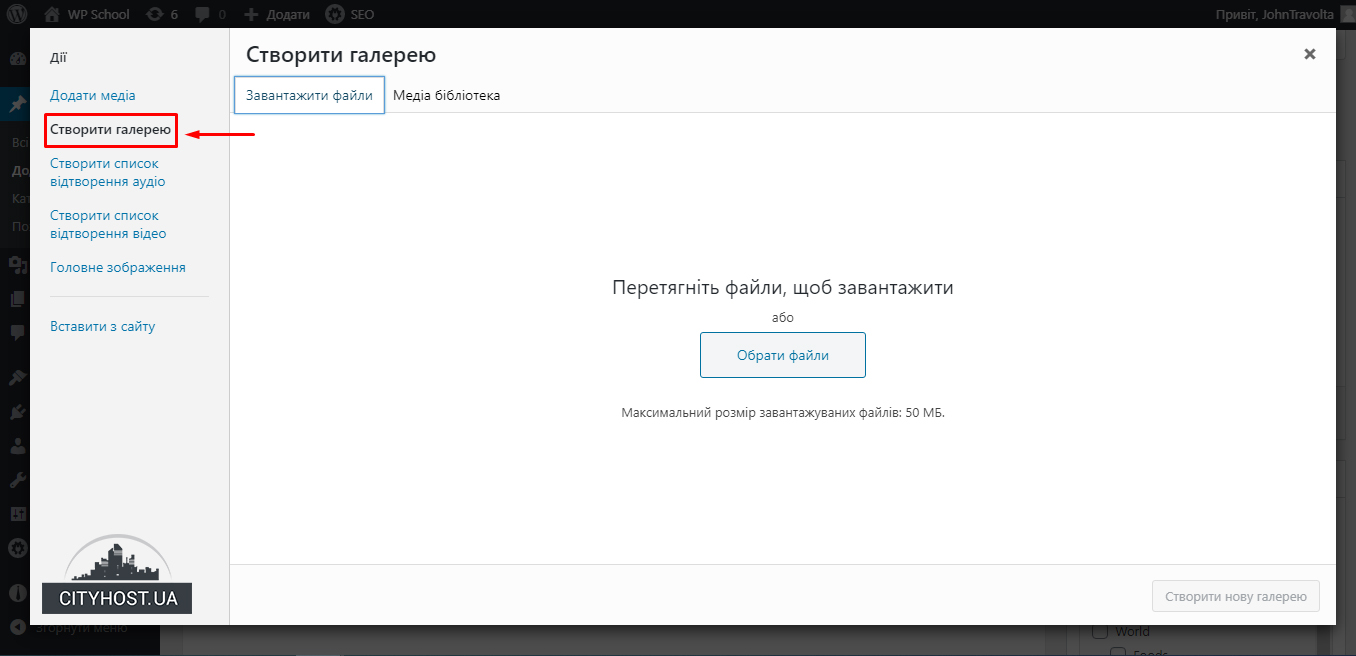
- In the window in the left column, click on the line "Create gallery".

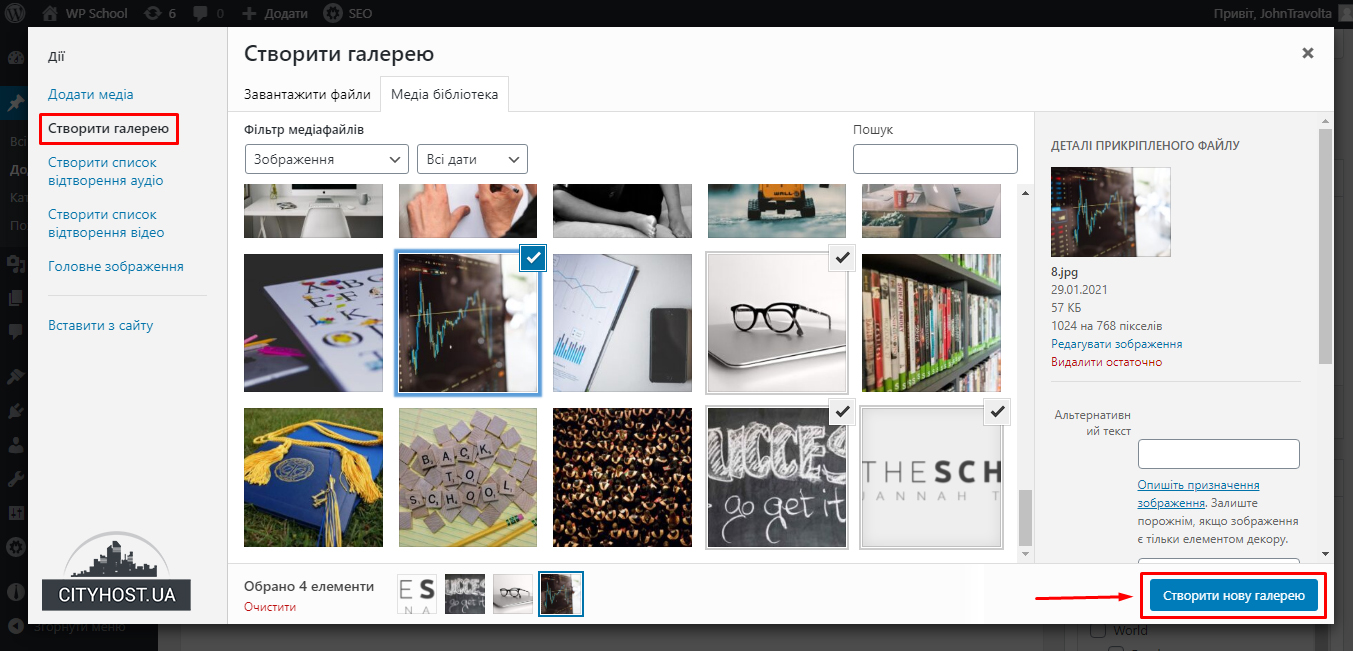
- Upload the necessary images or click the "Choose files" button if the images have already been uploaded.
- Wait for the files to upload and click the Create New Gallery button.

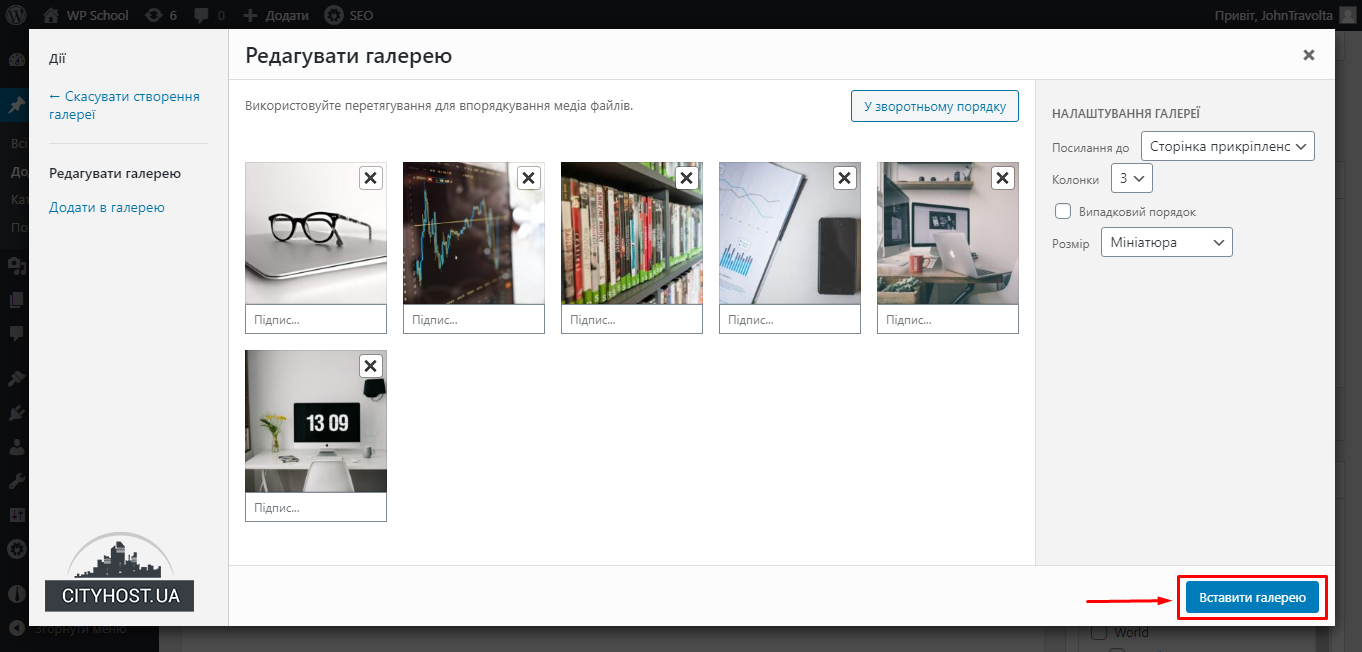
In the right column, you can set the optimal settings for the gallery:
- Link. You can leave it as it is or choose another option.
- Columns. The smaller the size of the thumbnails, the more columns are available.
- Random order. If there is a checkmark, the images will be displayed in random order at each page refresh. In its absence - in the order specified by you (at the stage of editing the picture, you can drag it with the mouse).
- Size. The standard value remains here - "Thumbnail".

Next, click the "Insert Gallery" button and be sure to save the page.
This is the simple way to create a gallery. If you wish, you can add the Lightbox effect so that when you click on a thumbnail image, it opens in full size. For this, it is enough to install the appropriate plugin. For example, Simple Lightbox or any other.
Creating a Wordpress gallery with plugins
If for some reason you are not satisfied with the built-in functionality of WordPress, you can install a plugin for working with images. It is advisable to choose one that supports the Lightbox effect (enlargement of pictures when clicking) and other necessary functions (adding frames, editing images on the go, etc.).
There should be no problems with how to add a gallery to a Wordpress site using a plugin.
Yes, they all have a different interface, but the principle of action is the same everywhere:
- we indicate the optimal sizes;
- set the necessary parameters supported by the plugin (background transparency, order and time of image flipping, etc.).
The main advantage of plugins is that they create more beautiful and effective galleries than you can do with the built-in functionality of Wordpress. But their installation loads the site. In order for all images to open as quickly as possible, you need to order hosting services from a proven company.
Well, now it will be much easier for you to work with a Wordpress site: you already know how to create a gallery. With its help, you can design pages in a beautiful and original way, providing users with a maximum of useful information in a visual form.
Read also: How to remove or change the inscription: "The site works on Wordpress"?


