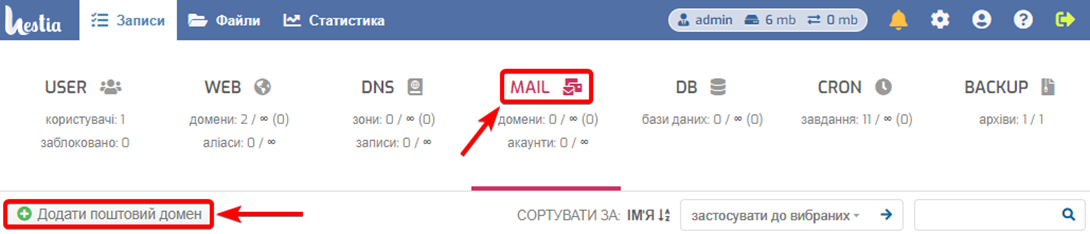
Go to the MAIL section and click the Add mail domain button
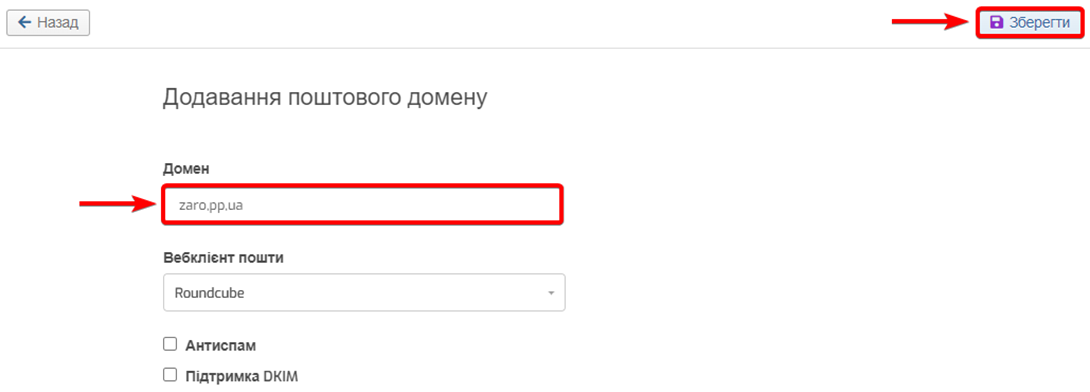
Enter the name of your domain in the Domain field
Check the Antispam and DKIM support items if necessary, we recommend enabling them.
Click the Save button
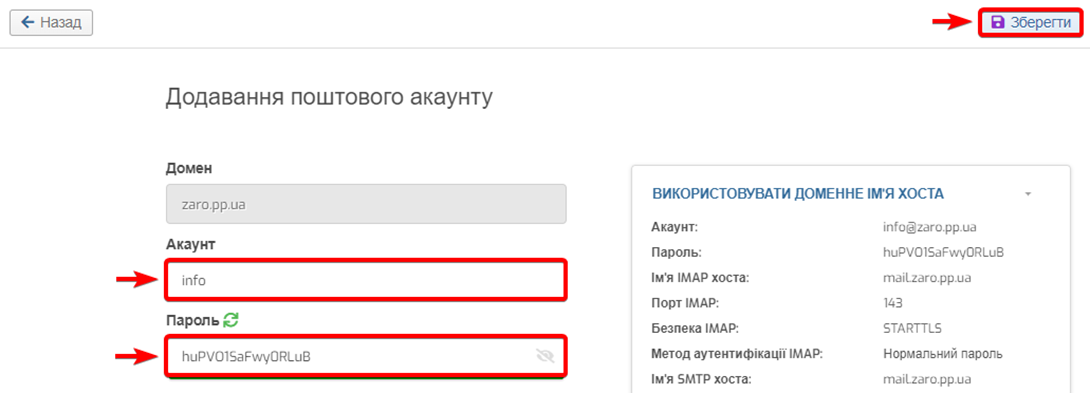
Go to the MAIL section again, opposite the newly added domain, click the Add mail account button

In the Account field, enter the name of the mailbox
In the Password field, enter your own password or generate a ready one. Please note that the password will not be visible in the future, so save it in a safe place. If necessary, a new password can be generated in the mailbox settings.
If necessary, click the Additional options button, here you can create aliases (Alices), enable mail forwarding, etc.
When everything is ready, click the Save button
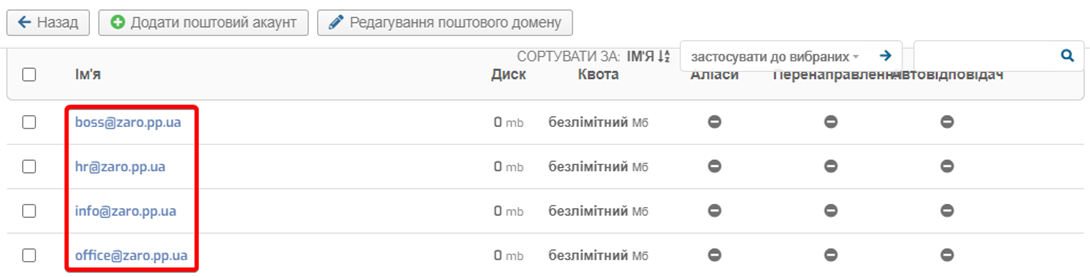
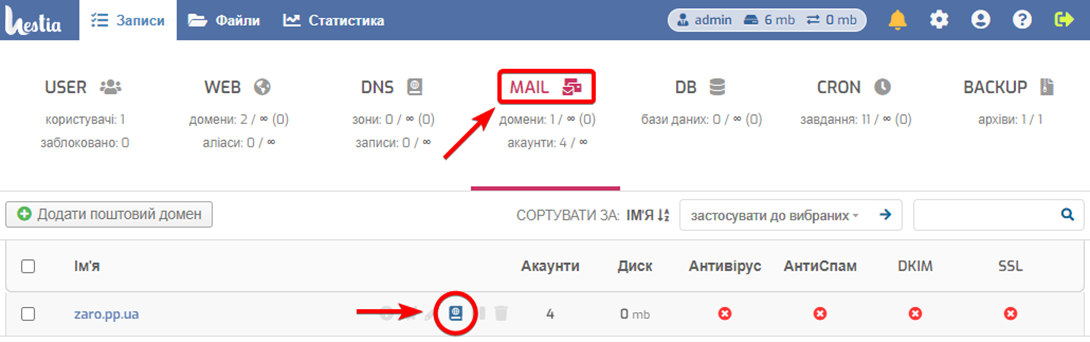
You can manage the created mailboxes in the MAIL section by clicking on the name of the postal domain .
Now you need to connect your domain to the server by creating MX/A/TXT/SPF/DKIM mail DNS records in the domain control panel. If this step is not performed, or performed with errors, the mail may not work, deliver letters to the spam folder instead of the inbox, or work with errors, so pay attention to these settings and their correctness.
|
Pay attention! From 2022, the presence of SPF, DKIM and PTR records for a DNS domain is mandatory. In their absence, most mail servers, including Gmail, Microsoft and Yahoo, will mark mail as spam or block delivery entirely. In case of difficulties with the delivery of letters, you should analyze the mail log at the path /var/log/exim4/mainlog and pay attention to the response of the mail servers at the time of sending the letter from your server. Here is, for example, what Gmail writes in the mail log, if there is no SPF record on the DNS domain — This message does not pass authentication checks (SPF and DKIM both do not pass). SPF check for * does not pass with ip *. To best protect our users from spam, the message has been blocked. Please visit https://support.google.com/mail/answer/81126#authentication According to the text of the error from the log, it can be concluded that the Gmail mail server has blocked its delivery and it will not be delivered until it passes Google's terms. |
If your domain uses our company's NS servers, these settings must be made in the DNS section of the hosting control panel — https://cp.cityhost.ua/dns . If the domain is parked to third-party NS servers, accordingly, DNS records must be created in the control panel where the domain is parked.
Go to the MAIL section, opposite the mail domain, click the DNS record button
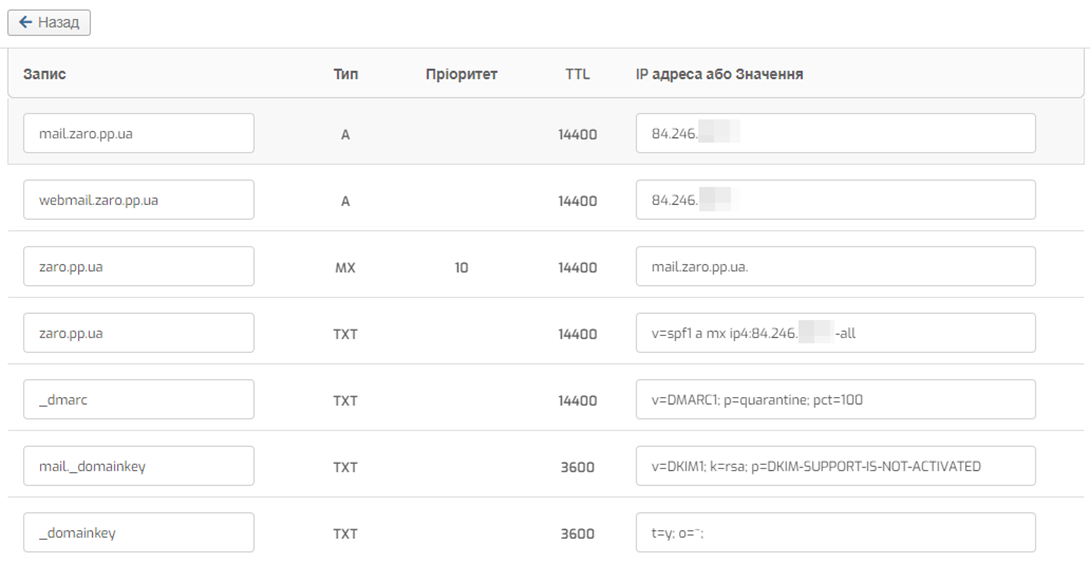
Here you will see a list of DNS records responsible for domain mail.
Copy all these DNS records and create them in the control panel of your domain https://cp.cityhost.ua/dns
When all the necessary DNS records for the domain have been created, wait 30-60 minutes , this time is needed to synchronize the records on the Internet. After synchronization, you can try to check the domain mail.

Go to the MAIL section, opposite the mail domain, click the Open webmail button
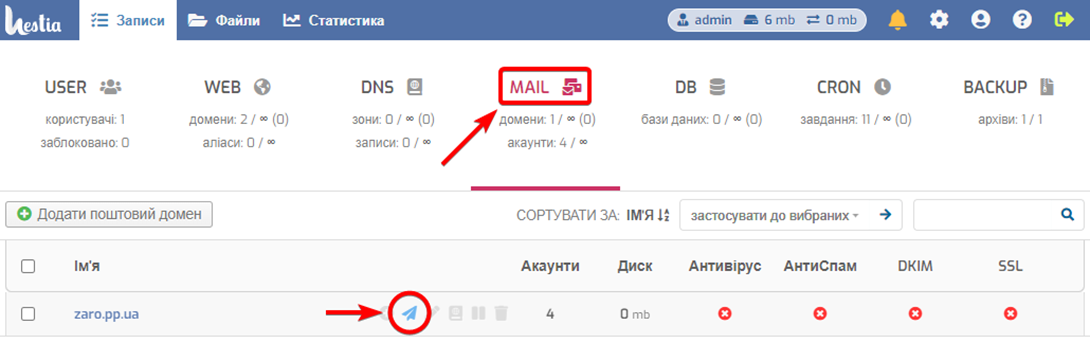
If the DNS records have been added correctly and enough time has passed for synchronization, you will see the login form in the mail room.
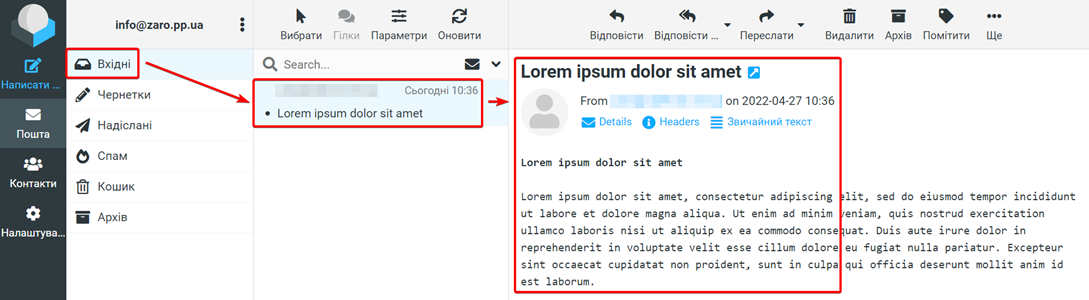
Enter the mailbox name and password that was created earlier and click the Login button.

This is how an example of a letter that was sent and received by the server's domain mail looks like.
All question categories
CityHost
Services
Contacts


2004 - 2026 "CityHost" - professional
paid hosting in Ukraine.