Authorization by ssh keys
In addition to the usual way of connecting to the SSH protocol by entering a password, virtual hosting has the option of connecting using so-called ssh-keys.
For authorization using ssh-keys on the device from which you plan to connect, you need to generate a pair of keys, the public part of which will need to be added to your control panel, which will ensure connection without entering a password, since the key will be stored on the hosting.
How to add a public key to hosting
If you already have a ready pair of keys, below we will consider how to add them to hosting. If you do not have the keys yet, scroll down the page, there will be instructions on how to generate them.
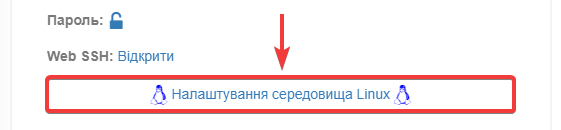
So go to the hosting for which you want to add the key and open the SSH section.

While in the SSH section, click on the Linux Environment Settings button
Opposite the SSH key setting, click the button in the form of a plus sign +, then insert the public part of the key into the input field and click the Add SSH key button
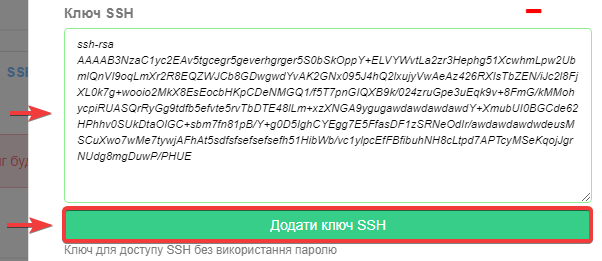
After a short download, a success message will be displayed.
From now on, you can access the SSH protocol of your hosting by entering only your_login @ your_server in the terminal, for example:
ssh some-login@some-server.cityhost.com.ua
All added keys are stored in the .ssh/authorized_keys file, if necessary, you can remove or add keys by making changes to this file on the hosting.
How to generate keys on Windows 10/11 and Linux
1. Generate a key pair in the command line or console with the command:
ssh-keygen -t rsa -b 2048
2. In the first step, the command will ask you where exactly to save the key pair, if you do not have your own wishes, just press Enter. The keys will be generated in the default directory.
3. Next, you will be asked to enter a passphrase. If there are no wishes, press Enter twice.
4. Go to the key generation directory that was displayed in step 2 and find there the public key file with the extension .pub, by default it is id_rsa.pub
5. The contents of the public key file must be hosted as described in the first part of this instruction.
Importantly!
This instruction creates the necessary files and directories for the keys to work, setting them the correct access rights. For keys created by yourself, without using this instruction, do not forget to set chmod 700 .ssh/ and chmod 600 .ssh/authorized_keys , otherwise authorization by keys will not work.


