To install WordPress CMS manually, you need:
1. For the site on which you will deploy the CMS, install a version of PHP higher than 5.6. You can do this with the help of [instructions] .
2. After that, download the latest version of CMS to your computer. You can download from [direct link] .
3. Next, using a [file manager] or any [FTP CLIENT], upload the downloaded archive in point 2 to the server, to the [site root directory] .
4. Unzip the downloaded archive to the server using [file manager] .
| All CMS system files should be located in [site root directory] |
5. In the MySQL section of your control panel, create a new database and database user for your site. You can do this with the help of [instructions] .
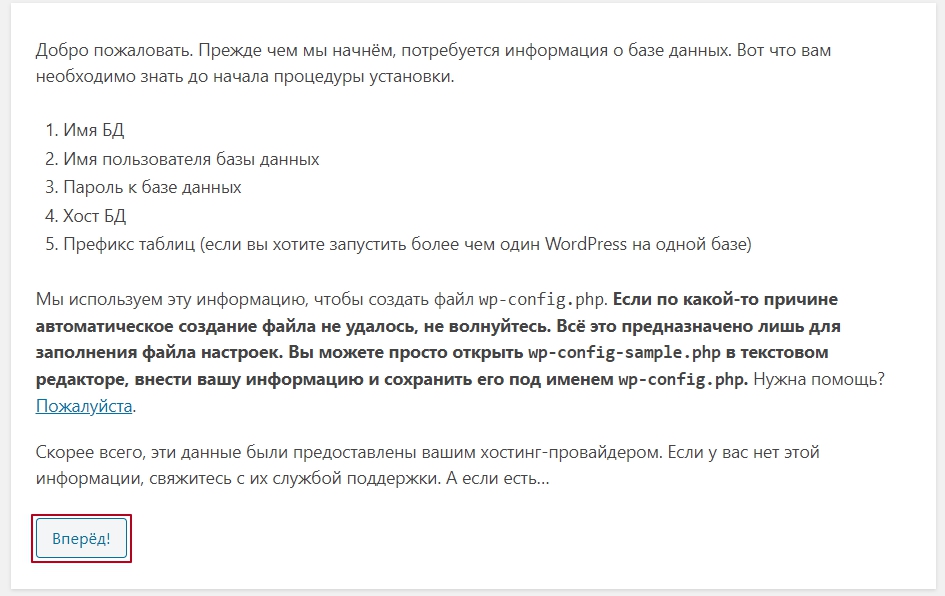
6. Go to the page of your site and start the installation by clicking on the [NEXT] button:
7. In the next menu item, enter the data for accessing the database created in [item 4] and click the [SEND] button:

8. At the next stage, fill in all the necessary fields with current data and click the [Install WordPress] button: 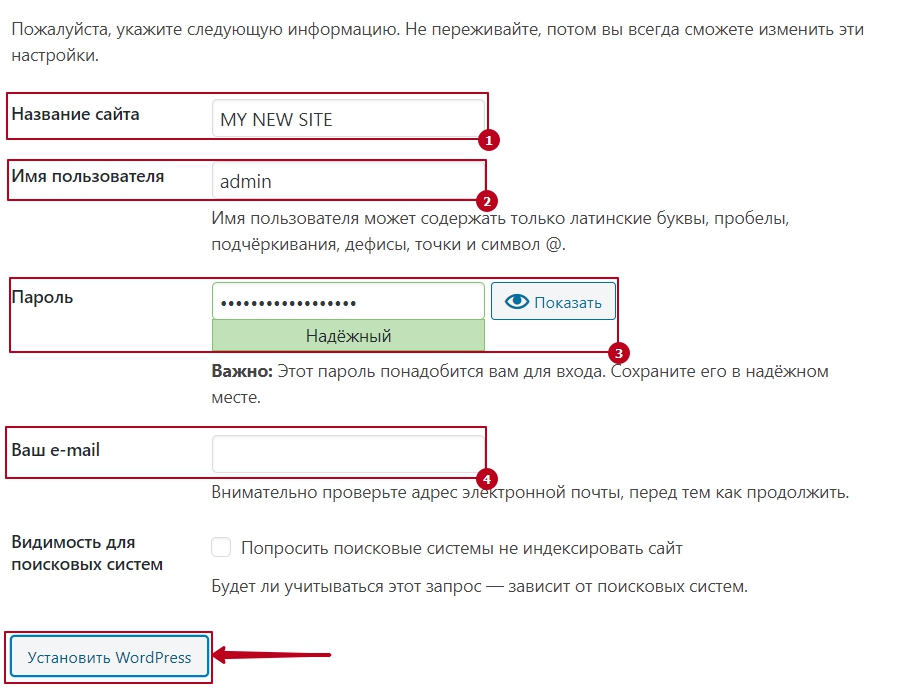
All question categories
CityHost
Services
Contacts


2004 - 2026 "CityHost" - professional
paid hosting in Ukraine.