The automatic site transfer feature is useful for optimizing resources and managing multiple projects within a single hosting provider. This functionality is needed in situations where you need to move a site from one account to another (for example, to transfer a project to a new owner, organize accounts, or to optimize resource allocation).
To transfer a site to another hosting account, go to your CONTROL PANEL
Then in the menu on the left, select HOSTING 2.0 -MANAGEMENT and click the SITE TRANSFER
button.
Before starting the transfer, please make sure that there is enough space on the hosting where you plan to transfer the site.

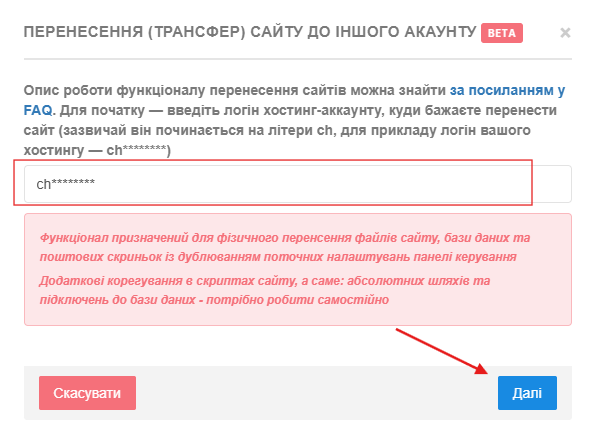
In the form, enter the login of the hosting account of the recipient TO WHOM you want to transfer the site and click NEXT

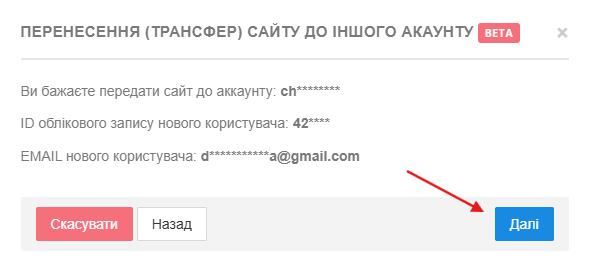
After checking the recipient's account details, click NEXT

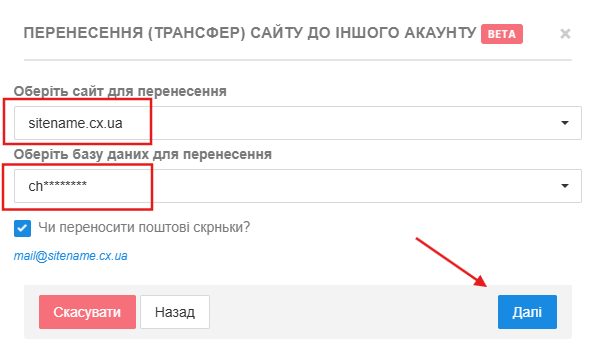
Specify the site and database that you want to transfer to another account. If you want to transfer mailboxes as well, check the box. After that, click NEXT.

If the transfer is successful, a corresponding message will appear in the control panel.
While the site is being transferred to another account, a notification about that the process is not yet complete. At this time, hosting actions will be temporarily limited. The duration of the migration process is from 5 minutes to several hours and depends on the size of the site.

After the site transfer is complete, you and the recipient will receive confirmation of the successful completion of the operation, which will indicate the files containing the mention of the previous account, as well as the name of the database.
In order for the site to work in the new hosting account, you need to:
All question categories